The DRBD 9 User Guide
Please read this first
本指南旨在为分布式复制块设备Distributed Repliated Block Device 版本9(DRBD-9)的用户提供最终参考指南和手册。
It is being made available to the DRBD community by LINBIT, the project’s sponsor company, free of charge and in the hope that it will be useful. The guide is constantly being updated. We try to add information about new DRBD features simultaneously with the corresponding DRBD releases. An online HTML version of this guide is always available at https://linbit.com/drbd-user-guide/drbd-guide-9_0-en/.
| This guide assumes, throughout, that you are using the latest version of DRBD and related tools. If you are using an 8.4 release of DRBD, please use the matching version of this guide from https://linbit.com/drbd-user-guide/users-guide-drbd-8-4/. |
Use the LINBIT community forum to submit comments.
本指南的组织如下:
-
DRBD简介介绍DRBD的基本功能。本文简要概述了DRBD在Linux I/O堆栈中的位置,以及基本的DRBD概念。它还详细研究了DRBD最重要的特性。
-
Building and Installing the DRBD Software讨论从源代码构建DRBD,安装预构建的DRBD包,并包含在集群系统上运行DRBD的概述。
-
使用DRBD讲述如何使用资源配置文件管理DRBD,以及常见的故障排除方案。
-
DRBD-enabled Applications deals with leveraging DRBD to add storage replication and high availability to applications. It not only covers DRBD integration in the Pacemaker cluster manager, but also advanced LVM configurations, integration of DRBD with GFS, using OCFS2 with DRBD, and using the LINBIT-developed open source DRBD Reactor software as an easier to configure and deploy cluster resource manager.
-
Optimizing DRBD Performance包含从DRBD配置中获得最佳性能的要点。
-
Learning More深入了解DRBD的内部,还包含指向其他资源的指引,本指南的读者可能会发现这些指引很有用。
-
-
Recent changes是DRBD 9.0与早期DRBD版本相比所做更改的概述。
-
欢迎对DRBD培训或支持服务感兴趣的用户通过 [email protected] 或 [email protected] 与我们联系。
DRBD简介
1. DRBD fundamentals
DRBD is a software-based, shared-nothing, replicated storage solution mirroring the content of block devices (hard disks, partitions, logical volumes, and so on) between hosts.
DRBD镜像数据
-
in real time. Replication occurs continuously while applications modify the data on the device.
-
transparently. Applications need not be aware that the data is stored on multiple hosts.
-
synchronously or asynchronously. With synchronous mirroring, applications are notified of write completions after the writes have been carried out on all (connected) hosts. With asynchronous mirroring, applications are notified of write completions when the writes have completed locally, which usually is before they have propagated to the other hosts.
1.1. Kernel module
DRBD的核心功能是通过Linux内核模块实现的。具体来说,DRBD构成虚拟块设备的驱动程序,因此DRBD位于系统的I/O堆栈的底部附近。因此,DRBD非常灵活和通用,这使得它成为一个复制解决方案,适合为几乎任何应用程序添加高可用性。
DRBD is, by definition and as mandated by the Linux kernel architecture, agnostic of the layers above it. Therefore, it is impossible for DRBD to miraculously add features to upper layers that these do not possess. For example, DRBD cannot auto-detect file system corruption or add active-active clustering capability to file systems like ext3 or XFS.

1.2. User space administration tools
DRBD includes a set of administration tools which communicate with the kernel module to configure and administer DRBD resources. From top-level to bottom-most these are:
drbdadmThe high-level administration tool of the DRBD-utils program suite. Obtains all DRBD configuration parameters from the configuration file /etc/drbd.conf and acts as a front-end for drbdsetup and drbdmeta. drbdadm has a dry-run mode, invoked with the -d option, that shows which drbdsetup and drbdmeta calls drbdadm would issue without actually calling those commands.
drbdsetupConfigures the DRBD module that was loaded into the kernel. All parameters to drbdsetup must be passed on the command line. The separation between drbdadm and drbdsetup allows for maximum flexibility. Most users will rarely need to use drbdsetup directly, if at all.
drbdmeta允许创建、转储、还原和修改DRBD元数据结构。与 drbdsetup 一样,大多数用户很少直接使用 drbdmeta。
1.3. 资源
在DRBD中,资源 是指特定复制数据集的所有方面的集合术语。其中包括:
This can be any arbitrary, US-ASCII name not containing white space by which the resource is referred to.
Beginning with DRBD 9.2.0, there is a stricter naming convention for resources. DRBD 9.2.x accepts only alphanumeric, ., +, _, and - characters in resource names (regular expression: [0-9A-Za-z.+_-]*). If you depend on the old behavior, it can be brought back by disabling strict name checking: echo 0 > /sys/module/drbd/parameters/strict_names.
|
任何资源都是一个复制组,由共享同一复制流的多个 卷 之一组成。DRBD确保了资源中所有卷的写保真度。卷的编号以 0 开头,一个资源中最多可以有65535个卷。卷包含复制的数据集和一组供DRBD内部使用的元数据。
在 drbdadm 级别,可以通过资源名称和卷号将资源中的卷寻址为 resource/volume。
这是一个由DRBD管理的虚拟块设备。它的设备主编号为147,次编号从0开始,这是Linux中的惯例。每个DRBD设备对应于资源中的一个卷。关联的块设备通常命名为`/dev/drbdX`,其中`X`是设备的次要编号。udev`通常还会创建包含资源名和卷号的符号链接,如/dev/drbd/by-res/resource/vol-nr`。
Depending on how you installed DRBD, you might need to install the drbd-udev package on RPM based systems to install the DRBD udev rules. If your DRBD resources were created before the DRBD udev rules were installed, you will need to manually trigger the udev rules to generate the udev symlinks for DRBD resources, by using the udevadm trigger command.
|
| Very early DRBD versions hijacked NBD’s device major number 43. This is long obsolete; 147 is the allocated DRBD device major. |
A connection is a communication link between two hosts that share a replicated data set. With DRBD 9 each resource can be defined on multiple hosts; with the current versions this requires a full-meshed connection setup between these hosts (that is, each host connected to every other for that resource).
在 drbdadm 级别,连接由资源和连接名(后者默认为对等主机名)寻址,如 resource:connection。
1.4. Resource roles
In DRBD, every resource has a role, which may be Primary or Secondary.
| The choice of terms here is not arbitrary. These roles were deliberately not named “Active” and “Passive” by DRBD’s creators. Primary compared to Secondary refers to a concept related to availability of storage, whereas active compared to passive refers to the availability of an application. It is usually the case in a high-availability environment that the primary node is also the active one, but this is by no means necessary. |
-
A DRBD device in the primary role can be used unrestrictedly for read and write operations. It may be used for creating and mounting file systems, raw or direct I/O to the block device, and so on.
-
处于 secondary 角色的DRBD设备接收来自对等节点设备的所有更新,但在其他情况下完全不允许访问。它不能被应用程序使用,也不能用于读写访问。甚至不允许对设备进行只读访问的原因是必须保持缓存一致性,如果以任何方式访问辅助资源,这是不可能的。
当然,资源的角色可以通过manual intervention,调用集群管理应用程序的一些自动算法,或者automatically来更改。将资源角色从次要角色更改为主要角色称为 promotion (升级),而反向操作称为 demotion (降级)。
1.5. Hardware and environment requirements
DRBD’s hardware and environment requirements and limitations are mentioned below. DRBD can work with just a few KiBs of physical storage and memory, or it can scale up to work with several TiBs of storage and many MiBs of memory.
1.5.2. Required memory
DRBD needs about 32MiB of RAM per 1TiB of storage[1]. So, for DRBD’s maximum amount of storage (1PiB), you would need 32GiB of RAM for the DRBD bitmap alone, even before operating system, userspace, and buffer cache considerations.
1.5.3. CPU requirements
DRBD 9 is tested to build for the following CPU architectures:
-
amd64
-
arm64
-
ppc64le
-
s390x
Recent versions of DRBD 9 are only tested to build on 64 bit CPU architecture. Building DRBD on 32 bit CPU architecture is unsupported and may or may not work.
1.5.4. Minimum Linux kernel version
The minimum Linux kernel version supported in DRBD 9.0 is 2.6.32. Starting with DRBD 9.1, the minimum Linux kernel version supported is 3.10.
1.5.5. Maximum number of DRBD volumes on a node
Due to the 20 bit constraint on minor numbers, the maximum number of DRBD volumes that you can have on a node is 1048576.
1.6. FIPS compliance
This standard shall be used in designing and implementing cryptographic modules…
Since DRBD version 9.2.6, it is possible to encrypt DRBD traffic by using the TLS feature. However, DRBD itself does not contain cryptographic modules. DRBD uses cryptographic modules that are available in the ktls-utils package (used by the tlshd daemon), or that are referenced by the Linux kernel crypto API. In either case, the cryptographic modules that DRBD uses to encrypt traffic will be FIPS compliant, so long as you are using a FIPS mode enabled operating system.
If you have not enabled the TLS feature, then DRBD does not use any cryptographic modules.
In DRBD versions before 9.2.6, it was only possible to use encryption with DRBD if it was implemented in a different block layer, and not by DRBD itself. Linux Unified Key Setup (LUKS) is an example of such an implementation. You can refer to details in the LINSTOR User Guide about using LINSTOR as a way that you can layer LUKS below the DRBD layer.
| If you are using DRBD outside of LINSTOR, it is possible to layer LUKS above the DRBD layer. However, this implementation is not recommended because DRBD would no longer be able to disklessly attach or auto-promote resources. |
2. DRBD features
本章讨论了各种有用的DRBD特性,并给出了它们的一些背景信息。这些特性中的一些对大多数用户都很重要,有些只在非常特定的部署场景中才相关。使用DRBD和Troubleshooting and error recovery包含如何在日常操作中启用和使用这些功能的说明。
2.1. Single-primary mode
In single-primary mode, a resource is, at any given time, in the primary role on only one cluster member. Since it is guaranteed that only one cluster node manipulates the data at any moment, this mode can be used with any conventional file system (ext3, ext4, XFS, and so on).
在单一主模式下部署DRBD是高可用性(支持故障转移)集群的规范方法。
2.2. Dual-primary mode
In dual-primary mode a resource can be in the primary role on two nodes at a time. Since concurrent access to the data is therefore possible, this mode usually requires the use of a shared cluster file system that uses a distributed lock manager. Examples include GFS and OCFS2.
Deploying DRBD in dual-primary mode is the preferred approach for load-balancing clusters which require concurrent data access from two nodes, for example, virtualization environments with a need for live-migration. This mode is disabled by default, and must be enabled explicitly in DRBD’s configuration file.
See 启用双主模式 for information about enabling dual-primary mode for specific resources.
2.3. Replication modes
DRBD支持三种不同的复制模式,允许三种程度的复制同步性。
Asynchronous replication protocol. Local write operations on the primary node are considered completed as soon as the local disk write has finished, and the replication packet has been placed in the local TCP send buffer. In case of forced fail-over, data loss may occur. The data on the standby node is consistent after fail-over; however, the most recent updates performed prior to the fail-over could be lost. Protocol A is most often used in long distance replication scenarios. When used in combination with DRBD Proxy it makes an effective disaster recovery solution. See Long-distance replication through DRBD Proxy, for more information.
Memory synchronous (semi-synchronous) replication protocol. Local write operations on the primary node are considered completed as soon as the local disk write has occurred, and the replication packet has reached the peer node. Normally, no writes are lost in case of forced fail-over. However, in case of simultaneous power failure on both nodes and concurrent, irreversible destruction of the primary’s data store, the most recent writes completed on the primary may be lost.
Synchronous replication protocol. Local write operations on the primary node are considered completed only after both the local and the remote disk write(s) have been confirmed. As a result, loss of a single node is guaranteed not to lead to any data loss. Data loss is, of course, inevitable even with this replication protocol if all nodes (respective of their storage subsystems) are irreversibly destroyed at the same time.
到目前为止,DRBD设置中最常用的复制协议是protocol C。
复制协议的选择影响部署的两个因素: 保护 和 延迟 。相比之下, 吞吐量 在很大程度上独立于所选的复制协议。
有关演示复制协议配置的资源配置示例,请参见配置资源。
2.4. More than two-way redundancy
DRBD supports replicating data to up to 32 nodes simultaneously. In practice, 3-, 4-, or 5-way redundancy is usually sufficient. Beyond that, other factors become the leading cause of downtime.
2.5. Automatic promotion of resources
DRBD automatically promotes a resource to the primary role when one of its volumes is mounted or opened for writing. As soon as all volumes are unmounted or closed, the role of the resource changes back to secondary. This behavior is controlled by the auto-promote option, which is enabled by default.
Automatic promotion will only succeed if the cluster state allows it (that is, if an explicit drbdadm primary command would succeed). Otherwise, mounting or opening the device will fail.
2.6. Multiple replication transports
DRBD支持多种网络传输。到目前为止,有两种传输实现可用:TCP和RDMA。每个传输都由对应的内核模块来实现。
2.6.1. TCP transport
drbd_transport_tcp.ko 传输实现包含在drbd本身的分发文件中。顾名思义,这个传输实现使用TCP/IP协议在机器之间移动数据。
DRBD的复制和同步框架套接字层支持多个低级传输:
这是规范实现,也是DRBD的默认实现。它可以在任何启用了IPv4的系统上使用。
当配置为使用标准的TCP套接字进行复制和同步时,DRBD还可以使用IPv6作为其网络协议。这在语义和性能上等同于IPv4,尽管它使用不同的寻址方案。
SDP是BSD风格的套接字的实现,用于支持RDMA的传输,如InfiniBand。SDP是大多数发行版OFED堆栈的一部分,但现在 被视为已弃用 。SDP使用IPv4风格的寻址方案。SDP通过InfiniBand互连使用,为DRBD提供了一个高吞吐量、低延迟的复制网络。
SuperSockets用一个单一的、单片的、高效的、支持RDMA的套接字实现来替换堆栈的TCP/IP部分。DRBD可以使用这种套接字类型进行非常低延迟的复制。SuperSockets必须运行在特定的硬件上,而这些硬件目前只能从一家供应商Dolphin Interconnect Solutions获得。
2.6.2. RDMA transport
Since DRBD version 9.2.0, the drbd_transport_rdma kernel module is available as open source code.
You can download the open source code from LINBIT’s tar archived DRBD releases page, or through LINBIT’s DRBD GitHub repository.
Alternatively, if you are LINBIT customer, the drbd_transport_rdma.ko kernel module is available in LINBIT’s customer software repositories.
This transport uses the verbs/RDMA API to move data over InfiniBand HCAs, iWARP capable NICs or RoCE capable NICs. In contrast to the BSD sockets API (used by TCP/IP) the verbs/RDMA API allows data movement with very little CPU involvement.
At high transfer rates it might be possible that the CPU load/memory bandwidth of the tcp transport becomes the limiting factor. You can probably achieve higher transfer rates using the RDMA transport with appropriate hardware.
可以为资源的每个连接配置传输层实现。有关详细信息,请参见配置传输实现。
2.7. Multiple paths
DRBD allows configuring multiple paths per connection. The TCP transport uses only one path at a time for a connection, unless you have configured the TCP load balancing feature. The RDMA transport is capable of balancing the network traffic over multiple paths of a single connection. see Configuring multiple paths for more details.
2.8. Efficient synchronization
(重新)同步不同于设备复制。当对主角色中的资源的任何写入事件发生复制时,同步与传入的写操作是分离的。否则,它会影响到设备整体。
如果复制链路由于任何原因中断(无论是由于主节点故障、辅助节点故障还是复制链路中断)时,则必须进行同步。同步是有效的,因为DRBD不会按照修改后的块最初写入的顺序,而是按照线性顺序同步,这会产生以下后果:
-
同步速度很快,因为发生多个连续写操作的块只同步一次。
-
同步还与很少的磁盘查找相关,因为块是根据磁盘上块的自然布局进行同步的。
-
在同步过程中,备用节点上的数据集部分过时,部分已更新。这种数据状态称为 不一致 。
后台同步正在进行时,服务继续在活动节点上不间断地运行。
| A node with inconsistent data generally cannot be put into operation, therefore it is desirable to keep the time period during which a node is inconsistent as short as possible. DRBD does, however, include an LVM integration facility that automates the creation of LVM snapshots immediately before synchronization. This ensures that a consistent copy of the data is always available on the peer, even while synchronization is running. See Using automated LVM snapshots during DRBD synchronization for details on using this facility. |
2.8.1. Variable-rate synchronization
在可变速率同步(8.4版本后被设为默认值)中,DRBD检测同步网络上的可用带宽,将其与传入的前台应用程序I/O进行比较,并基于全自动控制回路选择适当的同步速率。
有关可变速率同步的配置建议,请参见Variable synchronization rate configuration。
2.8.2. Fixed-rate synchronization
在固定速率同步中,每秒传送到同步对等机的数据量(同步速率)有一个可配置的静态上限。基于此限制,您可以根据以下简单公式估计预期的同步时间:

tsync is the expected sync time. D is the amount of data to be synchronized, which you are unlikely to have any influence over (this is the amount of data that was modified by your application while the replication link was broken). R is the rate of synchronization, which is configurable — bounded by the throughput limitations of the replication network and I/O subsystem.
有关固定速率同步的配置建议,请参见Configuring the rate of synchronization。
2.8.3. Checksum-based synchronization
通过使用数据摘要(也称为校验和)可以进一步提高DRBD的同步算法的效率。当使用基于校验和的同步时,DRBD在同步前先 读取 块,并计算当前在磁盘上找到的内容的哈希,而不是对标记为不同步的块执行强制覆盖。然后,它将此哈希与从对等机上的同一扇区计算的哈希进行比较,如果哈希匹配,则省略重新写入此块。如果文件系统在DRBD处于断开模式时用相同的内容重新写入了扇区,这可以显著缩短同步时间。
有关同步的配置建议,请参见Configuring checksum-based synchronization。
2.9. Suspended replication
如果配置正确,DRBD可以检测复制网络是否拥塞,在这种情况下可以暂停复制。在这种模式下,主节点会”超前”于次节点 即 暂时不同步,但仍在次节点上保留一致的副本。当有更多带宽可用时,复制将自动恢复并进行后台同步。
挂起复制通常在具有可变带宽的链接上启用,例如在数据中心或云实例之间的共享连接上启用广域复制。
有关拥塞策略和挂起复制的详细信息,请参见Configuring congestion policies and suspended replication。
2.10. Online device verification
Online device verification enables users to do a block-by-block data integrity check between nodes in a very efficient manner.
Note that efficient refers to efficient use of network bandwidth here, and to the fact that verification does not break redundancy in any way. Online verification is still a resource-intensive operation, with a noticeable impact on CPU utilization and load average.
It works by one node (the verification source) sequentially calculating a cryptographic digest of every block stored on the lower-level storage device of a particular resource. DRBD then transmits that digest to the peer node(s) (the verification target(s)), where it is checked against a digest of the local copy of the affected block. If the digests do not match, the block is marked out-of-sync and may later be synchronized. Because DRBD transmits just the digests, not the full blocks, online verification uses network bandwidth very efficiently.
The process is termed online verification because it does not require that the DRBD resource being verified is unused at the time of verification. Therefore, though it does carry a slight performance penalty while it is running, online verification does not cause service interruption or system down time — neither during the verification run nor during subsequent synchronization.
It is a common use case to have online verification managed by the local cron daemon, running it, for example, once a week or once a month. See Using online device verification for information about how to enable, invoke, and automate online verification.
2.11. Replication traffic integrity checking
DRBD可以选择使用加密消息摘要算法(如MD5、SHA-1或CRC-32C)执行端到端消息完整性检查。
These message digest algorithms are not provided by DRBD, but by the Linux kernel crypto API; DRBD merely uses them. Therefore, DRBD is capable of using any message digest algorithm available in a particular system’s kernel configuration.
With this feature enabled, DRBD generates a message digest of every data block it replicates to the peer, which the peer then uses to verify the integrity of the replication packet. If the replicated block can not be verified against the digest, the connection is dropped and immediately re-established; because of the bitmap the typical result is a retransmission. Therefore, DRBD replication is protected against several error sources, all of which, if unchecked, would potentially lead to data corruption during the replication process:
-
在主存储器和发送节点上的网络接口之间传输的数据上会发生按位错误(”位翻转”)(如果将其卸载到网卡,则TCP校验和无法检测到该错误,这在最近的实现中很常见);
-
在从网络接口传输到接收节点的主存储器的数据上发生的位翻转(同样的考虑适用于TCP校验和卸载);
-
由于网络接口固件或驱动程序中的竞争条件或错误而导致的任何形式的损坏;
-
通过在节点之间重新组装网络组件(如果不使用直接的背对背连接)注入的位翻转或随机损坏。
See Configuring replication traffic integrity checking for information about how to enable replication traffic integrity checking.
2.12. Split brain notification and automatic recovery
Split brain is a situation where, due to temporary failure of all network links between cluster nodes, and possibly due to intervention by a cluster management software or human error, both nodes switched to the Primary role while disconnected. This is a potentially harmful state, as it implies that modifications to the data might have been made on either node, without having been replicated to the peer. Therefore, it is likely in this situation that two diverging sets of data have been created, which cannot be trivially merged.
DRBD split brain is distinct from cluster split brain, which is the loss of all connectivity between hosts managed by a distributed cluster management application such as Pacemaker. To avoid confusion, this guide uses the following convention:
-
裂脑 是指如上文所述的DRBD裂脑。
-
所有集群连接的丧失被称为 集群分片,是集群裂脑的另一个术语。
DRBD允许在检测到脑裂时自动通知管理员(通过电子邮件或其他方式)。有关如何配置此功能的详细信息,请参见Split brain notification。
虽然在这种情况下,建议的操作过程是manually resolve处理脑裂,然后消除其根本原因,但在某些情况下,可能需要自动化该过程。DRBD有几种可用的解决方案列举如下:
-
Discarding modifications made on the younger primary. In this mode, when the network connection is re-established and split brain is discovered, DRBD will discard modifications made, in the meantime, on the node which switched to the primary role last.
-
Discarding modifications made on the older primary. In this mode, DRBD will discard modifications made, in the meantime, on the node which switched to the primary role first.
-
Discarding modifications on the primary with fewer changes. In this mode, DRBD will check which of the two nodes has recorded fewer modifications, and will then discard all modifications made on that host.
-
Graceful recovery from split brain if one host has had no intermediate changes. In this mode, if one of the hosts has made no modifications at all during split brain, DRBD will simply recover gracefully and declare the split brain resolved. Note that this is a fairly unlikely scenario. Even if both hosts only mounted the file system on the DRBD block device (even read-only), the device contents typically would be modified (for example, by file system journal replay), ruling out the possibility of automatic recovery.
Whether or not automatic split brain recovery is acceptable depends largely on the individual application. Consider the example of DRBD hosting a database. The discard modifications from host with fewer changes approach may be fine for a web application click-through database. By contrast, it may be totally unacceptable to automatically discard any modifications made to a financial database, requiring manual recovery in any split brain event. Consider your application’s requirements carefully before enabling automatic split brain recovery.
请参阅Automatic split brain recovery policies以了解有关配置DRBD的自动裂脑恢复策略的详细信息。
2.13. Support for disk flushes
当本地块设备(如硬盘驱动器或RAID逻辑磁盘)启用了写缓存时,对这些设备的写入在到达易失性缓存后即被视为完成。控制器制造商通常将此称为回写模式,反之则为直写模式。如果控制器在回写模式下断电,则最后一次写入永远不会提交到磁盘,可能会导致数据丢失。
为了解决这个问题,DRBD使用了磁盘刷新。磁盘刷新是一种写入操作,仅当关联的数据已提交到稳定(非易失性)存储时才完成,也就是说,它已有效地写入磁盘,而不是缓存。DRBD使用磁盘刷新对其复制的数据集和元数据进行写操作。实际上,DRBD在其认为必要的情况下绕过写缓存,如在activity log更新或强制隐式写后依赖项中。这意味着即使在停电的情况下,也会有额外的可靠性。
It is important to understand that DRBD can use disk flushes only when layered on top of backing devices that support them. Most reasonably recent kernels support disk flushes for most SCSI and SATA devices. Linux software RAID (md) supports disk flushes for RAID-1 provided that all component devices support them too. The same is true for device-mapper devices (LVM2, dm-raid, multipath).
带电池备份的写缓存(BBWC)的控制器使用电池备份其易失性存储。在这些设备上,当断电后恢复供电时,控制器会从电池支持的高速缓存中清除所有挂起的写入到磁盘的操作,确保提交到易失性高速缓存的所有写入实际上都转移到稳定存储中。在这些设备上运行DRBD时,可以禁用磁盘刷新,从而提高DRBD的写入性能。有关详细信息,请参见Disabling backing device flushes。
2.14. Trim and discard support
Trim and Discard are two names for the same feature: a request to a storage system, telling it that some data range is not being used anymore[2] and can be erased internally.
This call originates in Flash-based storages (SSDs, FusionIO cards, and so on), which cannot easily rewrite a sector but instead have to erase and write the (new) data again (incurring some latency cost). For more details, see for example, the wikipedia page.
从8.4.3版开始, DRBD包含了对 Trim/Discard 的支持。您不需要配置或启用任何东西;如果DRBD检测到本地(底层)存储系统允许使用这些命令,它将透明地启用这些命令并传递这些请求。
The effect is that for example, a recent-enough mkfs.ext4 on a multi-TB volume can shorten the initial sync time to a few seconds to minutes – just by telling DRBD (which will relay that information to all connected nodes) that most/all of the storage is now to be seen as invalidated.
稍后连接到该资源的节点将不会看到 Trim/Discard 请求,因此将启动完全重新同步;不过,依赖于内核版本和文件系统,对`fstrim`的调用可能会给出所需的结果。
| 即使您没有支持 Trim/Discard 的存储,一些虚拟块设备也会为您提供相同的功能,例如精简LVM。 |
2.15. Disk error handling strategies
如果被用作其中一个节点上DRBD的备份块设备的硬盘发生故障,DRBD可以将I/O错误传递到上层(通常是文件系统),也可以屏蔽上层的I/O错误。
If DRBD is configured to pass on I/O errors, any such errors occurring on the lower-level device are transparently passed to upper I/O layers. Therefore, it is left to upper layers to deal with such errors (this may result in a file system being remounted read-only, for example). This strategy does not ensure service continuity, and is therefore not recommended for most users.
如果DRBD被配置为在低层I/O错误时分离, 即 detach ,DRBD将在第一个低层I/O错误发生时自动这样做。当DRBD通过网络从对等节点透明地获取受影响的块时,I/O错误从上层被屏蔽。从那时起,DRBD被称为在无盘模式下操作,并且仅在对等节点上执行所有后续的读写I/O操作。此模式下的性能将降低,但服务不会中断,并且可以在方便的时候经过验证后再移动到对等节点。
See Configuring I/O error handling strategies for information about configuring I/O error handling strategies for DRBD.
2.16. Strategies for handling outdated data
DRBD distinguishes between inconsistent and outdated data. Inconsistent data is data that cannot be expected to be accessible and useful in any manner. The prime example for this is data on a node that is currently the target of an ongoing synchronization. Data on such a node is part obsolete, part up to date, and impossible to identify as either. Therefore, for example, if the device holds a file system (as is commonly the case), that file system would be unexpected to mount or even pass an automatic file system check.
Outdated data, by contrast, is data on a secondary node that is consistent, but no longer in sync with the primary node. This would occur in any interruption of the replication link, whether temporary or permanent. Data on an outdated, disconnected secondary node is expected to be clean, but it reflects a state of the peer node some time past. To avoid services using outdated data, DRBD disallows promoting a resource that is in the outdated state.
DRBD has interfaces that allow an external application to outdate a secondary node as soon as a network interruption occurs. DRBD will then refuse to switch the node to the primary role, preventing applications from using the outdated data. A complete implementation of this functionality exists for the Pacemaker cluster management framework (where it uses a communication channel separate from the DRBD replication link). However, the interfaces are generic and may be easily used by any other cluster management application.
每当过时的资源重新建立其复制链接时,其过时标志将自动清除。参阅background synchronization。
2.17. Three-way replication using stacking
| 在DRBD版本8.3.0及更高版本中可用;在DRBD版本9.x中不推荐使用,因为更多节点可以在单个级别上实现。有关详细信息,请参见定义网络连接。 |
When using three-way replication, DRBD adds a third node to an existing 2-node cluster and replicates data to that node, where it can be used for backup and disaster recovery purposes. This type of configuration generally involves Long-distance replication through DRBD Proxy.
三向复制通过在保存生产数据的现有资源上添加另一个堆叠 stacked 的DRBD资源来工作,如下图所示:

堆叠(stack)资源使用异步复制(DRBD Protocol A)进行复制,而生产数据通常使用同步复制(DRBD Protocol C)。
三路复制可以永久使用,其中第三个节点将使用生产集群中的数据不断更新。或者,它也可以按需使用,其中生产集群通常与备份站点断开连接,并且定期执行站点到站点的同步,例如通过运行夜间cron作业。
2.18. Long-distance replication through DRBD Proxy
DRBD的protocol A是异步的,但是一旦套接字输出缓冲区满了,写入应用程序就会阻塞(请参见 DRBD.conf 手册页中的 sndbuf size 选项)。在这种情况下,写入应用程序必须等到某些写入的数据, 这些数据可能要通过可能很小的带宽网络,而使得链路耗尽。
平均写入带宽受网络链路可用带宽的限制。只有配置好受限的套接字输出缓冲区时,突发写入才能被优雅的处理。
You can mitigate this by DRBD Proxy’s buffering mechanism. DRBD Proxy will place changed data from the DRBD device on the primary node into its buffers. DRBD Proxy’s buffer size is freely configurable, only limited by the address room size and available physical RAM.
Optionally DRBD Proxy can be configured to compress and decompress the data it forwards. Compression and decompression of DRBD’s data packets might slightly increase latency. However, when the bandwidth of the network link is the limiting factor, the gain in shortening transmit time outweighs the added latency of compression and decompression.
Compression and decompression were implemented with multi core SMP systems in mind, and can use multiple CPU cores.
事实上,大多数块I/O数据压缩得非常好,因此对带宽的使用更加有效,这证明了即使使用DRBD Protocol B和C也可以使用DRBD代理。
See 使用DRBD代理 for information about configuring DRBD Proxy.
| DRBD Proxy是DRBD产品系列中少数未在开源许可下发布的部分之一。请联系 [email protected] 或 [email protected] 获取评估许可证。 |
2.19. Truck-based replication
Truck-based replication, also known as disk shipping, is a means of preseeding a remote site with data to be replicated, by physically shipping storage media to the remote site. This is particularly suited for situations where
-
要复制的数据总量相当大(超过几百GB);
-
要复制的数据的预期变化率不太大;
-
站点之间的可用网络带宽是有限的。
In such situations, without truck-based replication, DRBD would require a very long initial device synchronization (on the order of weeks, months, or years). Truck based replication allows shipping a data seed to the remote site, and so drastically reduces the initial synchronization time. See Using truck-based replication for details on this use case.
2.20. Floating peers
| 此功能在DRBD 8.3.2及以上版本中可用。 |
DRBD的一个有点特殊的用例是 浮动节点 。在浮动节点设置中,DRBD节点不绑定到特定的命名主机(如在传统配置中),而是能够在多个主机之间浮动。在这种配置中,DRBD通过IP地址而不是主机名来标识对方。
有关管理浮动对等配置的更多信息,请参见Configuring DRBD to replicate between two SAN-backed Pacemaker clusters。
2.21. Data rebalancing (horizontal storage scaling)
If your company’s policy says that three-way redundancy is needed, you need at least three servers for your setup.
Now, as your storage demands grow, you will encounter the need for additional servers. Rather than having to buy 3 more servers at the same time, you can rebalance your data across a single additional node.

In the figure above you can see the before and after states: from 3 nodes with three 25TiB volumes each (for a net 75TiB), to 4 nodes, with net 100TiB.
DRBD 9使在线实时迁移数据成为可能;请参见Data rebalancing了解所需的确切步骤。
2.22. DRBD client
With the multiple-peer feature of DRBD, several interesting use cases have been added, for example the DRBD client.
The basic idea is that the DRBD back end can consist of three, four, or more nodes (depending on the policy of required redundancy); but, as DRBD 9 can connect more nodes than that. DRBD works then as a storage access protocol in addition to storage replication.
在主 DRBD客户端 上执行的所有写请求都会被发送到配备了存储设备的所有节点。读取请求仅传送到其中一个服务器节点。DRBD客户端 将在所有可用的服务器节点之间平均分配读取请求。
See Permanently diskless nodes for more information.
2.23. DRBD quorum
DRBD quorum is a feature that can help you avoid split-brain situations and data divergence in high-availability clusters. By using DRBD quorum, you do not have to resort to using fencing or STONITH solutions, although you can also use these if you want to. DRBD quorum requires at least three nodes but a third node which acts as an arbitrator can be diskless. An arbitrator node does not need to have the same hardware specifications as diskful storage nodes in your cluster. For example, a low-powered single-board computer such as a Raspberry Pi might even be sufficient.
The functional concept behind DRBD quorum is that a cluster node can only modify the DRBD replicated data set if the number of DRBD-running nodes for the data set that the node can communicate with, including the node itself, meets the requirement that you specify when you enable the quorum option. For most configurations, this will be a majority number of nodes. A majority number is more than half of the total number of DRBD-running nodes for the data set in the cluster. By only allowing data writes on a node that has network access to more than half the nodes in a given partition, including the node itself, the DRBD quorum feature helps you avoid a situation that would create a diverging data set.
It is not however the case that you always need two or more running nodes in a 3-node cluster for a DRBD primary node to be able to write to the data set. There is an exception, for example, if you disconnect all secondary nodes gracefully, then DRBD will mark their data as outdated as they leave the cluster. In this way, a single remaining DRBD primary node would “know” that it is safe to continue to write data. This situation could arise, for example, while performing system maintenance on nodes in your cluster. This way, you can maintain nodes in your cluster without causing downtime for your applications and services.
Using DRBD quorum is compatible with running a Pacemaker cluster. Pacemaker gets informed about quorum or loss-of-quorum through the master score of the DRBD resource.
There are different options and behaviors that you can configure related to the DRBD quorum feature, such as how you define quorum in your cluster and what actions DRBD might take when a node loses quorum. Refer to the Configuring quorum section for information about this.
2.23.1. Quorum tiebreaker
| quorum tiebreaker功能在DRBD版本9.0.18及更高版本中可用。 |
The fundamental problem with 2-node clusters is that in the moment they lose connectivity there are two partitions and neither partition has quorum. This results in the cluster halting the service. You can mitigate this problem by adding a third, diskless node to the cluster which will then act as a quorum tiebreaker.
Refer to Using a diskless node as a tiebreaker for more information.
2.24. Resync-after
DRBD runs all its necessary resync operations in parallel so that nodes are reintegrated with up-to-date data as soon as possible. This works well when there is one DRBD resource per backing disk.
However, when DRBD resources share a physical disk (or when a single resource spans multiple volumes), resyncing these resources (or volumes) in parallel results in a nonlinear access pattern. Hard disks perform much better with a linear access pattern. For such cases you can serialize resyncs using the resync-after keyword within a disk section of a DRBD resource configuration file.
See here for an example.
2.25. Failover clusters
In many scenarios it is useful to combine DRBD with a failover cluster resource manager. DRBD can integrate with a cluster resource manager (CRM) such as DRBD Reactor and its promoter plug-in, or Pacemaker, to create failover clusters.
DRBD Reactor is an open source tool that monitors DRBD events and reacts to them. Its promoter plug-in manages services using systemd unit files or OCF resource agents. Since DRBD Reactor solely relies on DRBD’s cluster communication, no configuration for its own communication is needed.
DRBD Reactor requires that quorum is enabled on the DRBD resources it is monitoring, so a failover cluster must have a minimum of three nodes. A limitation is that it supports ordering of services only for collocated services. One of its advantages is that it makes possible fully automatic recovery of clusters after a temporary network failure. This, together with its simplicity, make it the recommended failover cluster manager. Furthermore, DRBD Reactor is perfectly suitable for deployments on clouds as it needs no STONITH or redundant networks in deployments with three or more nodes (for quorum).
Pacemaker is the longest available open source cluster resource manager for high-availability clusters. It requires its own communication layer (Corosync) and it requires STONITH to deal with various scenarios. STONITH might require dedicated hardware and it can increase the impact radius of a service failure. Pacemaker probably has the most flexible system to express resource location and ordering constraints. However, with this flexibility, setups can become complex.
Finally, there are also proprietary solutions for failover clusters that work with DRBD, such as SIOS LifeKeeper for Linux, HPE Serviceguard for Linux, and Veritas Cluster Server.
Building and Installing the DRBD Software
3. Installing prebuilt DRBD binary packages
3.1. LINBIT supplied packages
LINBIT, the DRBD project’s sponsor company, provides binary packages to its commercial support customers. These packages are available through repositories and package manager commands (for example, apt, dnf), and when reasonable through LINBIT’s Docker registry. Packages and images from these sources are considered “official” builds.
这些版本可用于以下发行版:
-
Red Hat Enterprise Linux (RHEL), versions 7, 8 and 9
-
SUSE Linux Enterprise Server (SLES), versions 12 and 15
-
Debian GNU/Linux, 9 (stretch), 10 (buster), and 11 (bullseye)
-
Ubuntu Server Edition LTS 18.04 (Bionic Beaver), LTS 20.04 (Focal Fossa), and LTS 22.04 (Jammy Jellyfish)
-
Oracle Linux (OL), versions 8 and 9
Refer to the LINBIT kernel module signing for secure boot section for information about which specific DRBD kernel modules have signed packages for which distributions.
一些其他发行版的软件包也已经构建好,但是未经充分测试。
LINBIT与DRBD在source release中也同时发布了二进制版本。
Package installation on RPM-based systems (SLES, RHEL, AlmaLinux) is done by simply using dnf install (for new installations) or dnf update (for upgrades).
For DEB-based systems (Debian GNU/Linux, Ubuntu) systems, drbd-utils and drbd-module-`uname -r` packages are installed by using apt install,
3.1.1. Using a LINBIT helper script to register nodes and configure package repositories
If you are a LINBIT customer, you can install DRBD and dependencies that you may need from LINBIT’s customer repositories. To access those repositories you will need to have been set up in LINBIT’s system and have access to the LINBIT Customer Portal. If you have not been set up in LINBIT’s system, or if you want an evaluation account, you can contact a sales team member: [email protected].
Using the LINBIT Customer Portal to register nodes
Once you have access to the LINBIT Customer Portal, you can register your cluster nodes and configure repository access by using LINBIT’s Python helper script. See the Register Nodes section of the Customer Portal for details about this script.
Downloading and running the LINBIT manage nodes helper script
To download and run the LINBIT helper script to register your nodes and configure LINBIT repository access, enter the following commands on all nodes, one node at a time:
# curl -O https://my.linbit.com/linbit-manage-node.py
# chmod +x ./linbit-manage-node.py
# ./linbit-manage-node.py
| The script must be run as superuser. |
If the error message no python interpreter found :-( is displayed when running linbit-manage-node.py, enter the command dnf -y install python3 (RPM-based distributions) or apt -y install python3 (DEB-based distributions) to install Python 3.
|
The script will prompt you to enter your LINBIT Customer Portal username and password. After validating your credentials, the script will list clusters and nodes (if you have any already registered) that are associated with your account.
Joining nodes to a cluster
Select the cluster that you want to register the current node with. If you want the node to be the first node in a new cluster, select the “new cluster” option.
Saving the registration and repository configurations to files
To save the registration information on your node, confirm the writing of registration data to a JSON file, when the helper script prompts you to.
Writing registration data:
--> Write to file (/var/lib/drbd-support/registration.json)? [y/N]
To save the LINBIT repository configuration to a file on your node, confirm the writing of a linbit.repo file, when the helper script prompts you to.
Enabling access to LINBIT repositories
After registering a node by using the LINBIT manage node helper script and joining the node to a cluster, the script will show you a menu of LINBIT repositories.
To install DRBD, its dependencies, and related packages, enable the drbd-9 repository.
The drbd-9 repository includes the latest DRBD 9 version. It also includes other LINBIT software packages, including LINSTOR®, DRBD Reactor, LINSTOR GUI, OCF resource agents, and others.
|
Installing the LINBIT public key and verifying LINBIT repositories
After enabling LINBIT repositories and confirming your selection, be sure to respond yes to the questions about installing LINBIT’s public key to your keyring and writing the repository configuration file.
Before it closes, the script will show a message that suggests different packages that you can install for different use cases.
Verifying LINBIT repositories
After the LINBIT manage node helper script completes, you can verify that you enabled LINBIT repositories by using the dnf info or apt info command, after updating your package manager’s package metadata.
On RPM-based systems, enter:
# dnf --refresh info drbd-utils
On DEB-based systems, enter:
# apt update && apt info drbd-utils
Output from the package manager info command should show that the package manager is pulling package information from LINBIT repositories.
Excluding packages from Red Hat or AlmaLinux repositories
If you are using an RPM-based Linux distribution, before installing DRBD, be sure to only pull DRBD and related packages from LINBIT repositories. To do this, you will need to exclude certain packages from your RPM-based distribution’s repositories that overlap with packages in the LINBIT customer repositories.
The commands that follow insert an “exclude” line after the occurrence of every enabled repository line in all files in the repositories configuration directory, except for LINBIT repository files.
To exclude the relevant DRBD packages from enabled repositories on RPM-based distributions, enter the commands:
# RPM_REPOS="`ls /etc/yum.repos.d/*.repo|grep -v linbit`"
# PKGS="drbd kmod-drbd"
# for file in $RPM_REPOS; do sed -i "/^enabled[ =]*1/a exclude=$PKGS" $file; done
Using the helper script’s suggested package manager command to install DRBD
To install DRBD, you can use the package manager command that the LINBIT helper script showed before the script completed. The relevant command was shown after this line:
If you don't intend to run an SDS satellite or controller, a useful set is:
[...]
|
If you need to refer to the helper script’s suggested actions some time after the script completes, you can run the script again using the # ./linbit-manage-node.py --hints |
On DEB based systems you can install a precompiled DRBD kernel module package, drbd-module-$(uname -r), or a source version of the kernel module, drbd-dkms. Install one or the other package but not both.
|
3.1.2. LINBIT kernel module signing for secure boot
LINBIT signs most of its kernel module object files, the following table gives an overview when signing for distributions started:
| Distribution | Module signing since DRBD release |
|---|---|
RHEL7 |
8.4.12/9.0.25/9.1.0 |
RHEL8 |
9.0.25/9.1.0 |
RHEL9+ |
all available |
SLES15 |
9.0.31/9.1.4 |
Debian |
9.0.30/9.1.3 |
Ubuntu |
9.0.30/9.1.3 |
Oracle Linux |
9.1.17/9.2.6 |
The public signing key is shipped in the RPM package and gets installed to /etc/pki/linbit/SECURE-BOOT-KEY-linbit.com.der. It can be enrolled with the following command:
# mokutil --import /etc/pki/linbit/SECURE-BOOT-KEY-linbit.com.der
input password:
input password again:
A password can be chosen freely. It will be used when the key is actually enrolled to the MOK list after the required reboot.
3.2. LINBIT supplied docker images
LINBIT provides a Docker registry for its commercial support customers. The registry is accessible through the host name ‘drbd.io’.
| The LINBIT container image repository (https://drbd.io) is only available to LINBIT customers or through LINBIT customer trial accounts. Contact LINBIT for information on pricing or to begin a trial. Alternatively, you may use LINSTOR SDS’ upstream project named Piraeus, without being a LINBIT customer. |
Before you can pull images, you have to log in to the registry:
# docker login drbd.io
成功登录后,可以拉取镜像。要测试登录名和registry,请首先输入以下命令:
# docker pull drbd.io/drbd-utils
# docker run -it --rm drbd.io/drbd-utils # press CTRL-D to exit
3.3. Distribution supplied packages
Several Linux distributions provide DRBD, including prebuilt binary packages. Support for these builds, if any, is being provided by the associated distribution vendor. Their release cycle may lag behind DRBD source releases.
3.3.1. SUSE Linux企业服务器
SUSE Linux Enterprise Server (SLES) High Availability Extension (HAE) includes DRBD.
On SLES, DRBD is normally installed through the software installation component of YaST2. It comes bundled with the High Availability Extension package selection.
喜欢命令行安装的用户只需输入:
# yast -i drbd
或
# zypper install drbd
3.3.2. CentOS
CentOS has had DRBD 8 since release 5; for DRBD 9 you will need examine EPEL and similar sources.
可以使用 yum 安装DRBD(请注意,要配置好正确的repository才能正常工作):
# yum install drbd kmod-drbd
3.3.3. Ubuntu Linux
对于Ubuntu LTS,LINBIT在https://launchpad.net/~LINBIT/+archive/Ubuntu/LINBIT-drbd9-stack上提供了一个PPA存储库。有关更多信息,请参见 Adding Launchpad PPA Repositories
# apt install drbd-utils drbd-dkms
3.4. Compiling packages from source
Releases generated by Git tags on github are snapshots of the Git repository at the given time. You most likely do not want to use these. They might lack things such as generated man pages, the configure script, and other generated files. If you want to build from a tar file, use the ones provided by us.
我们所有的项目都包含标准的构建脚本(例如,Makefile、configure)。维护每个发行版的特定信息(例如,编译文档时损坏的宏等)太麻烦了,而且从历史上看,本节中提供的信息很快就过时了。如果你不知道如何以标准的方式构建软件,请考虑使用LINBIT提供的软件包。
4. Building and installing DRBD from source
4.1. Downloading the DRBD sources
The source tar files for both current and historic DRBD releases are available for download from https://pkg.linbit.com/. Source tar files, by convention, are named drbd-x.y.z.tar.gz, for example, drbd-utils-x.y.z.tar.gz, where x, y and z refer to the major, minor and bug fix release numbers.
DRBD’s compressed source archive is less than half a megabyte in size. After downloading a tar file, you can decompress its contents into your current working directory, by using the tar -xzf command.
For organizational purposes, decompress DRBD into a directory normally used for keeping source code, such as /usr/src or /usr/local/src. The examples in this guide assume /usr/src.
4.2. Checking out sources from the public DRBD source repository
DRBD’s source code is kept in a public Git repository. You can browse this online at https://github.com/LINBIT. The DRBD software consists of these projects:
-
The DRBD kernel module
-
The DRBD utilities
Source code can be obtained by either cloning Git repositories or downloading release tar files. There are two minor differences between an unpacked source tar file and a Git checkout of the same release:
-
The Git checkout contains a
debian/subdirectoy, while the source tar file does not. This is due to a request from Debian maintainers, who prefer to add their own Debian build configuration to a pristine upstream tar file. -
The source tar file contains preprocessed man pages, the Git checkout does not. Therefore, building DRBD from a Git checkout requires a complete Docbook toolchain for building the man pages, while this is not a requirement for building from a source tar file.
4.2.1. DRBD kernel module
To check out a specific DRBD release from the repository, you must first clone the DRBD repository:
git clone --recursive https://github.com/LINBIT/drbd.git
This command will create a Git checkout subdirectory, named drbd. To now move to a source code state equivalent to a specific DRBD release (here 9.2.3), issue the following commands:
$ cd drbd
$ git checkout drbd-9.2.3
$ git submodule update
4.3. Building DRBD from source
After cloning the DRBD and related utilities source code repositories to your local host, you can proceed to building DRBD from the source code.
4.3.1. Checking build prerequisites
Before being able to build DRBD from source, your build host must fulfill the following prerequisites:
-
make,gcc, the glibc development libraries, and theflexscanner generator must be installed.You should verify that the gccyou use to compile the module is the same that was used to build the kernel you are running. If you have multiplegccversions available on your system, DRBD’s build system includes a facility to select a specificgccversion. -
For building directly from a Git checkout, GNU Autoconf is also required. This requirement does not apply when building from a tar file.
-
If you are running a stock kernel supplied by your distribution, you should install a matching kernel headers package. These are typically named
kernel-devel,kernel-headers,linux-headersor similar. In this case, you can skip Preparing the kernel source tree and continue with Preparing the DRBD userspace utilities build tree. -
If you are not running a distribution stock kernel (that is, your system runs on a kernel built from source with a custom configuration), your kernel source files must be installed.
On RPM-based systems, these packages will be named similar to kernel-source-version.rpm, which is easily confused withkernel-version.src.rpm. The former is the correct package to install for building DRBD.
“Vanilla” kernel tar files from the https://kernel.org/ archive are simply named linux-version.tar.bz2 and should be unpacked in /usr/src/linux-version, with the symlink /usr/src/linux pointing to that directory.
In this case of building DRBD against kernel sources (not headers), you must continue with Preparing the kernel source tree.
4.3.2. Preparing the kernel source tree
To prepare your source tree for building DRBD, you must first enter the directory where your unpacked kernel sources are located. Typically this is /usr/src/linux-version, or simply a symbolic link named /usr/src/linux:
# cd /usr/src/linux
The next step is recommended, though not strictly necessary. Be sure to copy your existing .config file to a safe location before performing it. This step essentially reverts your kernel source tree to its original state, removing any leftovers from an earlier build or configure run:
# make mrproper
Now it is time to clone your currently running kernel configuration into the kernel source tree. There are a few possible options for doing this:
-
Many reasonably recent kernel builds export the currently-running configuration, in compressed form, via the
/procfilesystem, enabling you to copy from there:
# zcat /proc/config.gz > .config
-
SUSE kernel Makefiles include a
cloneconfigtarget, so on those systems, you can issue:
# make cloneconfig
-
Some installs put a copy of the kernel config into
/boot, which allows you to do this:
# cp /boot/config-$(uname -r).config
-
Finally, you can simply use a backup copy of a
.configfile which has been used for building the currently-running kernel.
4.3.3. Preparing the DRBD userspace utilities build tree
The DRBD userspace compilation requires that you first configure your source tree with the included configure script.
When building from a Git checkout, the configure script does not yet exist. You must create it by simply typing autoconf from the top directory of the checkout.
|
Invoking the configure script with the --help option returns a full list of supported options. The table below summarizes the most important ones:
| Option | Description | Default | Remarks |
|---|---|---|---|
–prefix |
Installation directory prefix |
|
This is the default to maintain Filesystem Hierarchy Standard compatibility for locally installed, unpackaged software. In packaging, this is typically overridden with |
–localstatedir |
Local state directory |
|
Even with a default |
–sysconfdir |
System configuration directory |
|
Even with a default |
–with-udev |
Copy a rules file into your |
yes |
Disable for non- |
–with-heartbeat |
Build DRBD Heartbeat integration |
yes |
You can disable this option unless you are planning to use DRBD’s Heartbeat v1 resource agent or |
–with-pacemaker |
Build DRBD Pacemaker integration |
yes |
You can disable this option if you are not planning to use the Pacemaker cluster resource manager. |
–with-rgmanager |
Build DRBD Red Hat Cluster Suite integration |
no |
You should enable this option if you are planning to use DRBD with |
–with-bashcompletion |
Installs a bash completion script for |
yes |
You can disable this option if you are using a shell other than bash, or if you do not want to use programmable completion for the |
–with-initscripttype |
Type of your init system |
auto |
Type of init script to install (sysv, systemd, or both). |
–enable-spec |
Create a distribution specific RPM spec file |
no |
For package builders only: you can use this option if you want to create an RPM spec file adapted to your distribution. See also Building the DRBD userspace RPM packages. |
Most users will want the following configuration options:
$ ./configure --prefix=/usr --localstatedir=/var --sysconfdir=/etc
The configure script will adapt your DRBD build to distribution specific needs. It does so by auto-detecting which distribution it is being invoked on, and setting defaults accordingly. When overriding defaults, do so with caution.
The configure script creates a log file, config.log, in the directory where it was invoked. When reporting build issues on the LINBIT Community Forum, it is usually wise to either attach a copy of that file or point others to a location from where it can be viewed or downloaded.
4.3.4. Building DRBD userspace utilities
To build DRBD’s userspace utilities, invoke the following commands from the top of your Git checkout or expanded tar file:
$ make
$ sudo make install
This will build the management utilities (drbdadm, drbdsetup, and drbdmeta), and install them in the appropriate locations. Based on the other --with options selected during the configure stage, it will also install scripts to integrate DRBD with other applications.
4.3.5. Compiling the DRBD kernel module
The DRBD kernel module source always targets the newest upstream kernel. Backward compatibility with older kernels is handled automatically by a Coccinelle-based compat system that generates the necessary patches at build time.
Building from a release tarball
Release tar files ship pre-generated compat patches for common distribution kernels. In most cases, building is straightforward:
$ cd drbd-9.x.y
$ make clean
$ make
By default, this builds the module for the currently running kernel (using /lib/modules/$(uname -r)/build). To build against a different kernel, set KDIR:
$ make clean
$ make KDIR=/path/to/kernel/headers/or/source
For kernels without pre-generated compat patches, the build automatically uses the LINBIT “spatch as a service” web service to generate them. If you do not have internet access, you will need a local Coccinelle installation.
Building from a Git-cloned repository
Building from a Git-cloned repository requires Coccinelle (spatch) for the compat system. Refer to the DRBD README for requirements and options.
$ cd drbd
$ make clean
$ make
Checking for successful build completion
If the module build completes successfully, you can find the built module by entering the following command:
$ find -name "drbd.ko"
After you find the newly-built kernel module file, you can show information about it by entering:
$ /sbin/modinfo <path/to/kernel/module>
4.4. Installing DRBD
Provided your DRBD build completed successfully, you will be able to install DRBD by issuing the commands:
$ cd drbd && sudo make install && cd ..
$ cd drbd-utils && sudo make install && cd ..
The DRBD userspace management tools (drbdadm, drbdsetup, and drbdmeta) will now be installed in the prefix path that was passed to configure, typically /sbin/.
Note that any kernel upgrade will require you to rebuild and reinstall the DRBD kernel module to match the new kernel.
Some distributions allow to register kernel module source directories, so that rebuilds are done as necessary. See e.g. dkms(8) on Debian.
The DRBD userspace tools, in contrast, need only to be rebuilt and reinstalled when upgrading to a new DRBD version. If at any time you upgrade to a new kernel and new DRBD version, you will need to upgrade both components.
4.5. Building the DRBD userspace RPM packages
The DRBD build system contains a facility to build RPM packages directly out of the DRBD source tree. For building RPMs, Checking build prerequisites applies essentially in the same way as for building and installing with make, except that you also need the RPM build tools, of course.
Also, see Preparing the kernel source tree if you are not building against a running kernel with precompiled headers available.
The build system offers two approaches for building RPMs. The simpler approach is to simply invoke the rpm target in the top-level Makefile:
$ ./configure
$ make rpm
This approach will auto-generate spec files from pre-defined templates, and then use those spec files to build binary RPM packages.
The make rpm approach generates several RPM packages:
| Package name | Description | Dependencies | Remarks |
|---|---|---|---|
drbd |
DRBD meta-package |
All other |
Top-level virtual package. When installed, this pulls in all other userland packages as dependencies. |
drbd-utils |
Binary administration utilities |
Required for any DRBD enabled host |
|
drbd-udev |
udev integration facility |
|
Enables |
drbd-heartbeat |
DRBD Heartbeat integration scripts |
|
Enables DRBD management by legacy v1-style Heartbeat clusters |
drbd-pacemaker |
DRBD Pacemaker integration scripts |
|
Enables DRBD management by Pacemaker clusters |
drbd-rgmanager |
DRBD RedHat Cluster Suite integration scripts |
|
Enables DRBD management by |
drbd-bashcompletion |
Programmable bash completion |
|
Enables Programmable bash completion for the |
The other, more flexible approach is to have configure generate the spec file, make any changes you deem necessary, and then use the rpmbuild command:
$ ./configure --enable-spec
$ make tgz
$ cp drbd*.tar.gz `rpm -E %sourcedir`
$ rpmbuild -bb drbd.spec
The RPMs will be created wherever your system RPM configuration (or your personal ~/.rpmmacros configuration) dictates.
After you have created these packages, you can install, upgrade, and uninstall them as you would any other RPM package in your system.
Note that any kernel upgrade will require you to generate a new kmod-drbd package to match the new kernel; see also [s-kabi-warning].
The DRBD userland packages, in contrast, need only be recreated when upgrading to a new DRBD version. If at any time you upgrade to a new kernel and new DRBD version, you will need to upgrade both packages.
4.6. Building a DRBD Debian package
The DRBD build system contains a facility to build Debian packages directly out of the DRBD source tree. For building Debian packages, Checking build prerequisites applies essentially in the same way as for building and installing with make, except that you of course also need the dpkg-dev package containing the Debian packaging tools, and fakeroot if you want to build DRBD as a non-root user (highly recommended). All DRBD sub-projects (kernel module and drbd-utils) support Debian package building.
Also, see Preparing the kernel source tree if you are not building against a running kernel with precompiled headers available.
The DRBD source tree includes a debian subdirectory containing the required files for Debian packaging. That subdirectory, however, is not included in the DRBD source tar files — instead, you will need to create a Git checkout of a tag associated with a specific DRBD release.
Once you have created your checkout in this fashion, you can issue the following commands to build DRBD Debian packages:
$ dpkg-buildpackage -rfakeroot -b -uc
This (example) drbd-buildpackage invocation enables a binary-only build (-b) by a non-root user (-rfakeroot), disabling cryptographic signature for the changes file (-uc). Of course, you might prefer other build options, see the dpkg-buildpackage man page for details.
|
This build process will create the following Debian packages:
-
A package containing the DRBD userspace tools, named
drbd-utils_x.y.z-ARCH.deb; -
A module source package suitable for
module-assistantnameddrbd-module-source_x.y.z-BUILD_all.deb. -
A dkms package suitable for
dkmsnameddrbd-dkms_x.y.z-BUILD_all.deb.
After you have created these packages, you can install, upgrade, and uninstall them as you would any other Debian package in your system.
The drbd-utils packages supports Debian’s dpkg-reconfigure facility, which can be used to switch which versions of the man-pages are shown by default (8.3, 8.4, or 9.0).
Building and installing the actual kernel module from the installed module source package is easily accomplished via Debian’s module-assistant facility:
# module-assistant auto-install drbd-module
You can also use the shorthand form of the above command:
# m-a a-i drbd-module
Note that any kernel upgrade will require you to rebuild the kernel module (with module-assistant, as just described) to match the new kernel. The drbd-utils and drbd-module-source packages, in contrast, only need to be recreated when upgrading to a new DRBD version. If at any time you upgrade to a new kernel and new DRBD version, you will need to upgrade both packages.
Starting from DRBD 9, automatic updates of the DRBD kernel module are possible with the help of dkms(8). All that is needed is to install the drbd-dkms Debian package.
使用DRBD
5. Common administrative tasks
本章概述了日常运营中遇到的典型管理任务。它不包括故障排除任务,故障排除任务在Troubleshooting and error recovery中有详细介绍。
5.1. 配置DRBD
5.1.1. 准备底层存储
安装完DRBD之后,必须在两个集群节点上留出大致相同大小的存储区域。这将成为DRBD资源的底层设备。为此,您可以使用系统上找到的任何类型的块设备。典型示例包括:
-
硬盘分区(或完整的物理硬盘驱动器),
-
一个软件RAID设备,
-
an LVM or ZFS logical volume, or any other block device configured by the Linux device-mapper infrastructure,
-
在系统上找到的任何其他块设备类型。
您也可以使用 资源堆叠 ,这意味着您可以将一个DRBD设备用作另一个底层设备。使用堆叠资源有一些特定注意事项;它们的配置在Creating a stacked 3-node setup中有详细介绍。
| 虽然可以使用环路设备(loop devices)作为DRBD的底层设备,但由于死锁问题,不建议这样做。 |
在某个存储区域中创建DRBD资源之前,不 需要将其设置为空。事实上,通常利用DRBD从以前的非冗余单服务器系统中创建出双节点集群。(如果您计划这样做,请参考DRBD metadata)。
在本指南中,我们假设一个非常简单的设置:
-
Both hosts have a free (currently unused) partition named
/dev/disk/by-id/ata-[some ID]. -
我们选择使用internal metadata。
5.1.2. 准备网络配置
虽然不是严格要求,但建议您通过专用连接运行DRBD复制。在撰写本文时,最合理的选择是直接、背对背(back-to-back)、千兆以太网连接。当DRBD在交换机网络上运行时,建议使用冗余组件和 bonding 驱动程序(在 active-backup 模式下)。
通常不建议通过路由器网络运行DRBD复制,因为存在相当明显的性能缺陷(对吞吐量和延迟都有不利影响)。
就本地防火墙的考虑而言,重要的是要理解DRBD(按惯例)使用7788以上的TCP端口,每个资源都在一个单独的端口上监听。DRBD对每个配置的资源使用两个TCP连接。为了实现正确的DRBD功能,防火墙配置必须允许这些连接。
如果启用了诸如SELinux或AppArmor之类的强制访问控制(MAC)方案,则除防火墙之外的安全考虑也可能适用。您可能需要调整本地安全策略,使其无法使DRBD正常工作。
当然,您还必须确保DRBD的TCP端口尚未被其他应用程序使用。
Since DRBD version 9.2.6, it is possible to configure a DRBD resource to support more than one TCP connection pair, for traffic load balancing purposes. Refer to the Load balancing DRBD traffic section for details.
在本指南中,我们假设一个非常简单的设置:
-
我们的两台DRBD主机都有一个当前未使用的网络接口eth1,其IP地址分别为
10.1.1.31和10.1.1.32。 -
无其他服务在任一主机上使用TCP端口7788到7799。
-
本地防火墙配置允许主机之间通过这些端口进行入站和出站TCP连接。
5.1.3. 配置资源
DRBD的所有选项都在其配置文件 /etc/DRBD.conf 中进行控制。通常,此配置文件只是具有以下内容的框架:
include "/etc/drbd.d/global_common.conf";
include "/etc/drbd.d/*.res";
也可以使用 drbd.conf 作为一个单一配置文件,而不使用任何 include 语句。然而,这样的配置很快就会变得杂乱无章,难以管理,这就是为什么多文件方法是首选的方法。
无论采用哪种方法,都应该始终确保所有参与集群节点上的 drbd.conf 及其包含的任何其他文件 完全相同 。
DRBD 源码压缩包解压后, 在 scripts 子目录中包含一个示例配置文件。二进制安装包将直接在 /etc ,或在 /usr/share/doc/packages/drbd 等由安装包定义出的文档目录中安装此示例配置。
本节仅描述配置文件的几个部分,这些部分对于使DRBD启动和运行是绝对必要的。配置文件的语法和内容在 drbd.conf 的手册页中有详细的说明。
示例配置
在本指南中,我们假设按照前面章节中给出的示例进行最小设置:
/etc/DRBD.d/global_common.conf )global {
usage-count yes;
}
common {
net {
protocol C;
}
}
/etc/drbd.d/rc0.res )resource "r0" {
device minor 1;
disk "/dev/vg0/lv0";
meta-disk internal;
on "alice" {
node-id 0;
}
on "bob" {
node-id 1;
}
connection {
host "alice" address 10.1.1.31:7789;
host "bob" address 10.1.1.32:7789;
}
}
The disk value in this configuration uses an LVM logical volume. If you are using physical disks rather than LVM or ZFS logical volumes underneath your DRBD resources, reference the disks by using persistent block device names (/dev/disk/by-id/<disk-by-id>) rather than by bus-based names (for example, /dev/sda2). This will prevent a bus-based name change from possibly affecting your DRBD resources. You can enter a lsblk -o Name,UUID,WWN command to determine a particular disk’s ID.
|
此示例按以下方式配置DRBD:
-
您 “决定参加” 将包含在DRBD的使用统计信息中 (参见
usage-count)。 -
除非另有明确规定,否则资源配置为使用完全同步复制(Protocol C)。
-
Your cluster consists of two nodes, ‘alice’ and ‘bob’.
-
You have a resource arbitrarily named
r0which uses an LVM logical volume,/dev/vg0/lv0, as the lower-level device, and is configured with internal metadata. -
The resource uses TCP port 7789 for its network connections, and binds to the IP addresses 10.1.1.31 and 10.1.1.32, respectively.
-
The configuration above implicitly creates one volume in the resource, numbered zero (
0).
The next example explicitly configures multiple volumes in one resource. Assume that the same LVM volume group, vg0, exists on each node and contains the specified logical volumes for each node. By specifying a different logical volume for the disk value within the volume 1 configuration for node bob, you override the volume 1 value specified in the common configuration section: /dev/vg0/lv2 rather than /dev/vg0/lv1.
/etc/drbd.d/rc0.res )resource "r0" {
volume 0 {
device minor 1;
disk "/dev/vg0/lv0";
meta-disk internal;
}
volume 1 {
device minor 2;
disk "/dev/vg0/lv1";
meta-disk internal;
}
on "alice" {
node-id 0;
}
on "bob" {
node-id 1;
volume 1 {
disk "/dev/vg0/lv2";
}
}
connection {
host "alice" address 10.1.1.31:7789;
host "bob" address 10.1.1.32:7789;
}
}
-
Host sections (‘on’ keyword) inherit volume sections from the resource level. They may contain volume themselves, these values have precedence over inherited values.
| 卷也可以动态添加到现有资源中。有关示例,请参见Adding a new DRBD volume to an existing volume group。 |
For compatibility with older releases of DRBD it supports also drbd-8.4 like configuration files.
resource r0 {
  on alice {
    device    /dev/drbd1;
    disk      /dev/vg0/lv0;
    meta-disk internal;
    address 10.1.1.31:7789;
  }
  on bob {
    device    /dev/drbd1;
    disk      /dev/vg0/lv0;
    meta-disk internal;
    address   10.1.1.32:7789;
  }
-
Strings that do not contain keywords might be given without double quotes
". -
In the old (8.4) version, the way to specify the device was by using a string that specified the name of the resulting
/dev/drbdXdevice file. -
Two node configurations get node numbers assigned by drbdadm.
-
A pure two node configuration gets an implicit connection.
global 部分
此部分在配置中只允许使用一次。它通常位于 /etc/drbd.d/global_common.conf 文件中。在单个文件配置中,它应该位于配置文件的最顶端。在本节提供的少数选项中,只有一个与大多数用户相关:
usage-countThe DRBD project keeps statistics about the usage of various DRBD versions. This is done by contacting an HTTP server every time a new DRBD version is installed on a system. This can be disabled by setting usage-count no;. The default is usage-count ask; which will prompt you every time you upgrade DRBD.
DRBD’s usage statistics are, of course, publicly available: see https://usage.drbd.org.
common 部分
本节提供了一个速记方法来定义每个资源继承的配置设置。它通常位于 /etc/drbd.d/global_common.conf 。您可以定义任何选项,也可以基于每个资源定义。
严格来说,不需要包含 common 部分,但如果您使用多个资源,则强烈建议您这样做。否则,重复使用的选项会使配置很快变得复杂。
在上面的示例中,我们在 common 部分中包含了 net {protocol C; } ”,因此每个配置的资源(包括 r0 )都继承此选项,除非它显式配置了另一个 protocol 选项。有关可用的其他同步协议,请参见Replication modes。
resource 部分
A per-resource configuration file is usually named /etc/drbd.d/resource.res. Any DRBD resource you define must be named by specifying a resource name in the configuration. The convention is to use only letters, digits, and the underscore; while it is technically possible to use other characters as well, you won’t like the result if you ever need the more specific resource:_peer/volume syntax.
每个资源配置还必须至少有两个 on host 子字节,每个群集节点一个。所有其他配置设置要么继承自 common 部分(如果存在),要么派生自DRBD的默认设置。
此外,可以在 resource 部分直接指定在所有主机上具有相同值的选项。因此,我们可以进一步压缩示例配置如下:
resource "r0" {
  device minor 1;
  disk "/dev/vg0/lv0";
  meta-disk internal;
  on "alice" {
    address   10.1.1.31:7789;
  }
  on "bob" {
    address   10.1.1.32:7789;
  }
}
5.1.4. 定义网络连接
目前,DRBD 9中的通信链路必须建立一个完整的网格,即在每个资源中,每个节点都必须与每个其他节点(当然,不包括自身)有直接连接。
对于两台主机的简单情况, drbdadm 将自行插入(单个)网络连接,以便于使用和向后兼容。
The net effect of this is a quadratic number of network connections over hosts. For the “traditional” two nodes one connection is needed; for three hosts there are three node pairs; for four, six pairs; five hosts: 10 connections, and so on. For the maximum of 32 nodes there will be 496 host pairs to connect.

三台主机的配置文件示例如下:
resource r0 {
  device    minor 1;
  disk      "/dev/vg0/lv0";
  meta-disk internal;
  on alice {
    address   10.1.1.31:7000;
    node-id   0;
  }
  on bob {
    address   10.1.1.32:7000;
    node-id   1;
  }
  on charlie {
    address   10.1.1.33:7000;
    node-id   2;
  }
  connection-mesh {
    hosts alice bob charlie;
  }
}
If have enough network cards in your servers, you can create direct cross-over links between server pairs. A single four-port ethernet card allows you to have a single management interface, and to connect three other servers, to get a full mesh for four cluster nodes.
在这种情况下,可以指定其他节点的IP地址以使用直接链接:
resource r0 {
  ...
  connection {
    host alice   address 10.1.2.1:7010;
    host bob     address 10.1.2.2:7001;
  }
  connection {
    host alice   address 10.1.3.1:7020;
    host charlie address 10.1.3.2:7002;
  }
  connection {
    host bob     address 10.1.4.1:7021;
    host charlie address 10.1.4.2:7012;
  }
}
For easier maintenance and debugging, it’s recommended that you have different ports for each endpoint. This will allow you to more easily associate packets to an endpoint when doing a tcpdump. The examples below will still be using two servers only; please see 四个节点的示例配置 for a four-node example.
5.1.5. Configuring multiple paths
DRBD allows configuring multiple paths per connection, by introducing multiple path sections in a connection. Please see the following example:
resource <resource> {
  ...
  connection {
    path {
      host alpha address 192.168.41.1:7900;
      host bravo address 192.168.41.2:7900;
    }
    path {
      host alpha address 192.168.42.1:7900;
      host bravo address 192.168.42.2:7900;
    }
  }
  ...
}
Obviously the two endpoint hostnames need to be equal in all paths of a connection. Paths may be on different IPs (potentially different NICs) or may only be on different ports.
The TCP transport uses one path at a time, unless you have configured load balancing (refer to Load balancing DRBD traffic). If the backing TCP connections get dropped, or show timeouts, the TCP transport implementation tries to establish a connection over the next path. It goes over all paths in a round-robin fashion until a connection gets established.
The RDMA transport uses all paths of a connection concurrently and it balances the network traffic between the paths evenly.
5.1.6. 配置传输实现
DRBD支持多种网络传输。可以为资源的每个连接配置传输实现。
TCP/IP协议
TCP is the default transport for DRBD replication traffic. Each DRBD resource connection where the transport option is not specified in the resource configuration will use the TCP transport.
resource <resource> {
  net {
    transport "tcp";
  }
  ...
}
You can configure the tcp transport with the following options, by specifying them in the net section of a resource configuration: sndbuf-size, rcvbuf-size, connect-int, socket-check-timeout, ping-timeout, timeout, load-balance-paths, and tls. Refer to man drbd.conf-9.0 for more details about each option.
Load balancing DRBD traffic
| It is not possible at this time to use the DRBD TCP load balancing and TLS traffic encryption features concurrently on the same resource. |
By default, the TCP transport establishes a connection path between DRBD resource peers serially, that is, one at a time. Since DRBD version 9.2.6, by setting the option load-balance-paths to yes, you can enable the transport to establish all paths in parallel. Also, when load balancing is configured, the transport will always send replicated traffic into the path with the shortest send queue. Data can arrive out of order on the receiving side when multiple paths are established. The DRBD transport implementation takes care of sorting the received data packets and provides the data to the DRBD core in the original sending order.
Using the load balancing feature also requires a drbd-utils version 9.26.0 or later. If you have an earlier version of drbd-utils installed, you might get “bad parser” error messages when trying to run drbdadm commands against resources for which you have configured load balancing.
|
An example configuration with load balancing configured for a DRBD resource named drbd-lb-0, is as follows:
drbd-lb-0.resresource "drbd-lb-0"
{
[...]
net
{
load-balance-paths yes;
[...]
}
on "node-0"
{
volume 0
{
[...]
}
node-id 0;
}
on "node-1"
{
volume 0
{
[...]
}
node-id 1;
}
on "node-2"
{
volume 0
{
[...]
}
node-id 2;
}
connection
{
path
{
host "node-0" address ipv4 192.168.220.60:7900;
host "node-1" address ipv4 192.168.220.61:7900;
}
path
{
host "node-0" address ipv4 192.168.221.60:7900;
host "node-1" address ipv4 192.168.221.61:7900;
}
}
connection
{
path
{
host "node-0" address ipv4 192.168.220.60:7900;
host "node-2" address ipv4 192.168.220.62:7900;
}
path
{
host "node-0" address ipv4 192.168.221.60:7900;
host "node-2" address ipv4 192.168.221.62:7900;
}
}
connection
{
path
{
host "node-1" address ipv4 192.168.220.61:7900;
host "node-2" address ipv4 192.168.220.62:7900;
}
path
{
host "node-1" address ipv4 192.168.221.61:7900;
host "node-2" address ipv4 192.168.221.62:7900;
}
}
}
While the above configuration shows three DRBD connection paths, only two are necessary in a three-node cluster. For example, if the above configuration was on node node-0, the connection between node-1 and node-2 would be unnecessary in the configuration. On node-1, the connection between node-0 and node-2 would be unnecessary, and so on, for the configuration on node-2. Nevertheless, it can be helpful to have all possible connections in your resource configuration. This way, you can use a single configuration file on all the nodes in your cluster without having to edit and customize the configuration on each node.
|
Securing DRBD connections with TLS
| It is not possible at this time to use the DRBD TCP load balancing and TLS traffic encryption features concurrently on the same resource. |
You can enable authenticated and encrypted DRBD connections via the tcp transport by adding the tls net option to a DRBD resource configuration file.
resource <resource> {
  net {
    tls yes;
  }
  ...
}
DRBD will temporarily pass the sockets to a user space utility (tlshd, part of the ktls-utils package) when establishing connections. tlshd will use the keys configured in /etc/tlshd.conf to set up authentication and encryption.
[authenticate.client]
x509.certificate=/etc/tlshd.d/tls.crt
x509.private_key=/etc/tlshd.d/tls.key
x509.truststore=/etc/tlshd.d/ca.crt

[authenticate.server]
x509.certificate=/etc/tlshd.d/tls.crt
x509.private_key=/etc/tlshd.d/tls.key
x509.truststore=/etc/tlshd.d/ca.crt
RDMA
You can configure DRBD resource replication traffic to use RDMA rather than TCP as a transport type by specifying it explicitly in a DRBD resource configuration.
resource <resource> {
  net {
    transport "rdma";
  }
  ...
}
You can configure the rdma transport with the following options, by specifying them in the net section of the resource configuration: sndbuf-size, rcvbuf-size, max_buffers, connect-int, socket-check-timeout, ping-timeout, timeout. Refer to man drbd.conf-9.0 for more details about each option.
The rdma transport is a zero-copy-receive transport. One implication of that is that the max_buffers configuration option must be set to a value big enough to hold all rcvbuf-size.
rcvbuf-size is configured in bytes, while max_buffers is configured in pages. For optimal performance max_buffers should be big enough to hold all of rcvbuf-size and the amount of data that might be in transit to the back-end device at any point in time.
|
In case you are using InfiniBand host channel adapters (HCAs) with the rdma transport, you also need to configure IP over InfiniBand (IPoIB). The IP address is not used for data transfer, but it is used to find the right adapters and ports while establishing the connection.
|
The configuration options sndbuf-size and rcvbuf-size are only considered at the time a connection is established. While you can change their values when the connection is established, your changes will only take effect when the connection is re-established.
|
5.1.7. 首次启用资源
在您完成了前面章节中概述的初始资源配置之后,您可以启用您定义的资源。
必须在两个节点上完成以下每个步骤。
请注意,使用我们的示例配置片段( resource r0 { … } )时, <resource> 将是 r0 。
此步骤只能在初始设备创建时完成。它初始化DRBD的元数据:
# drbdadm create-md <resource>
v09 Magic number not found
Writing meta data...
initialising activity log
NOT initializing bitmap
New drbd meta data block successfully created.
| The number of bitmap slots that are allocated in the meta-data depends on the number of hosts for this resource; per default the hosts in the resource configuration are counted. If all hosts are specified before creating the meta-data, this will “just work”; adding bitmap slots for further nodes is possible later, but incurs some manual work. |
此步骤将资源与其备份设备(如果是多卷资源,则为多个设备)关联,设置复制参数,并将资源连接到其对等方:
# drbdadm up <resource>
drbdadm status 观察状态变化The status command output should now contain information similar to the following:
# drbdadm status r0
r0 role:Secondary
  disk:Inconsistent
  bob role:Secondary
    disk:Inconsistent
| 此时磁盘状态应该是 Inconsistent/Inconsistent 。 |
到目前为止,DRBD已经成功地分配了磁盘和网络资源,并准备就绪。然而它还不知道应该使用哪个节点作为初始设备同步的源。
5.1.8. 初始设备同步
要使DRBD完全运行,还需要两个步骤:
If you are dealing with newly-initialized, empty disks, this choice is entirely arbitrary. If one of your nodes already has valuable data that you need to preserve, however, it is of crucial importance that you select that node as your synchronization source. If you do initial device synchronization in the wrong direction, you will lose that data. Exercise caution.
此步骤只能在一个节点上执行,只能在初始资源配置上执行,并且只能在您选择作为同步源的节点上执行。要执行此步骤,请输入以下命令:
# drbdadm primary --force <resource>
发出此命令后,将启动初始化全量同步。您将能够通过 drbdadm status 监视其进度。根据设备的大小,可能需要一些时间。
现在,您的DRBD设备已经完全运行,甚至在初始化同步完成之前(尽管性能略有降低)。如果从空磁盘开始,现在可能已经在设备上创建了一个文件系统,将其用作原始块设备,挂载它,并对可访问的块设备执行任何其他操作。
您现在可能需要继续执行使用DRBD,它描述了要在资源上执行的常见管理任务。
5.1.9. Skipping initial resynchronization
If (and only if) you are starting DRBD resources from scratch (with no valuable data on them) you can use following command sequence to skip initial resync (don’t do that with data you want to keep on the devices):
On all nodes:
# drbdadm create-md <res>
# drbdadm up <res>
The command drbdadm status should now show all disks as Inconsistent.
Then, on one node execute the following command:
# drbdadm new-current-uuid --clear-bitmap <resource>/<volume>
或
# drbdsetup new-current-uuid --clear-bitmap <minor>
Running drbdadm status now shows the disks as UpToDate (even though the backing devices might be out of sync). You can now create a file system on the disk and start using it.
| Don’t do the above with data you want to keep or it gets corrupted. |
5.1.10. Using truck-based replication
为了向远程节点预先设定数据,然后保持同步,并跳过初始的全量设备同步,请执行以下步骤。
This assumes that your local node has a configured, but disconnected DRBD resource in the Primary role. That is to say, device configuration is completed, identical drbd.conf copies exist on both nodes, and you have issued the commands for initial resource promotion on your local node but the remote node is not connected yet.
-
On the local node, issue the following command:
# drbdadm new-current-uuid --clear-bitmap <resource>/<volume>
或
# drbdsetup new-current-uuid --clear-bitmap <minor>
-
Create a consistent, verbatim copy of the resource’s data and its metadata. You may do so, for example, by removing a hot-swappable drive from a RAID-1 mirror. You would, of course, replace it with a fresh drive, and rebuild the RAID set, to ensure continued redundancy. But the removed drive is a verbatim copy that can now be shipped off site. If your local block device supports snapshot copies (such as when using DRBD on top of LVM), you may also create a bitwise copy of that snapshot using
dd. -
On the local node, issue:
# drbdadm new-current-uuid <resource>
or the matching
drbdsetupcommand.Note the absence of the
--clear-bitmapoption in this second invocation. -
Physically transport the copies to the remote peer location.
-
Add the copies to the remote node. This may again be a matter of plugging in a physical disk, or grafting a bitwise copy of your shipped data onto existing storage on the remote node. Be sure to restore or copy not only your replicated data, but also the associated DRBD metadata. If you fail to do so, the disk shipping process is moot.
-
On the new node you need to fix the node ID in the metadata, and exchange the peer-node info for the two nodes. Refer to the following command lines as an example for changing the node id from 2 to 1 on a resource
r0volume0.必须在卷未使用时执行此操作。
You need to edit the first four lines to match your needs. V is the resource name with the volume number. NODE_FROM is the node ID of the node the data originates from. NODE_TO is the node ID of the node where data will be replicated to. META_DATA_LOCATION is the location of the metadata which might be internal or flex-external.
V=r0/0
NODE_FROM=2
NODE_TO=1
META_DATA_LOCATION=internal

drbdadm -- --force dump-md $V > /tmp/md_orig.txt
sed -e "s/node-id $NODE_FROM/node-id $NODE_TO/" \
	-e "s/^peer.$NODE_FROM. /peer-NEW /" \
	-e "s/^peer.$NODE_TO. /peer[$NODE_FROM] /" \
	-e "s/^peer-NEW /peer[$NODE_TO] /" \
	< /tmp/md_orig.txt > /tmp/md.txt

drbdmeta --force $(drbdadm sh-minor $V) v09 $(drbdadm sh-md-dev $V) $META_DATA_LOCATION restore-md /tmp/md.txt
drbdmeta before 8.9.7 cannot cope with out-of-order peer sections. You will need to exchange the blocks manually by using an editor.
|
-
Bring up the resource on the remote node:
# drbdadm up <resource>
After the two peers connect, they will not initiate a full device synchronization. Instead, the automatic synchronization that now commences only covers those blocks that changed since the invocation of drbdadm --clear-bitmap new-current-uuid.
Even if there were no changes whatsoever since then, there may still be a brief synchronization period due to areas covered by the Activity Log being rolled back on the new Secondary. This may be mitigated by the use of checksum-based synchronization.
You may use this same procedure regardless of whether the resource is a regular DRBD resource, or a stacked resource. For stacked resources, simply add the -S or --stacked option to drbdadm.
5.1.11. 四个节点的示例配置
下面是一个四节点集群的示例。
resource r0 {
  device      minor 0;
  disk        /dev/vg/r0;
  meta-disk   internal;

  on store1 {
    address   10.1.10.1:7100;
    node-id   1;
  }
  on store2 {
    address   10.1.10.2:7100;
    node-id   2;
  }
  on store3 {
    address   10.1.10.3:7100;
    node-id   3;
  }
  on store4 {
    address   10.1.10.4:7100;
    node-id   4;
  }

  connection-mesh {
	hosts     store1 store2 store3 store4;
  }
}
In case you want to see the connection-mesh configuration expanded, try drbdadm dump <resource> -v.
As another example, if the four nodes have enough interfaces to provide a complete mesh via direct links[3], you can specify the IP addresses of the interfaces:
resource r0 {
  ...

  # store1 has crossover links like 10.99.1x.y
  connection {
    host store1  address 10.99.12.1 port 7012;
    host store2  address 10.99.12.2 port 7021;
  }
  connection {
    host store1  address 10.99.13.1  port 7013;
    host store3  address 10.99.13.3  port 7031;
  }
  connection {
    host store1  address 10.99.14.1  port 7014;
    host store4  address 10.99.14.4  port 7041;
  }

  # store2 has crossover links like 10.99.2x.y
  connection {
    host store2  address 10.99.23.2  port 7023;
    host store3  address 10.99.23.3  port 7032;
  }
  connection {
    host store2  address 10.99.24.2  port 7024;
    host store4  address 10.99.24.4  port 7042;
  }

  # store3 has crossover links like 10.99.3x.y
  connection {
    host store3  address 10.99.34.3  port 7034;
    host store4  address 10.99.34.4  port 7043;
  }
}
Please note the numbering scheme used for the IP addresses and ports. Another resource could use the same IP addresses, but ports 71xy, the next one 72xy, and so on.
5.2. Checking DRBD status
5.2.1. Monitoring and performing actions on DRBD resources in real time
One convenient way to work with and monitor DRBD is by using the DRBDmon utility. DRBDmon is included in the drbd-utils package. To run the utility, enter drbdmon on a node where the drbd-utils package is installed.
DRBDmon is CLI-based but works with the concept of displays, similar to windows, and supports keyboard and mouse navigation. Different displays in DRBDmon show different aspects of DRBD status and activity. For example, one display lists all the DRBD resources and their statuses on the current node. Another display lists peer connections and their statuses for a selected resource. There are other displays for other DRBD components.
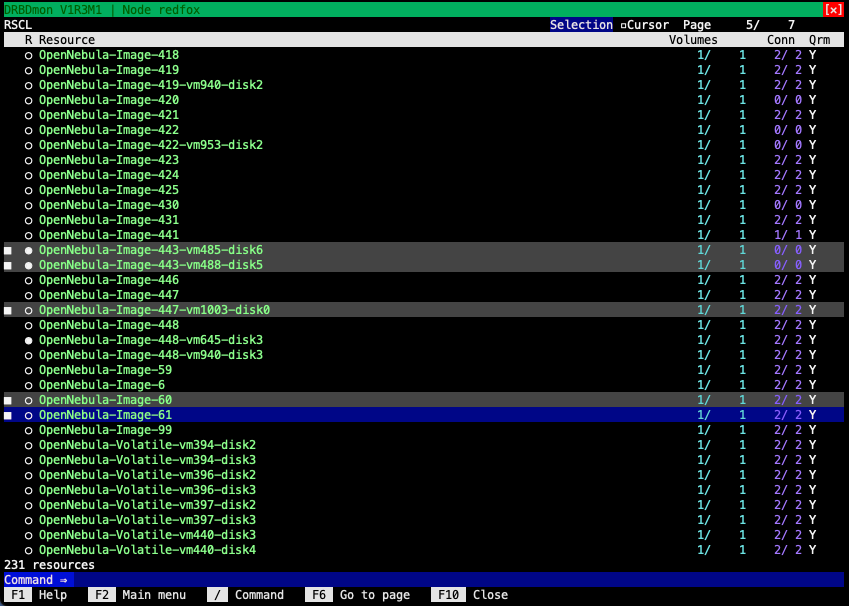
Besides being able to get information about the status of DRBD resources, volumes, connections, and other DRBD components, you can also use DRBDmon to perform actions on them. DRBDmon has context-based help text within the utility to help you navigate and use it. DRBDmon is useful for new DRBD users who can benefit from getting status information or performing actions without having to enter CLI commands. The utility is also useful for experienced DRBD users who might be working with a cluster that has a large number of DRBD resources.
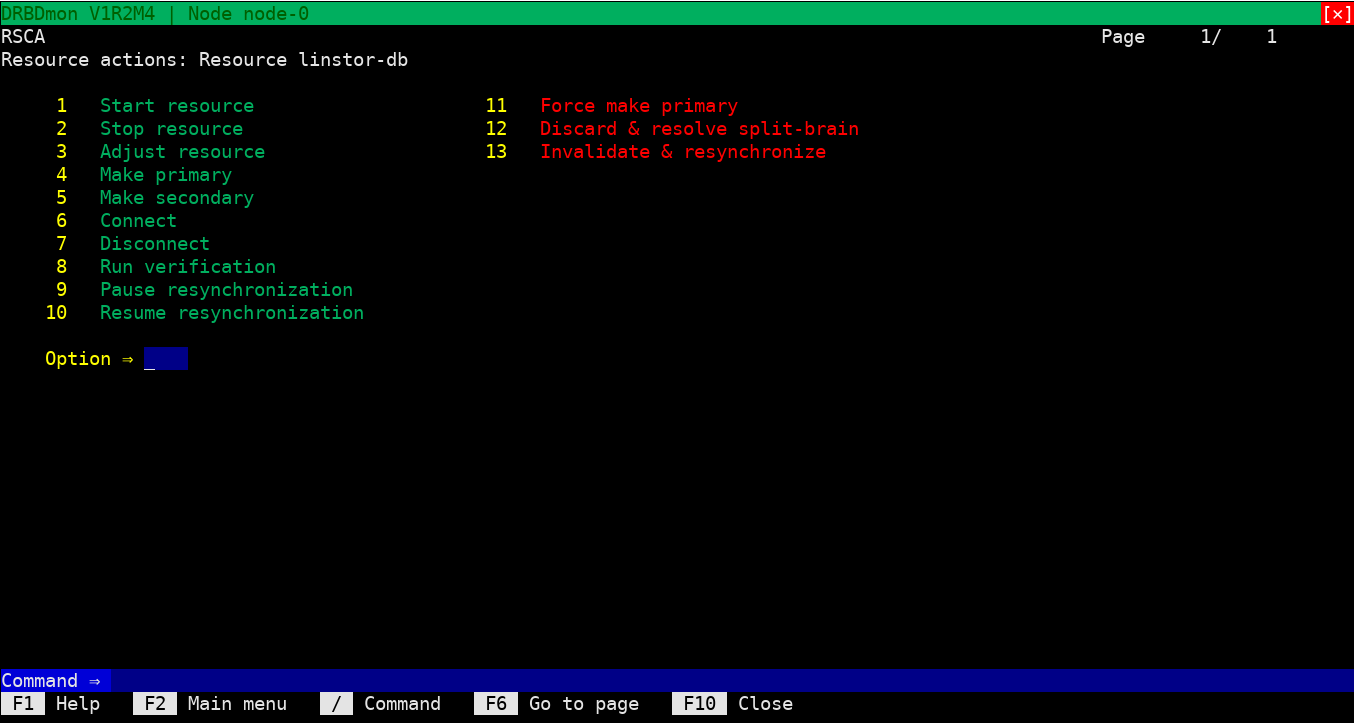
5.2.2. Retrieving status information through the DRBD process file
In DRBD 9, /proc/drbd only shows version information. Per-resource status output has been removed. Use Retrieving status information by using the DRBD administration tool or Retrieving status by information using the DRBD setup command instead.
|
/proc/drbd is a virtual file that was used extensively in DRBD 8.4 to display resource status. In DRBD 9, it only shows the DRBD module version and build information:
$ cat /proc/drbd
version: 9.x.y (api:2/proto:118-124)
GIT-hash: XXX
5.2.3. Retrieving status information by using the DRBD administration tool
In its simplest invocation, we just ask for the status of a single resource.
# drbdadm status home
home role:Secondary
  disk:UpToDate
  nina role:Secondary
    disk:UpToDate
  nino role:Secondary
    disk:UpToDate
  nono connection:Connecting
这里表明资源_home_是本地的,在 nina 上以及在 nino 上,是 UpToDate 的和 Secondary 的,所以这三个节点在他们的存储设备上有相同的数据,并且目前没有人在使用这个设备。
节点 nono 是未连接的,其状态报告为 Connecting_ ;有关详细信息,请参见下面的Connection states。
您可以通过将 --verbose 和/或 --statistics 参数传递给 drbdsetup 来获得更多信息(为了可读性,行输出将被打断):
# drbdsetup status home --verbose --statistics
home node-id:1 role:Secondary suspended:no
    write-ordering:none
  volume:0 minor:0 disk:UpToDate
      size:1048412 read:0 written:1048412 al-writes:0 bm-writes:48 upper-pending:0
                                        lower-pending:0 al-suspended:no blocked:no
  nina local:ipv4:10.9.9.111:7001 peer:ipv4:10.9.9.103:7010 node-id:0
                                               connection:Connected role:Secondary
      congested:no
    volume:0 replication:Established disk:UpToDate resync-suspended:no
        received:1048412 sent:0 out-of-sync:0 pending:0 unacked:0
  nino local:ipv4:10.9.9.111:7021 peer:ipv4:10.9.9.129:7012 node-id:2
                                               connection:Connected role:Secondary
      congested:no
    volume:0 replication:Established disk:UpToDate resync-suspended:no
        received:0 sent:0 out-of-sync:0 pending:0 unacked:0
  nono local:ipv4:10.9.9.111:7013 peer:ipv4:10.9.9.138:7031 node-id:3
                                                           connection:Connecting
此示例中的每几行组成一个块,对于此资源中使用的每个节点重复此块,对于本地节点则有小的格式例外 – 有关详细信息,请参见下面的内容。
每个块中的第一行显示 node id(对于当前资源;主机在不同资源中可以有不同的 node id )。此外,还显示了 role (请参见Resource roles)。
The next important line begins with the volume specification; normally these are numbered starting by zero, but the configuration may specify other IDs as well. This line shows the replication state in the replication item (see Replication states for details) and the remote disk state in disk (see Disk states). Then there’s a line for this volume giving a bit of statistics – data received, sent, out-of-sync, and so on. Please see Performance indicators and Connection information data for more information.
对于本地节点,在我们的示例中,第一行显示资源名 home 。由于第一个块始终描述本地节点,因此没有连接或地址信息。
有关详细信息,请参阅 drbd.conf 手册页。
本例中的其他四行组成一个块,对每个配置的DRBD设备重复该块,前缀为设备次要编号。在本例中,这是 0 ,对应于设备 /dev/drbd0 。
特定于资源的输出包含有关资源的各种信息:
5.2.4. Retrieving status by information using the DRBD setup command
| 这仅适用于8.9.3及更高版本的用户空间。 |
Using the command drbdsetup events2 with additional options and arguments is a low-level mechanism to get information out of DRBD, suitable for use in automated tools, like monitoring.
One-shot monitoring
在最简单的调用中,仅显示当前状态,输出如下所示(但是,在终端上运行时,将包括颜色):
# drbdsetup events2 --now r0
exists resource name:r0 role:Secondary suspended:no
exists connection name:r0 peer-node-id:1 conn-name:remote-host connection:Connected role:Secondary
exists device name:r0 volume:0 minor:7 disk:UpToDate
exists device name:r0 volume:1 minor:8 disk:UpToDate
exists peer-device name:r0 peer-node-id:1 conn-name:remote-host volume:0
    replication:Established peer-disk:UpToDate resync-suspended:no
exists peer-device name:r0 peer-node-id:1 conn-name:remote-host volume:1
    replication:Established peer-disk:UpToDate resync-suspended:no
exists -
Real-time monitoring
如果没有 ”–now” ,进程将继续运行,并发送连续更新,如下所示:
# drbdsetup events2 r0
...
change connection name:r0 peer-node-id:1 conn-name:remote-host connection:StandAlone
change connection name:r0 peer-node-id:1 conn-name:remote-host connection:Unconnected
change connection name:r0 peer-node-id:1 conn-name:remote-host connection:Connecting
然后,出于监控的目的,还有另一个参数 ”–statistics”,它将生成一些性能计数器和其他指标:
drbdsetup verbose output(为可读性而换行输出):
# drbdsetup events2 --statistics --now r0
exists resource name:r0 role:Secondary suspended:no write-ordering:drain
exists connection name:r0 peer-node-id:1 conn-name:remote-host connection:Connected
                                                        role:Secondary congested:no
exists device name:r0 volume:0 minor:7 disk:UpToDate size:6291228 read:6397188
            written:131844 al-writes:34 bm-writes:0 upper-pending:0 lower-pending:0
                                                         al-suspended:no blocked:no
exists device name:r0 volume:1 minor:8 disk:UpToDate size:104854364 read:5910680
          written:6634548 al-writes:417 bm-writes:0 upper-pending:0 lower-pending:0
                                                         al-suspended:no blocked:no
exists peer-device name:r0 peer-node-id:1 conn-name:remote-host volume:0
          replication:Established peer-disk:UpToDate resync-suspended:no received:0
                                      sent:131844 out-of-sync:0 pending:0 unacked:0
exists peer-device name:r0 peer-node-id:1 conn-name:remote-host volume:1
          replication:Established peer-disk:UpToDate resync-suspended:no received:0
                                     sent:6634548 out-of-sync:0 pending:0 unacked:0
exists -
您可能还喜欢 ”–timestamp” 参数。
5.2.5. Connection states
A resource’s connection state can be observed either by issuing the drbdadm cstate command:
# drbdadm cstate <resource>
Connected
Connected
StandAlone
如果只对资源的单个连接感兴趣,请指定连接名称:
默认值是配置文件中给定的节点主机名。
# drbdadm cstate <resource>:<peer>
Connected
资源可能具有以下连接状态之一:
No network configuration available. The resource has not yet been connected, or has been administratively disconnected (using drbdadm disconnect), or has dropped its connection due to failed authentication or split brain.
Temporary state during disconnection. The next state is StandAlone.
Temporary state, prior to a connection attempt. Possible next states: Connecting.
Temporary state following a timeout in the communication with the peer. Next state: Unconnected.
Temporary state after the connection to the peer was lost. Next state: Unconnected.
Temporary state after the connection to the partner was lost. Next state: Unconnected.
Temporary state after the connection to the partner was lost. Next state: Unconnected.
Temporary state. The peer is closing the connection. Next state: Unconnected.
This node is waiting until the peer node becomes visible on the network.
A DRBD connection has been established, data mirroring is now active. This is the normal state.
5.2.6. Replication states
Each volume has a replication state for each connection. The possible replication states are:
The volume is not replicated over this connection, since the connection is not Connected.
All writes to that volume are replicated online. This is the normal state.
Full synchronization, initiated by the administrator, is just starting. The next possible states are: SyncSource or PausedSyncS.
Full synchronization, initiated by the administrator, is just starting. Next state: WFSyncUUID.
Partial synchronization is just starting. Next possible states: SyncSource or PausedSyncS.
Partial synchronization is just starting. Next possible state: WFSyncUUID.
Synchronization is about to begin. Next possible states: SyncTarget or PausedSyncT.
Synchronization is currently running, with the local node being the source of synchronization.
Synchronization is currently running, with the local node being the target of synchronization.
The local node is the source of an ongoing synchronization, but synchronization is currently paused. This may be due to a dependency on the completion of another synchronization process, or due to synchronization having been manually interrupted by drbdadm pause-sync.
The local node is the target of an ongoing synchronization, but synchronization is currently paused. This may be due to a dependency on the completion of another synchronization process, or due to synchronization having been manually interrupted by drbdadm pause-sync.
On-line device verification is currently running, with the local node being the source of verification.
On-line device verification is currently running, with the local node being the target of verification.
Data replication was suspended, since the link can not cope with the load. This state is enabled by the configuration on-congestion option (see Configuring congestion policies and suspended replication).
Data replication was suspended by the peer, since the link can not cope with the load. This state is enabled by the configuration on-congestion option on the peer node (see Configuring congestion policies and suspended replication).
5.2.7. Resource roles
A resource’s role can be observed by issuing the drbdadm role command:
# drbdadm role <resource>
Primary
您可以看到以下资源角色之一:
The resource is currently in the primary role, and may be read from and written to. This role only occurs on one node, unless dual-primary mode is enabled.
The resource is currently in the secondary role. It normally receives updates from its peer (unless running in disconnected mode), but may neither be read from nor written to. This role can occur on more than one nodes.
The resource’s role is currently unknown. The local resource role never has this status. It is only displayed for the peer’s resource role, and only in disconnected mode.
5.2.8. Disk states
可以通过调用 drbdadm dstate 命令来观察资源的磁盘状态:
# drbdadm dstate <resource>
UpToDate
磁盘状态可以是以下之一:
No local block device has been assigned to the DRBD driver. This may mean that the resource has never attached to its backing device, that it has been manually detached using drbdadm detach, or that it automatically detached after a lower-level I/O error.
Transient state while reading metadata.
Transient state while detaching and waiting for ongoing I/O operations to complete.
Transient state following an I/O failure report by the local block device. Next state: Diskless.
Transient state when an Attach is carried out on an already-Connected DRBD device.
The data is inconsistent. This status occurs immediately upon creation of a new resource, on both nodes (before the initial full sync). Also, this status is found in one node (the synchronization target) during synchronization.
Resource data is consistent, but outdated.
This state is used for the peer disk if no network connection is available.
Consistent data of a node without connection. When the connection is established, it is decided whether the data is UpToDate or Outdated.
Consistent, up-to-date state of the data. This is the normal state.
5.2.9. Connection information data
显示网络协议栈、用于接受来自对等方的连接的本地地址和端口。
显示网络协议栈、对等方节点地址和用于连接的端口。
此标志指示数据连接的TCP发送缓冲区是否已填充80%以上。
5.2.10. Performance indicators
The command drbdsetup status --verbose --statistics can be used to show performance statistics. These are also available in drbdsetup events2 --statistics, although there will not be a changed event for every change. The statistics include the following counters and gauges:
Per volume/device:
Net data read from local disk; in KiB.
Net data written to local disk; in KiB.
元数据活动日志区域的更新次数。
元数据位图区域的更新次数。
Number of block I/O requests forwarded to DRBD, but not yet answered (completed) by DRBD.
DRBD向本地I/O子系统发出的打开请求数。
Shows local I/O congestion.
-
no: No congestion.
-
upper: I/O above the DRBD device is blocked, that is, to the filesystem. Typical causes are
-
由管理员暂停I/O,请参阅
drbdadm中的suspend-io命令。 -
Transient blocks, for example, during attach/detach.
-
Buffers depleted, see Optimizing DRBD Performance.
-
Waiting for bitmap I/O.
-
-
lower: Backing device is congested.
-
upper,lower: Both upper and lower are blocked.
Per connection:
Application data that is being written by the peer. That is, DRBD has sent it to the peer and is waiting for the acknowledgment that it has been written. In sectors (512 bytes).
Resync data that is being written by the peer. That is, DRBD is SyncSource, has sent data to the peer as part of a resync and is waiting for the acknowledgment that it has been written. In sectors (512 bytes).
Per connection and volume (“peer device”):
Percentage of data synchronized out of the amount to be synchronized.
Whether the resynchronization is currently suspended or not. Possible values are no, user, peer, dependency. Comma separated.
Net data received from the peer; in KiB.
Net data sent to the peer; in KiB.
Amount of data currently out of sync with this peer, according to the bitmap that DRBD has for it; in KiB.
Number of requests sent to the peer, but that have not yet been acknowledged by the peer.
Number of requests received from the peer, but that have not yet been acknowledged by DRBD on this node.
Rate of synchronization within the last few seconds, reported as MiB/seconds. You can affect the synchronization rate by configuring options that are detailed in the Configuring the Rate of Synchronization section of this user guide.
Number of seconds remaining for the synchronization to complete. This number is calculated based on the synchronization rate within the last few seconds and the size of the resource’s backing device that remains to be synchronized.
5.3. Enabling and disabling resources
5.3.1. Enabling resources
Normally, all configured DRBD resources are automatically enabled
-
由群集资源管理应用程序根据您的群集配置自行决定,或
-
by the systemd units (e.g.,
[email protected])
但是,如果出于任何原因需要手动启用资源,可以通过调用命令
# drbdadm up <resource>
与往常一样,如果要同时启用在 /etc/drbd.conf 中配置的所有资源,可以使用关键字 all 而不是特定的资源名。
5.4. Reconfiguring resources
DRBD allows you to reconfigure resources while they are operational. To that end,
-
对
/etc/drbd.conf中的资源配置需要进行任何必要的更改, -
在两个节点之间同步
/etc/drbd.conf文件, -
issue the
drbdadm adjust <resource>command on both nodes.
drbdadm adjust 然后切换到 drbdsetup 对配置进行必要的调整。与往常一样,您可以通过使用 -d (dry-run)选项运行 drbdadm 来查看挂起的 drbdsetup 调用。
对 /etc/drbd.conf 中的 common 部分进行更改时,可以通过发出 drbdadm adjust all 来调整一次运行中所有资源的配置。
|
5.5. Promoting and demoting resources
Manually switching a resource’s role from secondary to primary (promotion) or vice versa (demotion) is done using one of the following commands:
# drbdadm primary <resource>
# drbdadm secondary <resource>
In single-primary mode (DRBD’s default), any resource can be in the primary role on only one node at any given time while the connection state is Connected. Therefore, issuing drbdadm primary <resource> on one node while the specified resource is still in the primary role on another node will result in an error.
A resource configured to allow dual-primary mode can be switched to the primary role on two nodes; this is, for example, needed for online migration of virtual machines.
5.6. Basic manual failover
If not using a cluster manager and looking to handle failovers manually in a passive/active configuration, the process is as follows.
On the current primary node, stop any applications or services using the DRBD device, unmount the DRBD device, and demote the resource to secondary.
# umount /dev/drbd/by-res/<resource>/<vol-nr>
# drbdadm secondary <resource>
Now on the node you want to make primary promote the resource and mount the device.
# drbdadm primary <resource>
# mount /dev/drbd/by-res/<resource>/<vol-nr> <mountpoint>
If you’re using the auto-promote feature, you don’t need to change the roles (Primary/Secondary) manually; only stopping of the services and unmounting, respectively mounting, is necessary.
5.7. Shutting down gracefully by using a systemd service
Included with drbd-utils versions since 9.26.0, there is a “graceful shutdown” service, drbd-graceful-shutdown.service. This service ensures that the DRBD “last man standing” behavior applies to your cluster when shutting down nodes.
The graceful shutdown service is started automatically by the udev service at the moment the first DRBD device is created. At system shutdown, the graceful shutdown service ensures that all nodes hosting DRBD resources shut down services in a proper sequence so that the last node keeps quorum.
During a normal system shutdown sequence without this intervention, networking often stops before a system unmounts file systems and takes down DRBD devices. Without the graceful shutdown service, to make it so that the last node to shut down keeps DRBD quorum, you would need to manually unmount file systems and down DRBD resources before shutting down nodes.
By virtue of the graceful shutdown service running on a node, when shutting down, a node marks its DRBD resources outdated, stops its running DRBD services, and then networking services are allowed to stop. This shutdown sequence makes it so that the DRBD peer nodes leaving the cluster are able to communicate their outdated status over the network to the last node, and in this way the last node to leave the cluster will keep quorum.
5.8. 升级DRBD
Upgrading DRBD is a fairly simple process. This section contains warnings or important information regarding upgrading to a particular DRBD 9 version from another DRBD 9 version.
If you are upgrading DRBD from 8.4.x to 9.x, refer to the instructions within the Appendix.
5.8.1. Upgrading to DRBD 9.2.x
If you are upgrading to DRBD 9.2.x from an earlier version not on the 9.2 branch, you will need to pay attention to the names of your resources. DRBD 9.2.x enforces strict naming conventions for DRBD resources. By default, DRBD 9.2.x accepts only alphanumeric, ., +, , and - characters in resource names (regular expression: [0-9A-Za-z.+-]*). If you depend on the old behavior, it can be brought back by disabling strict name checking:
# echo 0 > /sys/module/drbd/parameters/strict_names
5.8.2. Upgrading from DRBD 9.0.x
Due to an issue in the wire protocol code in DRBD versions on the 9.1 and 9.2 branches, you will not be able to upgrade DRBD 9.0 to 9.1 or 9.2 unless you are on version 9.0.26 or higher. If you are on an earlier 9.0 version, first upgrade to the latest DRBD 9.0 bug fix version, then continue upgrading to 9.1 or 9.2.
| Even if you are on version 9.0.26 or higher, it still might be safest to first upgrade to the latest 9.0 version, before upgrading to a higher minor version. The latest 9.0 version is periodically exercised in continuous integration testing and therefore will be the safest 9.0 version to upgrade from. |
5.8.3. Compatibility
DRBD is wire protocol compatible over minor versions, with the exception of DRBD 9.0 versions older than 9.0.26. The DRBD wire protocol is independent of the host kernel version and the machines’ CPU architectures.
DRBD is protocol compatible within a major number. For example, all version 9.x.y releases are protocol compatible.
5.8.4. Upgrading within DRBD 9
If you are already running DRBD 9.x, you can upgrade to a newer DRBD 9 version by following these steps:
-
Verify that DRBD resources are synchronized, by checking the DRBD state.
-
Stop the DRBD service or, if you are using a cluster manager, put the cluster node that you are upgrading into standby.
-
Unload and then reload the new kernel module.
-
Start the DRBD resources and bring the cluster node online again if you are using a cluster manager.
These individual steps are detailed below.
Checking the DRBD state
Before you update DRBD, verify that your resources are synchronized. The output of drbdadm status all should show an UpToDate status for your resources, as shown for an example resource (data) below:
# drbdadm status all
data role:Secondary
  disk:UpToDate
  node-1 role:Primary
    peer-disk:UpToDate
Upgrading the packages
If you are ready to upgrade DRBD within version 9, first upgrade your packages.
RPM-based:
# dnf -y upgrade
DEB-based:
# apt update && apt -y upgrade
Once the upgrade is finished you will have the latest DRBD 9.x kernel module and drbd-utils installed. However, the new kernel module is not active yet. Before you make the new kernel module active, you must first pause your cluster services.
Pausing the services
You can pause your cluster services manually or according to your cluster manager’s documentation. Both processes are covered below. If you are running Pacemaker as your cluster manager do not use the manual method.
Loading the new kernel module
After pausing your cluster services, the DRBD module should not be in use anymore, so unload it by entering the following command:
# rmmod drbd_transport_tcp; rmmod drbd
If there is a message like ERROR: Module drbd is in use, then not all resources have been correctly stopped.
Retry upgrading the packages, or run the command drbdadm down all to find out which resources are still active.
Some typical issues that might prevent you from unloading the kernel module are:
-
在DRBD支持的文件系统上有导出NFS的操作(参见
exportfs -v输出) -
File system still mounted – check
grep drbd /proc/mounts -
Loopback 设备仍然处于活动状态(
losetup -l) -
直接或间接使用DRBD的device mapper(
dmsetup ls --tree) -
有带DRBD-PV的LVM(
pvs)
| This list is not complete. These are just the most common examples. |
Now you can load the new DRBD module.
# modprobe drbd
Next, you can verify that the version of the DRBD kernel module that is loaded is the updated 9.x.y version. The output of drbdadm --version should show the 9.x.y version that you are expecting to upgrade to and look similar to this:
DRBDADM_BUILDTAG=GIT-hash: [...] build\ by\ buildd@lcy02-amd64-080\,\ 2023-03-14\ 10:21:20
DRBDADM_API_VERSION=2
DRBD_KERNEL_VERSION_CODE=0x090202
DRBD_KERNEL_VERSION=9.2.2
DRBDADM_VERSION_CODE=0x091701
DRBDADM_VERSION=9.23.1
Starting the DRBD resources again
Now, the only thing left to do is to get the DRBD devices up and running again. You can do this by using the drbdadm up all command.
Next, depending on whether you are using a cluster manager or if you are managing your DRBD resources manually, there are two different ways to bring up your resources. If you are using a cluster manager follow its documentation.
-
手动
# systemctl start drbd@<resource>.target
-
Pacemaker
# crm node online node-2
这将使DRBD连接到另一个节点,并且重新同步过程将启动。
When the two nodes are UpToDate on all resources again, you can move your applications to the already upgraded node, and then follow the same steps on the next cluster node that you want to upgrade.
5.9. 启用双主模式
双主模式允许资源在多个节点上同时承担主角色。这样做可以是永久性的,也可以是暂时性的。
|
Dual-primary mode requires that the resource is configured to replicate synchronously (protocol C). Because of this it is latency sensitive, and ill-suited for WAN environments. 另外,由于这两种资源都是主要的,节点之间网络的任何中断都会导致脑裂。 |
| In DRBD 9.0.x Dual-Primary mode is limited to exactly two Primaries for the use in live migration. |
5.9.1. 永久双主模式
To enable dual-primary mode, set the allow-two-primaries option to yes in the net section of your resource configuration:
resource <resource>
  net {
    protocol C;
    allow-two-primaries yes;
    fencing resource-and-stonith;
  }
  handlers {
    fence-peer "...";
    unfence-peer "...";
  }
  ...
}
之后,不要忘记同步节点之间的配置。在两个节点上都运行 drbdadm adjust 。
现在可以使用 drbdadm primary 将两个节点同时更改为role primary。
您应该始终执行适当的围栏策略。使用 allow-two-primaries 而没有围栏策略是个坏主意,比在无围栏使用单主节点更糟糕。
|
5.10. Using online device verification
5.10.1. Enabling online verification
Online device verification for resources is not enabled by default. To enable it, add the following lines to your resource configuration in /etc/drbd.conf:
resource <resource>
  net {
    verify-alg <algorithm>;
  }
  ...
}
<algorithm> 可能是系统内核配置中内核加密API支持的任何消息摘要算法。通常,您至少可以从 sha1 , md5 和 crc32c 中进行选择。
如果对现有资源进行此更改,请一如既往地将 drbd.conf 同步到对等节点,并在两个节点上运行 drbdadm adjust <resource> 。
5.10.2. Invoking online verification
After you have enabled online verification, you will be able to initiate a verification run using the following command:
# drbdadm verify <resource>:<peer>/<volume>
When you do so, DRBD starts an online verification run for <volume> to <peer> in <resource>, and if it detects any blocks that are not in sync, will mark those blocks as such and write a message to the kernel log. Any applications using the device at that time can continue to do so unimpeded, and you may also switch resource roles at will.
<Volume> is optional, if omitted, it will verify all volumes in that resource.
If out-of-sync blocks were detected during the verification run, you may resynchronize them using the following commands after verification has completed.
Since drbd-9.0.29 the preferred way is one of these commands:
# drbdadm invalidate <resource>:<peer>/volume --reset-bitmap=no
# drbdadm invalidate-remote <resource>:<peer>/volume --reset-bitmap=no
The first command will cause the local differences to be overwritten by the remote version. The second command does it in the opposite direction.
Before drbd-9.0.29 one needs to initiate a resync. A way to do that is disconnecting from a primary and ensuring that the primary changes at least one block while the peer is away.
# drbdadm disconnect <resource>:<peer>
## write one block on the primary
# drbdadm connect <resource>:<peer>
5.10.3. Automating online verification
Most users will want to automate online device verification. This can be easily accomplished. Create a file with the following contents, named /etc/cron.d/drbd-verify on one of your nodes:
42 0 * * 0 root /sbin/drbdadm verify <resource>This will have cron invoke a device verification every Sunday at 42 minutes past midnight; so, if you come into the office on Monday morning, a quick examination of the resource’s status would show the result. If your devices are very big, and the \~32 hours were not enough, then you’ll notice VerifyS or VerifyT as replication state, meaning that the verify is still in progress.
If you have enabled online verification for all your resources (for example, by adding verify-alg <algorithm> to the common section in /etc/drbd.d/global_common.conf), you may also use:
42 0 * * 0 root /sbin/drbdadm verify all5.11. Configuring the rate of synchronization
Normally, one tries to ensure that background synchronization (which makes the data on the synchronization target temporarily inconsistent) completes as quickly as possible. However, it is also necessary to keep background synchronization from hogging all bandwidth otherwise available for foreground replication, which would be detrimental to application performance. Therefore, you must configure the synchronization bandwidth to match your hardware — which you may do in a permanent fashion or on-the-fly.
| 设置高于辅助节点上最大写入吞吐量的同步速率是没有意义的。您不能期望辅助节点奇迹般地能够比其I/O子系统所允许的写入速度快,因为它恰好是正在进行的设备同步的目标。 |
同样,出于同样的原因,设置高于复制网络上可用带宽的同步速率是没有意义的。
5.11.1. Estimating a synchronization speed
| A good rule for this value is to use about 30% of the available replication bandwidth. Therefore, if you had an I/O subsystem capable of sustaining write throughput of 400MB/s, and a Gigabit Ethernet network capable of sustaining 110 MB/s network throughput (the network being the bottleneck), you would calculate: |

Therefore, the recommended value for the rate option would be 33M.
相比之下,如果您有一个最大吞吐量为80MB/s的I/O子系统和一个千兆以太网连接(I/O子系统是瓶颈),您将计算:

在这种情况下,rate 选项的建议值为 24M 。
类似地,对于800MB/s的存储速度和10Gbe的网络连接,您将获得大约\~240MB/s的同步速率。
5.11.2. Variable synchronization rate configuration
当多个DRBD资源共享一个复制/同步网络时,以固定速率同步可能不是最佳方法。因此,在DRBD 8.4.0中,默认情况下启用了可变速率同步。在这种模式下,DRBD使用自动控制环路算法来确定和调整同步速率。该算法保证了前台复制始终有足够的带宽,大大减轻了后台同步对前台I/O的影响。
The optimal configuration for variable-rate synchronization may vary greatly depending on the available network bandwidth, application I/O pattern and link congestion. Ideal configuration settings also depend on whether DRBD Proxy is in use or not. It may be wise to engage professional consultancy to optimally configure this DRBD feature. An example configuration (which assumes a deployment in conjunction with DRBD Proxy) is provided below:
resource <resource> {
  disk {
    c-plan-ahead 5;
    c-max-rate 10M;
    c-fill-target 2M;
  }
}
c-fill-target 的一个很好的初始值是 BDP * 2, 其中 BDP 是复制链接上的带宽延迟产品。
|
For example, when using a 1GBit/s crossover connection, you’ll end up with about 200µs latency[4].
1GBit/s means about 120MB/s; times 200*10-6 seconds gives 24000 Byte. Just round that value up to the next MB, and you’re good to go.
另一个例子:一个100兆位的广域网连接,200毫秒的延迟意味着12兆字节/秒乘以0.2秒,或者说大约2.5兆字节 “on the wire””在线”。在这里, c-fill-target 的初始值可预设为是3MB。
有关其他配置项的详细信息,请参见 drbd.conf 手册页。
5.11.3. Permanent fixed synchronization rate configuration
在一些非常受限的情况下,[5],使用一些固定的同步速率可能是有意义的。在这种情况下,首先需要使用 c-plan-ahead 0; 关闭动态同步速率控制器。
然后,资源用于后台重新同步的最大带宽由资源的 resync-rate 选项确定。这必须包含在 /etc/drbd.conf 的资源定义的 disk 条目中:
resource <resource>
  disk {
    resync-rate 40M;
    ...
  }
  ...
}
请注意,速率设置以字节为单位,而不是以比特/秒为单位;默认单位是字节,因此值 4096 将被解释为 4MiB 。
| 这只是定义了DRBD试图达到的速率。如果存在吞吐量较低的瓶颈(网络、存储速度),则无法达到定义的速度(也称为”期望”性能;)。 |
5.11.4. Further synchronization hints
When some amount of the to-be-synchronized data isn’t really in use anymore (for example, because files got deleted while one node wasn’t connected), you might benefit from the Trim and discard support.
Furthermore, c-min-rate is easy to misunderstand – it doesn’t define a minimum synchronization speed, but rather a limit below which DRBD will not slow down further on purpose.
Whether you manage to reach that synchronization rate depends on your network and storage speed, network latency (which might be highly variable for shared links), and application I/O (which you might not be able to do anything about).
5.12. Configuring checksum-based synchronization
Checksum-based synchronization is not enabled for resources by default. To enable it, add the following lines to your resource configuration in /etc/drbd.conf:
resource <resource>
  net {
    csums-alg <algorithm>;
  }
  ...
}
<algorithm> 可能是系统内核配置中内核加密API支持的任何消息摘要算法。通常,您至少可以从 sha1 , md5 和 crc32c 中进行选择。
如果对现有资源进行此更改,请一如既往地将 drbd.conf 同步到对等节点,并在两个节点上运行 drbdadm adjust <resource> 。
5.13. Configuring congestion policies and suspended replication
In an environment where the replication bandwidth is highly variable (as would be typical in WAN replication setups), the replication link might occasionally become congested. In a default configuration, this would cause I/O on the primary node to block, which is sometimes undesirable.
If and only if you are using DRBD with DRBD Proxy, you can configure DRBD to suspend the ongoing replication in this case, causing the data set on the Primary node to pull ahead of data sets on Secondary nodes. In this suspended mode, DRBD keeps the replication channel open — it never switches to disconnected mode — but does not actually replicate until sufficient bandwidth becomes available again.
The following example is for a DRBD with DRBD Proxy configuration:
resource <resource> {
  net {
    on-congestion pull-ahead;
    congestion-fill 2G;
    congestion-extents 2000;
    ...
  }
  ...
}
When using DRBD Proxy with DRBD to replicate over a WAN, you can set both congestion-fill and congestion-extents together with the pull-ahead option, if you might need to try to avoid DRBD disconnections or other symptoms related to DRBD replication over a sometimes congested WAN link.
In this case, a good value for congestion-fill is 90% of the allocated DRBD proxy buffer memory.
congestion-extents 的理想值是受影响资源配置的 al-extents 的90%。
5.14. Configuring I/O error handling strategies
DRBD’s strategy for handling lower-level I/O errors is determined by the on-io-error option, included in the resource disk configuration in /etc/drbd.conf:
resource <resource> {
  disk {
    on-io-error <strategy>;
    ...
  }
  ...
}
当然,如果要为所有资源定义全局I/O错误处理策略,也可以在 common 部分中设置此值。
The on-io-error option is independent from the on-no-data-accessible option. Some on-io-error strategies involve retrying I/O requests on peer disks. The on-no-data-accessible option setting dictates DRBD behavior when I/O requests are unsuccessful on all disks.
You can set the on-io-error <strategy> to one of the following:
detach这是默认和推荐的选项。在发生较低级别的I/O错误时,节点将丢弃其备份设备,并继续以无盘模式运行。
This causes DRBD to change the disk status to Inconsistent, mark the failed block as inconsistent in the DRBD quick-sync bitmap, and retry the I/O operation on a peer (secondary node) disk. If the I/O operation succeeds on at least one peer, then a write operation is considered successful. DRBD will retry a read operation until there are no more peer disks to try to read from.
call-local-io-error调用定义为本地I/O错误处理程序的命令。这要求在资源的 handlers 部分中定义相应的 local-io-error 命令调用。完全由管理员自行决定使用 local-io-error 调用的命令(或脚本)来实现I/O错误处理。
Early DRBD versions (prior to 8.0) included another option, panic, which would forcibly remove the node from the cluster by way of a kernel panic, whenever a local I/O error occurred. While that option is no longer available, the same behavior may be mimicked through the local-io-error/call-local-io-error interface. You should do so only if you fully understand the implications of such behavior.
|
您可以按照此过程重新配置正在运行的资源的I/O错误处理策略:
-
在
/etc/drbd.d/<resource>.res中编辑资源配置。 -
将配置复制到对等节点。
-
在两个节点上都运行
drbdadm adjust命令。
5.15. Configuring replication traffic integrity checking
Replication traffic integrity checking is not enabled for resources by default. To enable it, add the following lines to your resource configuration in /etc/drbd.conf:
resource <resource>
  net {
    data-integrity-alg <algorithm>;
  }
  ...
}
<algorithm> 可能是系统内核配置中内核加密API支持的任何消息摘要算法。通常,您至少可以从 sha1 , md5 和 crc32c 中进行选择。
如果对现有资源进行此更改,请一如既往地将 drbd.conf 同步到对等节点,并在两个节点上运行 drbdadm adjust <resource> 。
| 此功能不用于生产用途。仅当需要诊断数据损坏问题并希望查看传输路径(网络硬件、驱动程序、交换机)是否有故障时才启用! |
5.16. Resizing resources
When growing (extending) DRBD volumes, you need to grow from bottom to top. First, you need to extend the backing block devices on all nodes. Then you can tell DRBD to use the new space.
Once the DRBD volume is extended, you still need to propagate that change into whatever upper layers might be using the DRBD volume, for example, by extending the file system, or making a VM running with this volume attached aware of the new “disk size”.
Doing this typically means taking the following steps:
-
On all nodes, resize the backing logical volume, for example, when using LVM:
# lvextend -L +${additional_gb}g VG/LV -
On one node, resize the DRBD volume:
# drbdadm resize ${resource_name}/${volume_number} -
On the DRBD primary node only, resize the file system by using the tool specific to the file system. Refer to the details below and details in the Growing online section.
Note that different file systems have different capabilities and different sets of management tools. For example XFS can only grow. You point its tool to the active mount point: xfs_growfs /where/you/have/it/mounted.
While the EXT family can both grow (even online), and also shrink (only offline; you have to unmount it first). To resize an ext3 or ext4, you would point the tool not to the mount point, but to the (mounted) block device: resize2fs /dev/drbd#
Obviously use the correct DRBD (as displayed by mount or df -T, while mounted), and not the backing block device. If DRBD is up, that’s not supposed to work anyways (resize2fs: Device or resource busy while trying to open /dev/mapper/VG-LV Couldn’t find valid filesystem superblock.). If you tried to do that offline (with DRBD stopped), you may corrupt DRBD metadata if you ran the file system tools directly against the backing LV or partition. So don’t.
You do the file system resize only once on the Primary, against the active DRBD device. DRBD replicates the changes to the file system structure. That is what you have it for.
Also, don’t use resize2fs on XFS volumes, or XFS tools on EXT, or … but the right tool for the file system in use.
resize2fs: Bad magic number in super-block while trying to open /dev/drbd7 is probably just trying to tell you that this is not an EXT file system, and you should try an other tool instead. Maybe xfs_growfs? But as mentioned, that does not take the block device, but the mount point as argument.
When shrinking (reducing) DRBD volumes, you need to shrink from top to bottom. So first verify that no one is using the space you want to cut off. Next, shrink the file system (if your file system supports that). Then tell DRBD to stop using that space, which is not so easy with DRBD internal metadata, because they are by design “at the end” of the backing device.
Once you are sure that DRBD won’t use the space anymore either, you can cut it off from the backing device, for example using lvreduce.
See also Shrinking online, Shrinking offline.
5.17. Changing resource backing disk names
As mentioned elsewhere in this guide, using persistent block devices naming (/dev/disk/by-id/nvme-eui.cea2bf2ea901ceb4), rather than bus-based naming (/dev/nvme4n1), is recommended when configuring DRBD resources. This prevents a bus-based name change from possibly affecting your DRBD resources. If you have an existing DRBD resource that uses bus-based naming, you can reconfigure it to use persistent block device naming. To do this, take the following steps that use the general outline of steps found in Reconfiguring resources:
-
Change the bus-based names used in a DRBD resource configuration file to their persistent block device names. You can enter a
lsblk -o Name,UUID,WWNcommand to determine a particular disk’s ID on a given node. -
Copy the changed resource configuration file to all DRBD nodes in your cluster.
-
Either wait for the next reboot on each node or else enter a
drbdadm adjustcommand on each node during an appropriate maintenance window. This will cause the DRBD disks to briefly detach and reattach. After this, DRBD will use the persistent block devices names that you reconfigured your resource with.
5.17.1. Growing online
If the backing block devices can be grown while in operation (online), it is also possible to increase the size of a DRBD device based on these devices during operation. To do so, two criteria must be fulfilled:
-
受影响资源的备份设备必须由逻辑卷管理子系统(如LVM)管理。
-
资源当前必须处于连接状态。
在所有节点上增加了备份块设备后,请确保只有一个节点处于主状态。然后在一个节点上输入:
# drbdadm resize <resource>
这将触发新增部分的同步。同步是以从主节点到辅助节点的顺序完成的。
如果要添加的空间是干净的,可以使用—assume clean选项跳过同步新增的空间。
# drbdadm -- --assume-clean resize <resource>
5.17.2. Growing offline
When the backing block devices on both nodes are grown while DRBD is inactive, and the DRBD resource is using external metadata, then the new size is recognized automatically. No administrative intervention is necessary. The DRBD device will have the new size after the next activation of DRBD on both nodes and a successful establishment of a network connection.
然而,如果DRBD资源被配置为使用internal metadata,则在新的扩容空间可用之前,必须将该元数据移动到所生长设备的末端。为此,请完成以下步骤:
| 这是一个高级功能。请自己斟酌使用。 |
-
取消配置您的DRBD资源:
# drbdadm down <resource>-
在调整大小之前,请将元数据保存在文本文件中:
# drbdadm dump-md <resource> > /tmp/metadata
必须在两个节点上执行此操作,对每个节点使用单独的转储文件。 不要 在一个节点上转储元数据,只需将转储文件复制到对等节点。这. 行. 不. 通.
-
在两个节点上扩展备份块设备。
-
在两个节点上相应地调整文件
/tmp/metadata中的大小信息(la-size-sect)。请记住,必须在扇区中指定la-size-sect。 -
重新初始化元数据区域:
# drbdadm create-md <resource>
-
在两个节点上重新导入更正的元数据:
# drbdmeta_cmd=$(drbdadm -d dump-md <resource>)
# ${drbdmeta_cmd/dump-md/restore-md} /tmp/metadata
Valid meta-data in place, overwrite? [need to type 'yes' to confirm]
yes
Successfully restored meta data
此示例使用 bash 参数替换。它可能在其他SHELL中工作,也可能不工作。如果不确定当前使用的是哪个SHELL,请检查您的 SHELL 环境变量。
|
-
重新启用DRBD资源:
# drbdadm up <resource>
-
在一个节点上,升级DRBD资源:
# drbdadm primary <resource>
-
最后,扩展文件系统,使其填充DRBD设备的扩展大小。
5.17.3. Shrinking online
| 仅外部元数据支持在线缩容。 |
Before shrinking a DRBD device, you must shrink the layers above DRBD (usually the file system). Since DRBD cannot ask the file system how much space it actually uses, you have to be careful to not cause data loss.
| Whether or not the filesystem can be shrunk online depends on the filesystem being used. Most filesystems do not support online shrinking. XFS does not support shrinking at all. |
To shrink DRBD online, issue the following command after you have shrunk the file system residing on top of it:
# drbdadm resize --size=<new-size> <resource>You may use the usual multiplier suffixes for <new-size> (K, M, G, and so on). After you have shrunk DRBD, you may also shrink the containing block device (if it supports shrinking).
在调整底层设备的大小后,最好输入 drbdadm resize <resource> 命令,以便将DRBD元数据*真正*写入卷末尾的预期空间。
|
5.17.4. Shrinking offline
If you were to shrink a backing block device while DRBD is inactive, DRBD would refuse to attach to this block device during the next attach attempt, because the block device would now be too small (if external metadata was in use), or it would be unable to find its metadata (if internal metadata was in use because DRBD metadata is written to the end of the backing block device). To work around these issues, use this procedure (if you cannot use online shrinking):
| 这是一个高级功能。请自己斟酌使用。 |
-
在DRBD仍然配置的情况下,从一个节点缩容文件系统。
-
取消配置您的DRBD资源:
# drbdadm down <resource>
-
在缩容之前将元数据保存在文本文件中:
# drbdadm dump-md <resource> > /tmp/<resource>-metadata
If the dump-mdcommand fails with a warning about “unclean” metadata, you will first need to run the commanddrbdadm apply-al <resource>to apply the activity log of the specified resource. You can then retry thedump-mdcommand.You must dump the metadata on all nodes that are configured for the DRBD resource, by using a separate dump file for each node.
Do not dump the metadata on one node and then simply copy the dump file to peer nodes. This. Will. Not. Work. -
Shrink the backing block device on each node configured for the DRBD resource.
-
Adjust the size information (
la-size-sect) in the file/tmp/<resource>-metadataaccordingly, on each node. Remember thatla-size-sectmust be specified in sectors. -
Only if you are using internal metadata (which at this time have probably been lost due to the shrinking process), re-initialize the metadata area:
# drbdadm create-md <resource>
-
Reimport the corrected metadata, on each node:
# drbdmeta_cmd=$(drbdadm --dry-run dump-md <resource>)
# ${drbdmeta_cmd/dump-md/restore-md} /tmp/<resource>-metadata
Valid meta-data in place, overwrite?
[need to type 'yes' to confirm] yes

reinitializing
Successfully restored meta data
This example uses BASH parameter substitution to generate the drbdmeta restore-mdcommand necessary to restore the modified metadata for the resource. It might not work in other shells. Check yourSHELLenvironment variable if you are unsure which shell you are currently using. -
重新启用DRBD资源:
# drbdadm up <resource>
5.18. Disabling backing device flushes
| 在使用电池备份写缓存(BBWC)的设备上运行DRBD时,应禁用设备刷新。大多数存储控制器允许在电池耗尽时自动禁用写缓存,在电池耗尽时切换到直写模式。强烈建议启用此功能。 |
在没有BBWC的情况下运行或在电池耗尽的BBWC上运行时,禁用DRBD的刷新 可能会导致数据丢失 ,不应尝试。
DRBD allows you to enable and disable backing device flushes separately for the replicated data set and DRBD’s own metadata. Both of these options are enabled by default. If you want to disable either (or both), you would set this in the disk section for the DRBD configuration file, /etc/drbd.conf.
要禁用复制数据集的磁盘刷新,请在配置中包含以下行:
resource <resource>
  disk {
    disk-flushes no;
    ...
  }
  ...
}
要禁用DRBD元数据上的磁盘刷新,请包括以下行:
resource <resource>
  disk {
    md-flushes no;
    ...
  }
  ...
}
在修改了资源配置(当然,在节点之间同步了 /etc/drbd.conf )之后,可以通过在两个节点上输入以下命令来启用这些设置:
# drbdadm adjust <resource>
如果只有一个服务有BBWC[6],应将设置移动到主机部分,如下所示:
resource <resource> {
  disk {
    ... common settings ...
  }

  on host-1 {
    disk {
      md-flushes no;
    }
    ...
  }
  ...
}
5.19. Configuring split brain behavior
5.19.1. Split brain notification
DRBD调用 split brain 处理程序(如果已配置),随时检测到split brain。要配置此处理程序,请将以下项添加到资源配置中:
resource <resource>
  handlers {
    split-brain <handler>;
    ...
  }
  ...
}
<handler> 可以是系统中存在的任何可执行文件。
DRBD发行版包含一个split brain handler脚本,安装为 /usr/lib/DRBD/notify-split-brain.sh 。它会将通知电子邮件发送到指定的地址。要将处理程序配置为将消息发送到 root@localhost (预期是将通知转发给实际系统管理员的电子邮件地址),请按如下所示配置 split-brain handler :
resource <resource>
  handlers {
    split-brain "/usr/lib/drbd/notify-split-brain.sh root";
    ...
  }
  ...
}
对正在运行的资源进行此修改(并在节点之间同步配置文件)后,无需进行其他干预即可启用处理程序。DRBD只需在下一次出现split brain时调用新配置的处理程序。
5.19.2. Automatic split brain recovery policies
| Configuring DRBD to automatically resolve data divergence situations resulting from split-brain (or other) scenarios is configuring for potential automatic data loss. Understand the implications, and don’t do it if you don’t mean to. |
| 您应该花更多时间研究围栏策略、仲裁设置、群集管理器集成和冗余群集管理器通信链接,以便在第一时间*避免*数据差异。 |
To be able to enable and configure DRBD’s automatic split brain recovery policies, you must understand that DRBD offers several configuration options for this purpose. DRBD applies its split brain recovery procedures based on the number of nodes in the Primary role at the time the split brain is detected. To that end, DRBD examines the following keywords, all found in the resource’s net configuration section:
after-sb-0pri裂脑被检测到,但此时资源在任何主机上都不是主要角色。对于这个选项,DRBD理解以下关键字:
-
disconnect:不要自动恢复,只需调用split brain处理程序脚本(如果已配置),断开连接并以断开模式继续。 -
discard-younger-primary:放弃并回滚对最后担任主服务器角色的主机所做的修改。 -
discard-least-changes:丢弃并回滚发生较少更改的主机上的更改。 -
discard-zero-changes:如果有任何主机根本没有发生任何更改,只需在另一个主机上应用所做的所有修改并继续。
after-sb-1pri裂脑被检测到,此时资源在一个主机上扮演主要角色。对于这个选项,DRBD理解以下关键字:
-
disconnect:与after-sb-0pri一样,只需调用split brain处理程序脚本(如果已配置),断开连接并以断开模式继续。 -
consensus:应用after-sb-0pri中指定的相同恢复策略。如果在应用这些策略后可以选择裂脑受害者,则自动解决。否则,行为就像指定了disconnect一样。 -
call-pri-lost-after-sb:应用after-sb-0pri中指定的恢复策略。如果在应用这些策略后可以选择裂脑受害者,请调用受害者节点上的pri-lost-after-sb处理程序。必须在handlers部分中配置此处理程序,并要求将节点从集群中强制删除。 -
discard-secondary:无论哪个主机当前处于第二个角色,使该主机成为裂脑受害者。
after-sb-2pri裂脑被检测到,此时资源在两个主机上都处于主要角色。此选项接受与 after-sb-1pri 相同的关键字,但 discard-secondary 和 consensus 除外。
DRBD理解这三个选项的附加关键字,这里省略了这些关键字,因为它们很少使用。请参阅 drbd.conf 的手册页,以了解此处未讨论的脑分裂恢复关键字的详细信息。
|
例如,在双主模式下用作GFS或OCFS2文件系统的块设备的资源的恢复策略定义如下:
resource <resource> {
  handlers {
    split-brain "/usr/lib/drbd/notify-split-brain.sh root"
    ...
  }
  net {
    after-sb-0pri discard-zero-changes;
    after-sb-1pri discard-secondary;
    after-sb-2pri disconnect;
    ...
  }
  ...
}
5.20. Creating a stacked 3-node setup
三个节点的设置包括一个堆叠在另一个设备上的DRBD设备。
| Stacking is deprecated in DRBD version 9.x, as more nodes can be implemented on a single level. See 定义网络连接 for details. |
5.20.1. Device stacking considerations
以下注意事项适用于此类型的设置:
-
堆叠的设备是活动的。假设您已经配置了一个DRBD设备
/dev/drbd0,并且上面的堆叠设备是/dev/drbd10,那么/dev/drbd10将是您装载和使用的设备。 -
设备元数据将存储两次,分别存储在底层DRBD设备 和 堆叠的DRBD设备上。在堆叠设备上,必须始终使用internal metadata。这意味着,与未堆叠的设备相比,堆叠设备上的有效可用存储区域稍微小一些。
-
要使堆叠的上层设备运行,底层设备必须处于primary角色。
-
要同步备份节点,活动节点上的堆叠设备必须处于启动状态并且处于主要角色。
5.20.2. Configuring a stacked resource
在下面的示例中,节点名为 alice 、bob 和 charlie ,其中 alice 和 bob 组成一个两节点集群, charlie 是备份节点。
resource r0 {
  protocol C;
  device    /dev/drbd0;
  disk      /dev/vg0/lv0;
  meta-disk internal;

  on alice {
    address    10.0.0.1:7788;
  }

  on bob {
    address   10.0.0.2:7788;
  }
}

resource r0-U {
  protocol A;

  stacked-on-top-of r0 {
    device     /dev/drbd10;
    address    192.168.42.1:7789;
  }

  on charlie {
    device     /dev/drbd10;
    disk       /dev/vgdrbd/lv10;
    address    192.168.42.2:7789; # Public IP of the backup node
    meta-disk  internal;
  }
}
The disk values in this configuration use LVM logical volumes. If you are using physical disks rather than LVM or ZFS logical volumes underneath your DRBD resources, reference the disks by using persistent block device names (/dev/disk/by-id/<disk-by-id>) rather than by bus-based names (for example, /dev/nvme4n1). This will prevent a bus-based name change from possibly affecting your DRBD resources. You can enter a lsblk -o Name,UUID,WWN command to determine a particular disk’s ID.
|
与任何 drbd.conf 配置文件一样,它必须分布在集群中的所有节点上 – 在本例中是三个节点。请注意,在未备份的资源配置中未找到以下额外关键字:
stacked-on-top-of此选项通知DRBD包含它的资源是堆叠资源。它替换了通常在任何资源配置中找到的 on 部分之一。不要在较低级别的资源中使用 stacked-on-top-of 。
| 对于堆叠资源,不需要使用Protocol A。您可以根据您的应用程序选择任何DRBD的复制协议。 |

5.20.3. Enabling stacked resources
如果要启用堆叠资源,请先启用底层级别的资源后, 并将其提升:
drbdadm up r0
drbdadm primary r0
与未堆叠的资源一样,必须在堆叠的资源上创建DRBD元数据。使用以下命令完成此操作:
# drbdadm create-md --stacked r0-U
然后,可以启用堆叠资源:
# drbdadm up --stacked r0-U
# drbdadm primary --stacked r0-U
之后,您可以在备份节点上调出资源,启用三节点复制:
# drbdadm create-md r0-U
# drbdadm up r0-U
To automate stacked resource management, you may integrate stacked resources in your cluster manager configuration.
5.21. Permanently diskless nodes
在DRBD中,节点可能是永久无盘的。下面是一个配置示例,显示一个具有3个diskful节点(服务器)和一个永久无磁盘节点(客户端)的资源。
resource kvm-mail {
  device      /dev/drbd6;
  disk        /dev/vg/kvm-mail;
  meta-disk   internal;

  on store1 {
    address   10.1.10.1:7006;
    node-id   0;
  }
  on store2 {
    address   10.1.10.2:7006;
    node-id   1;
  }
  on store3 {
    address   10.1.10.3:7006;
    node-id   2;
  }

  on for-later-rebalancing {
    address   10.1.10.4:7006;
    node-id   3;
  }

  # DRBD "client"
  floating 10.1.11.6:8006 {
    disk      none;
    node-id   4;
  }

  # rest omitted for brevity
  ...
}
For permanently diskless nodes no bitmap slot gets allocated. For such nodes the diskless status is displayed in green color since it is not an error or unexpected state. See The client mode for internal details.
5.22. Data rebalancing
Given the (example) policy that data needs to be available on 3 nodes, you need at least 3 servers for your setup.
Now, as your storage demands grow, you will encounter the need for additional servers. Rather than having to buy 3 more servers at the same time, you can rebalance your data across a single additional node.
In the figure above you can see the before and after states: from 3 nodes with three 25TiB volumes each (for a net 75TiB), to 4 nodes, with net 100TiB.
To redistribute the data across your cluster you have to choose a new node, and one where you want to remove this DRBD resource.
Please note that removing the resource from a currently active node (that is, where DRBD is Primary) will involve either migrating the service or running this resource on this node as a DRBD client; it’s easier to choose a node in Secondary role. (Of course, that might not always be possible.)
5.22.1. Prepare a bitmap slot
您需要在每个具有要移动的资源的节点上有一个空闲的bitmap slot供临时使用。
您可以使用drbdadm create-md time再分配一个,或者只需在您的配置中放置一个占位符,这样 drbdadm 看到后就会再保留一个插槽:
resource r0 {
  ...
  on for-later-rebalancing {
    address   10.254.254.254:65533;
    node-id   3;
  }
}
|
如果您需要在实时使用期间提供该插槽,则必须
在未来的版本中, |
5.22.2. Preparing and activating the new node
首先,您必须在新节点上创建基础存储卷(使用例如 lvcreate )。然后,可以用正确的主机名、地址和存储路径填充配置中的占位符。现在将资源配置复制到所有相关节点。
在新节点上,通过执行以下操作初始化元数据(一次)
# drbdadm create-md <resource>
v09 Magic number not found
Writing meta data...
initialising activity log
NOT initializing bitmap
New drbd meta data block successfully created.
5.22.3. Starting the initial synchronization
现在新节点需要获取数据。
This is done by defining the network connection on the existing nodes using the command:
# drbdadm adjust <resource>
and starting the DRBD device on the new node using the command:
# drbdadm up <resource>
5.22.4. Check connectivity
At this time, show the status of your DRBD resource by entering the following command on the new node:
# drbdadm status <resource>
Verify that all other nodes are connected.
5.22.5. After the initial synchronization
只要新主机是 UpToDate 的,配置中的其他节点之一就可以重命名为 for-later-rebalancing ,并保留以进行另一次迁移。
Perhaps you want to comment the section; although that has the risk that doing a drbdadm create-md for a new node has too few bitmap slots for the next rebalancing.It might be easier to use a reserved (unused) IP address and host name. |
再次复制更改的配置,并运行如下命令
# drbdadm adjust <resource>
在所有节点上。
5.22.6. Cleaning up
在目前拥有数据但不再用于此资源的一个节点上,现在可以通过启动
# drbdsetup down <resource>
Use a drbdsetup command rather than a drbdadm command to down the resource because you cannot use drbdadm to down a resource that is no longer in the configuration file.
|
Now the lower level storage device isn’t used anymore, and can either be re-used for other purposes or, if it is a logical volume, its space can be returned to the volume group using the lvremove command.
5.23. Configuring quorum
This section describes how you can configure the DRBD quorum feature to avoid split-brain situations and data divergence in your high-availability clusters.
You enable quorum for a DRBD resource by setting the quorum option within the options section of a DRBD resource configuration file to either majority, all, or a numerical value. By default, DRBD quorum is not enabled and the option is set to off.
An example DRBD resource configuration that enables DRBD quorum is as follows:
resource quorum-demo {
  options {
    quorum <majority|all|numerical value>;
    [...]
  }
  [...]
}
You can also enable quorum globally, by setting the quorum option within the options subsection of the common section within the global DRBD configuration file, /etc/drbd.d/global_common.conf. Enabling quorum and any other related options within the global configuration file will affect all DRBD resources, unless the same option is set within a specific DRBD resource configuration file. In that case, the option value set within a DRBD resource configuration file will take precedence.
An example global configuration that enables DRBD quorum is as follows:
[...]
common {
    options {
        quorum <majority|all|numerical value>;
        [...]
    }
    [...]
}
[...]
5.23.1. Setting DRBD quorum to majority
By setting the quorum option to majority, a node can only write to the replicated data set if the node is a member of a majority partition of the DRBD-running nodes in the cluster. The number of nodes in a majority partition must be greater than half the number of total nodes in the cluster for a given DRBD resource. In a 3-node cluster, such a node would need to be able to communicate over the network with at least one other node.
An exception to this is if other secondary nodes have exited the cluster gracefully, and have marked their data as outdated. Outdated nodes do not take part in quorum voting. This behavior can lead to the Last man standing situation. This allows services to keep running in your cluster, even if only one up-to-date node remains.
5.23.2. Setting DRBD quorum to all
By setting the quorum option to all, a node can only write to the replicated data set if the node can communicate over the network with all other DRBD-running nodes for that data set in the cluster. This is the strictest possible quorum implementation and the most cautious (or most paranoid) way to avoid data divergence in your cluster.
The exception to the rule mentioned in the majority section for gracefully exiting nodes also applies to the all quorum implementation. That is, gracefully exiting nodes will mark their data as outdated and outdated nodes will not take part in quorum voting.
5.23.3. Setting DRBD quorum to a numerical value
For flexibility, you can also set the quorom option to a numerical value. This quorum implementation is the most solid, because you, as an administrator will have knowledge about the total number of nodes in your cluster that might be outside the scope of the majority and all quorum heuristics for some corner cases. However, setting quorum to a numerical value requires manual intervention and a property change if you increase or decrease the number of nodes in your cluster. For almost all cases, setting the quorum option to majority is sufficient and preferred.
If you choose to set the quorom property to a numerical value, choose a numerical value that is greater than half of the number of total nodes in the cluster. You undermine the purpose of quorum and risk data divergence if you choose a numerical value less than this.
|
5.23.4. Guaranteed minimal redundancy
By using the quorum-minimum-redundancy option in a DRBD resource or global configuration, you define that a quorum partition must consist of at least the number of nodes in an up-to-date state that you specify with the option. The quorum-minimum-redundancy option takes the same arguments as the quorum option: majority, all, or a numerical value.
Because only diskful nodes can be in an up-to-date state, using this option is a way to express that you prefer to wait until data resynchronization operations finish before a service that relies on the replicated data can start. That is, you prefer the security of guaranteeing a minimum redundancy of your data over the availability of your service. Financial data redundancy, or data redundancy required for regulatory reasons are examples where setting this option could be useful.
There might be some corner cases where specifying the quorum-minimum-redundancy option for a DRBD resource could lead to a situation that would require manual intervention to meet the minimum rendundancy requirement. Also, a potential side-effect of specifying a minimum data replica redundancy for quorum is that it will prevent Last man standing behavior in your cluster for replica redundancy values greater than 1. For these reasons, using this option should not be needed in most cases, unless requirements for your data compel you to use it.
|
Consider the following example configuration for a 5-node cluster:
resource quorum-demo {
  options {
    quorum majority;
    quorum-minimum-redundancy 2;
    [...]
  }
[...]
}
In this example, for a 5-node cluster, a majority partition consists of three nodes. Because of the quorum-minimum-redundancy option, two of the three nodes must be diskful and in an up-to-date state before the primary node for the resource is allowed to write to the data set.
5.23.5. Actions on loss of quorum
When a node that is in a primary role for a DRBD resource loses quorum, the node needs to stop write operations on the data set immediately. That means that I/O immediately starts to return errors for all I/O requests to the DRBD device. Usually that means that a graceful shutdown is not possible. A graceful shutdown would require more modifications to the data set, such as marking the data set out-of-date on the node.
Next, the I/O errors propagate from the block level to the file system and from the file system to the user space application(s). Ideally the application simply terminates in case of I/O errors. This then allows a cluster resource manager, such as Pacemaker or DRBD Reactor, to unmount the file system and to demote the node to secondary role for the DRBD resource. If that is true of the behavior of your application, you should set the on-no-quorum resource option to io-error. Here is an example configuration:
resource quorum-demo {
  options {
    quorum majority;
    on-no-quorum io-error;
    [...]
  }
}
If your application does not terminate on the first I/O error, you can configure DRBD to freeze I/O for a resource on a DRBD primary node that loses quorum. Here is a configuration example:
resource quorum-demo {
  options {
    quorum majority;
    on-no-quorum suspend-io;
    [...]
  }
  [...]
}
With this configuration, if a primary node does lose quorum and suspends I/O to its data set, you can follow the steps described in the Recovering a primary node that lost quorum section.
5.23.6. Using a diskless node as a tiebreaker
A diskless node with connections to all nodes in a cluster can be used to break ties in the quorum negotiation process.
考虑以下两个节点群集,其中节点A是主节点,节点B是次节点:

一旦两个节点之间的连接中断,它们就会失去仲裁,并且集群顶部的应用程序无法再写入数据。

If you add a third node, C, to the cluster and configure it as diskless, you can take advantage of the Quorum tiebreaker feature, available in DRBD versions since 9.0.18.

In this case, when the primary and secondary nodes lose connection to each other, each can still communicate with the diskless tiebreaker. Because of this, the primary node can continue working, while the secondary node demotes its DRBD resource to an out-of-date state. While the resource is in an out-of-date state, the node cannot be promoted to a primary role.

有一些特殊情况,以防两个连接失败。考虑以下场景:

In this case, the tiebreaker node forms a partition with the primary node. The primary therefore keeps quorum, while the secondary node becomes outdated.
| Here, the secondary node’s DRBD resource state will be “UpToDate”, but regardless it cannot be promoted to a primary role because it lacks quorum. |
Next, consider the possibility of the primary node losing connection to the tiebreaker node:

In this case, the primary node becomes unusable and goes into a “quorum suspended” state. This effectively results in the application on top of DRBD receiving I/O errors. A cluster resource manager such as Pacemaker or DRBD Reactor could then promote node B to a primary role and keep the service running on that node.
You also need to avoid data divergence if the diskless tiebreaker node “switches sides”. Consider this scenario:

The connection between the primary and secondary nodes has failed but the application continues to run on the primary node because it is part of a majority partition with the diskless tiebreaker node. Then the primary node suddenly loses its connection to the diskless node.
In this case, no node can be promoted to a primary role and the cluster cannot continue to operate.
| Protecting against data divergence always takes priority over ensuring service availability. |
Next, consider another scenario:

Here, the application is running on the primary node, while the secondary node is unavailable. Then the tiebreaker node first loses connection to the primary node, and then reconnects to the secondary node. In this case, the secondary node cannot become the primary node.
| A node that has lost quorum cannot regain quorum by connecting to a diskless node. In this case, there is no reliable way for the reconnecting node to check the “up-to-date”-ness of its data set against a diskless node, because the diskless node does not have a local data set to be able to make an accurate check. Therefore, in this case, no node has quorum and the cluster halts. |
5.23.7. Last man standing
Nodes that leave a cluster gracefully are counted differently from failed nodes for determining DRBD quorum. In this context, leaving gracefully means that a leaving node marked its data as out-of-date, and that the node was able to tell the remaining nodes that its data is out-of-date. Leaving gracefully would be equivalent to running a drbdadm down (or drbdadm disconnect) command.
In a group of nodes where all disks are out-of-date, no node in that group can be promoted to a primary role.[7]
An implication is that, if one node remains in a cluster where all the other nodes left gracefully, the remaining node can keep quorum. However, if any of the other nodes left ungracefully, the remaining node must assume that the departed nodes could form a partition and have access to up-to-date data.
The last man standing behavior is useful when you need to perform system maintenance such as upgrading software or replacing or adding hardware on nodes. In this case, a node or nodes that you might need to maintain can leave the cluster gracefully and allow a primary node to continue to run, host services, and write to the replicated data set. This gives you an environment where you can service other nodes without having application or service downtime for your users.
5.24. Removing DRBD
For the unlikely case that you want to remove DRBD, here are the necessary steps.
-
Stop the services and unmount the filesystems on top of the DRBD volumes. In case you are using a cluster manager, verify that it ceases to control the services first.
-
Stop the DRBD resource(s) by using
drbdadm down <res>ordrbdadm down all-
In case the DRBD resource was using internal meta-data you might choose to resize the file system to cover all of the backing device’s space. This step effectively removes DRBD’s meta-data. This is an action that can not be reversed easily. You can do that with
resize2fs <backing_dev>for ext[234] family of file systems. It supports resizing of unmounted file systems and under certain conditions also online grow. XFS can be grown online only with thexfs_growfscommand.
-
-
Mount the backing device(s) directly, start the services on top of them
-
Unload the DRBD kernel driver modules with
rmmod drbd_transport_tcpandrmmod drbd. -
Uninstall the DRBD software packages.
6. 使用DRBD代理
6.1. DRBD Proxy deployment considerations
DRBD Proxy进程可以直接位于设置drbd的机器上,也可以放置在不同的专用服务器上。一个DRBD代理实例可以作为分布在多个节点上的多个DRBD设备的代理。
DRBD Proxy is completely transparent to DRBD. Typically you will expect a high number of data packets in flight, therefore the activity log should be reasonably large. Since this may cause longer re-sync runs after the failure of a primary node, it is recommended to enable the DRBD csums-alg setting.
有关DRBD代理的基本原理的更多信息,请参见功能说明Long-distance replication through DRBD Proxy。
6.2. Installing DRBD Proxy
DRBD Proxy is available to LINBIT customers with an appropriate contract. If you want to try DRBD Proxy, contact the LINBIT team to start an evaluation.
DRBD Proxy can be installed from the LINBIT repositories. For details of how to set up these repositories, see Using a LINBIT helper script to register nodes and configure package repositories. For DRBD Proxy version 4, enable the drbd-proxy-4 repository. For legacy DRBD Proxy version 3.2, enable the drbd-proxy-3.2 repository.
Once the repository is set up, DRBD Proxy can be installed using your package manager. For example:
# dnf install drbd-proxy
Or:
# apt install drbd-proxy
Run the following to enable DRBD Proxy:
# systemctl enable --now drbd-proxy.socket
This causes systemd to start listening on the DRBD Proxy control socket. When DRBD Proxy is configured using drbdadm, or when drbd-proxy-ctl is used directly, the corresponding systemd service will be started. It is not necessary to enable drbd-proxy.service directly.
DRBD Proxy version 3 includes an init script which usually goes into /etc/init.d. Always use the init script to start or stop DRBD proxy since it also configures DRBD Proxy using the drbdadm tool.
|
6.3. License file
When obtaining a license from LINBIT, you will be sent a DRBD Proxy license file which is required to run DRBD Proxy. The file is called drbd-proxy.license, it must be copied into the /etc directory of the target machines.
# cp drbd-proxy.license /etc/
For DRBD Proxy version 3 the license file must be owned by the user and group drbdpxy.
|
6.4. Configuring DRBD Proxy by using LINSTOR
DRBD Proxy can be configured using LINSTOR as described in the LINSTOR User Guide.
6.5. Configuring DRBD Proxy by using resource files
DRBD Proxy can also be configured by editing resource files. It is configured by an additional section called proxy and additional proxy on sections within the host sections.
下面是直接在DRBD节点上运行的代理的DRBD配置示例:
resource r0 {
	protocol A;
	device     /dev/drbd15;
	disk       /dev/VG/r0;
	meta-disk  internal;

	proxy {
		memlimit 512M;
		plugin {
			zstd level 7;
		}
	}

	on alice {
		address 127.0.0.1:7915;
		proxy on alice {
			inside 127.0.0.1:7815;
			outside 192.168.23.1:7715;
		}
	}

	on bob {
		address 127.0.0.1:7915;
		proxy on bob {
			inside 127.0.0.1:7815;
			outside 192.168.23.2:7715;
		}
	}
}
inside IP地址用于DRBD和DRBD代理之间的通信,而 outside IP地址用于代理之间的通信。后一个通道可能必须在防火墙设置中被允许。
6.6. 控制DRBD代理
drbdadm offers the proxy-up and proxy-down subcommands to configure or delete the connection to the local DRBD Proxy process of the named DRBD resource(s). When the drbd-proxy service starts, it uses the proxy-up command to add the connections defined in the resource files.
The DRBD Proxy has a low level configuration tool, called drbd-proxy-ctl.
With DRBD Proxy v3, commands are passed using the -c parameter. For instance drbd-proxy-ctl -c "show hconnections".
|
要显示可用的命令,请使用:
# drbd-proxy-ctl --help
Here is a list of commands; while the first few ones are typically only used indirectly (via drbdadm proxy-up resp. drbdadm proxy-down), the latter ones give various status information.
add connection <name> lots of arguments-
创建通信路径。由于这是通过
drbdadm proxy-up运行的,因此这里省略了长参数列表。 del connection <name>-
删除通信路径。
set memlimit <name> <memlimit-in-bytes>-
Sets the memory limit for a connection. This command understands the usual units
k,M, andG. This command can only increase the memory limit. To reduce the memory limit, change the value in the resource file and usedrbdadm adjust. This will remove the connection and add it again with the lower limit. show-
显示当前配置的通信路径。
show memusage-
Shows memory usage of each connection. For example, the following commands monitors memory usage:
# watch -n 1 'drbd-proxy-ctl show memusage'
show [h]subconnections-
显示当前建立的个人连接以及一些统计信息。
h选项以可读格式输出字节。 show [h]connections-
Shows currently configured connections and their states With
houtputs bytes in human readable format. When using DRBD Proxy version 4, theStatuscolumn will show one of these states:-
Connecting: No communication to the remote DRBD Proxy process.
-
ProxyConnected: The connection to the remote DRBD Proxy is established. The connections between the DRBD Proxy instances and DRBD are not yet established.
-
Connected: The DRBD connection is fully established.
-
print statistics-
This prints detailed statistics for the currently active connections, in a format that can be easily parsed. Use this for integration to your monitoring solution!
Legacy DRBD Proxy v3 only accepts the commands above from UID 0 (that is, the rootuser), with the exception of this one which can be used by any user (provided that UNIX permissions allow access on the proxy socket at/var/run/drbd-proxy/drbd-proxy-ctl.socket). Refer to the init script at/etc/init.d/drbdproxyabout setting the permissions.
6.7. About DRBD Proxy plugins
DRBD Proxy version 4 only provides the zstd plugin. zstd (Zstandard) is a real-time compression algorithm, providing high compression ratios. It offers a very wide range of compression for speed tradeoff, while being backed by a very fast decoder. Compression rates are dependent on “level” parameter which can be arranged between 1 to
22. Over level 20, DRBD Proxy will require more memory.
Plugin configurations for lz4 and zlib are aliased to appropriate zstd compression levels for backward compatibility.
Contact the LINBIT team to find the best settings for your environment – it depends on the CPU (speed, number of threads), available memory, input and available output bandwidth, and expected I/O spikes. Having a week of sysstat data already available helps in determining the configuration, too.
6.7.1. DRBD Proxy version 3 plugins
DRBD Proxy version 3 provides some additional plugins which use other software compression algorithms.
lz4 是一种非常快速的压缩算法;数据通常被压缩1:2到1:4,可以节省一半到三分之二的带宽。
The zlib plugin uses the GZIP algorithm for compression; it uses a bit more CPU than lz4, but gives a ratio of 1:3 to 1:5.
The lzma plugin uses the liblzma2 library. It can use dictionaries of several hundred MiB; these allow for very efficient delta-compression of repeated data, even for small changes. lzma needs much more CPU and memory, but results in much better compression than zlib — real-world tests with a VM sitting on top of DRBD gave ratios of 1:10 to 1:40. The lzma plugin has to be enabled in your license.
6.8. Using a WAN-side bandwidth limit
You can use the Linux kernel’s traffic control framework to limit bandwidth consumed by DRBD Proxy on the WAN side.
In the following example you would need to replace the interface name, the source port and the IP address of the peer.
# tc qdisc add dev eth0 root handle 1: htb default 1
# tc class add dev eth0 parent 1: classid 1:1 htb rate 1gbit
# tc class add dev eth0 parent 1:1 classid 1:10 htb rate 500kbit
# tc filter add dev eth0 parent 1: protocol ip prio 16 u32 \
        match ip sport 7000 0xffff \
        match ip dst 192.168.47.11 flowid 1:10
# tc filter add dev eth0 parent 1: protocol ip prio 16 u32 \
        match ip dport 7000 0xffff \
        match ip dst 192.168.47.11 flowid 1:10
You can remove this bandwidth limitation with:
# tc qdisc del dev eth0 root handle 1
DRBD Proxy version 3 has an experimental bwlimit option. Do not use it, as it might cause applications on top of DRBD to block on I/O.
|
6.9. 故障排除
The logs from DRBD Proxy version 4 are collected by the systemd journal and can be viewed with journalctl -u drbd-proxy.
Enabling debug mode causes DRBD Proxy to produce more detailed logs. This can be done with the following command.
# drbd-proxy-ctl set loglevel debug
For example, if DRBD Proxy fails to connect, it will log a corresponding message. In that case, on both nodes, verify that DRBD is running (not in StandAlone mode) and that the proxy service is running. Also double-check your configuration.
7. Troubleshooting and error recovery
This chapter describes tasks to be performed in case of hardware or system failures.
7.1. Getting information about DRBD error codes
DRBD and the DRBD administrative tool, drbdadm, return POSIX error codes. If you need to get more information about a specific error code number, you can use the following command, provided that Perl is installed in your environment. For example, to get information about error code number 11, enter:
# perl -e 'print $! = 11, "\n"'
Resource temporarily unavailable
7.2. Dealing with hard disk failure
How to deal with hard disk failure depends on the way DRBD is configured to handle disk I/O errors (see Disk error handling strategies), and on the type of metadata configured (see DRBD metadata).
|
For the most part, the steps described here apply only if you run DRBD directly on top of physical hard disks. They generally do not apply in case you are running DRBD layered on top of
|
7.2.1. Manually detaching DRBD from your hard disk
If DRBD is configured to pass on I/O errors (not recommended), you must first detach the DRBD resource, that is, disassociate it from its backing storage:
# drbdadm detach <resource>
By running the drbdadm status or the drbdadm dstate command, you will now be able to verify that the resource is now in diskless mode:
# drbdadm status <resource>
<resource> role:Primary
  volume:0 disk:Diskless
  <peer> role:Secondary
    volume:0 peer-disk:UpToDate
# drbdadm dstate <resource>
Diskless/UpToDate
If the disk failure has occurred on your primary node, you may combine this step with a switch-over operation.
7.2.2. Automatically detaching on I/O error
如果DRBD是configured to automatically detach upon I/O error时自动分离(推荐选项),DRBD应该已经自动将资源从其备份存储中分离,而无需手动干预。您仍然可以使用 drbdadm status 命令来验证资源实际上是在无盘模式下运行的。
7.2.3. Replacing a failed disk when using internal metadata
If using internal metadata, it is sufficient to bind the DRBD device to the new hard disk. If the new hard disk has to be addressed by another Linux device name than the defective disk, the DRBD configuration file has to be modified accordingly.
This process involves creating a new metadata set, then reattaching the resource:
# drbdadm create-md <resource>
v08 Magic number not found
Writing meta data...
initialising activity log
NOT initializing bitmap
New drbd meta data block successfully created.

# drbdadm attach <resource>
Full synchronization of the new hard disk starts instantaneously and automatically. You will be able to monitor the synchronization’s progress using the drbdadm status --verbose command, as with any background synchronization.
7.2.4. Replacing a failed disk when using external metadata
When using external metadata, the procedure is basically the same. However, DRBD is not able to recognize independently that the hard disk was swapped, therefore an additional step is required.
# drbdadm create-md <resource>
v08 Magic number not found
Writing meta data...
initialising activity log
NOT initializing bitmap
New drbd meta data block successfully created.

# drbdadm attach <resource>
# drbdadm invalidate <resource>
Be sure to run drbdadm invalidate on the node *without* good data; this command will cause the local contents to be overwritten with data from the peers, so running this command on the wrong node might lose data!
|
Here, the drbdadm invalidate command triggers synchronization. Again, sync progress may be observed using the drbdadm status --verbose command.
7.3. Dealing with node failure
When DRBD detects that its peer node is down (either by true hardware failure or manual intervention), DRBD changes its connection state from Connected to Connecting and waits for the peer node to reappear. The DRBD resource is then said to operate in disconnected mode. In disconnected mode, the resource and its associated block device are fully usable, and may be promoted and demoted as necessary, but no block modifications are being replicated to the peer node. Instead, DRBD stores which blocks are being modified while disconnected, on a per-peer basis.
7.3.1. Dealing with temporary secondary node failure
If a node that currently has a resource in the secondary role fails temporarily (due to, for example, a memory problem that is subsequently rectified by replacing RAM), no further intervention is necessary — besides the obvious necessity to repair the failed node and bring it back online. When that happens, the two nodes will simply re-establish connectivity upon system start-up. After this, DRBD synchronizes all modifications made on the primary node in the meantime to the secondary node.
| At this point, due to the nature of DRBD’s re-synchronization algorithm, the resource is briefly inconsistent on the secondary node. During that short time window, the secondary node can not switch to the Primary role if the peer is unavailable. Therefore, the period in which your cluster is not redundant consists of the actual secondary node down time, plus the subsequent re-synchronization. |
Please note that with DRBD 9 more than two nodes can be connected for each resource. So, for example, in the case of four nodes, a single failing secondary still leaves two other secondaries available for failover.
7.3.2. Dealing with temporary primary node failure
From DRBD’s standpoint, failure of the primary node is almost identical to a failure of the secondary node. The surviving node detects the peer node’s failure, and switches to disconnected mode. DRBD does not promote the surviving node to the primary role; it is the cluster management application’s responsibility to do so.
When the failed node is repaired and returns to the cluster, it does so in the secondary role, therefore, as outlined in the previous section, no further manual intervention is necessary. Again, DRBD does not change the resource role back, it is up to the cluster manager to do so (if so configured).
DRBD通过一种特殊的机制,在主节点发生故障的情况下保证块设备的一致性。有关详细讨论,请参阅The activity log。
7.3.3. Dealing with permanent node failure
If a node suffers an unrecoverable problem or permanent destruction, you must follow the following steps:
Manually starting a full device synchronization is not necessary at this point. The synchronization will commence automatically upon connection to the surviving primary or secondary node(s), or both.
7.4. Manual split brain recovery
DRBD detects split brain at the time connectivity becomes available again and the peer nodes exchange the initial DRBD protocol handshake. If DRBD detects that both nodes are (or were at some point, while disconnected) in the primary role, it immediately tears down the replication connection. The tell-tale sign of this is a message like the following appearing in the system log:
Split-Brain detected, dropping connection!
After split brain has been detected, one node will always have the resource in a StandAlone connection state. The other might either also be in the StandAlone state (if both nodes detected the split brain simultaneously), or in Connecting (if the peer tore down the connection before the other node had a chance to detect split brain).
At this point, unless you configured DRBD to automatically recover from split brain, you must manually intervene by selecting one node whose modifications will be discarded (this node is referred to as the split brain victim). This intervention is made with the following commands:
# drbdadm disconnect <resource>
# drbdadm secondary <resource>
# drbdadm connect --discard-my-data <resource>
On the other node (the split brain survivor), if its connection state is also StandAlone, you would enter:
# drbdadm disconnect <resource>
# drbdadm connect <resource>
如果节点已处于 Connecting 状态,则可以省略此步骤;然后将自动重新连接。
连接后,裂脑受害者立即将其连接状态更改为 SyncTarget,并由其他节点覆盖其修改。
| 裂脑受害者不受全设备同步的影响。取而代之的是,它的局部修改被回滚,对裂脑幸存者所做的任何修改都会传播给受害者。 |
在重新同步完成后,裂脑被视为已解决,节点再次形成完全一致的冗余复制存储系统。
7.5. Recovering a primary node that lost quorum
| The following instructions apply to cases where the DRBD on-loss-of-quorum action has been set to suspend I/O operations. In cases where the action has been set to generate I/O errors, the instructions are unnecessary. |
The DRBD administration tool, drbdadm, includes a force secondary option, secondary --force. If DRBD quorum was configured to suspend DRBD resource I/O operations upon loss of quorum, the force secondary option will allow you to gracefully recover the node that lost quorum and reintegrate it with the other nodes.
Requirements:
-
DRBD version 9.1.7 or newer
-
drbd-utilsversion 9.21 or newer
You can use the command drbdadm secondary --force <all|resource_name> to demote a primary node to secondary, in cases where you are trying to recover a primary node that lost quorum. The argument to this command can be either a single DRBD resource name or all to demote the node to a secondary role for all its DRBD resources.
By using this command on the primary node that lost quorum with suspended I/O operations, all the suspended I/O requests and newly submitted I/O requests will terminate with I/O errors. You can then usually unmount the file system and reconnect the node to the other nodes in your cluster. An edge case is a file system opener that does not do any I/O and just idles around. Such processes need to be removed manually before unmounting will succeed or with the help of external tools such as fuser -k, or the OCF file system resource agent in clustered setups.
Along with the DRBD administration tool’s force secondary option, you can also add the on-suspended-primary-outdated option to a DRBD resource configuration file and set it to the keyword value force-secondary. You will also need to add the resource role conflict (rr-conflict) option to the DRBD resource configuration file’s net section, and set it to retry-connect. This enables DRBD to automatically recover a primary node that loses quorum with suspended I/O operations. With these options configured, when such a node connects to a cluster partition that has a more recent data set, DRBD automatically demotes the primary node that lost quorum and has suspended I/O operations. Additional configurations, for example in a handlers section of the resource configuration file, as well as additional configurations within a cluster manager, may also be necessary to complete a fully automatic recovery setup.
Settings within a DRBD resource configuration file’s options section that cover this scenario could look like this:
resource <resource_name> {
net {
	rr-conflict retry-connect;
[...]
}

options {
	quorum majority; # or explicit value
	on-no-quorum suspend-io;
	on-no-data-accessible suspend-io;
	on-suspended-primary-outdated force-secondary;
[...]
}
[...]
}
DRBD-enabled Applications
8. DRBD Reactor
DRBD Reactor is a daemon that monitors DRBD events and reacts to them. DRBD Reactor uses systemd behind the scenes to react to DRBD events. DRBD Reactor can generate and use systemd units to start or stop services on nodes in a cluster, for example, to mount a file system, to start a database service, to run Open Cluster Framework (OCF) resource agents, and others.
DRBD Reactor has various potential uses, from monitoring DRBD resources and metrics, to creating failover clusters, to providing highly available services that you would usually need to configure by using a complex cluster resource manager (CRM).
8.1. Installing DRBD Reactor
You can install DRBD Reactor from source files found within the DRBD Reactor source code repository. See the instructions there for details and any prerequisites.
Alternatively, LINBIT customers can install DRBD Reactor from officially supported prebuilt packages, available from the LINBIT drbd-9 packages repository.
DRBD Reactor packages are also available in the LINBIT PPA for the latest two LTS Ubuntu releases.
| Although the LINBIT PPA can be a great option for a homelab, testing, or other non-production use, LINBIT does not offer any guarantees, support, or SLAs for the packages in this public repository. For production or enterprise deployments, using the official LINBIT customer repositories is recommended. |
After installing DRBD Reactor, you can verify the version number by using the drbd-reactor --version command.
8.2. DRBD Reactor components
Because DRBD Reactor has many different uses, it was split into two components: a core component and a plugin component.
8.2.1. DRBD Reactor core
The DRBD Reactor core component is responsible for collecting DRBD events, preparing them, and sending them to the DRBD Reactor plugins.
The core can be reloaded with an all new or an additional, updated configuration. It can stop plugin instances that are no longer needed and start new plugin threads without losing DRBD events. Last but not least, the core has to ensure that plugins receive an initial and complete DRBD state.
8.2.2. DRBD Reactor plugins
Plugins give DRBD Reactor its functionality and there are different plugins for different uses. A plugin receives messages from the core component and acts upon DRBD resources based on the message content and according to the plugin type and configuration.
You can instantiate plugins more than once and a cluster can have many instances of every plugin type. For example, a high-availability cluster might have many promoter plugin instances, one per DRBD resource.
8.2.3. The promoter plugin
The promoter plugin is arguably the most important and useful DRBD Reactor feature. You can use it to create failover clusters hosting highly available services more easily than using other more complex cluster resource managers (CRMs). If you want to get started quickly, you can finish reading this section, then skip to Configuring the Promoter plugin. You can then try the instructions in the Using the DRBD Reactor promoter plugin to create a highly available file system mount section for an example exercise.
The promoter plugin monitors events on DRBD resources and executes systemd units. This plugin allows DRBD Reactor to provide failover functionality to a cluster to create high-availability deployments. You can use DRBD Reactor and its promoter plugin as a replacement for other CRMs, such as Pacemaker, in many scenarios where its lightness and its configuration simplicity offer advantages.
For example, you can use the promoter plugin to configure fully automatic recovery of isolated primary nodes. Furthermore, there is no need for a separate communication layer (such as Corosync), because DRBD and DRBD Reactor (used as the CRM) will always agree on the quorum status of nodes.
A disadvantage to the promoter plugin when compared to a CRM such as Pacemaker is that it is not possible to create order constraints that are independent of colocations. For example, if a web service and a database run on different nodes, Pacemaker can constrain the web service to start after the database. DRBD Reactor and its promoter plugin cannot.
How the Promoter plugin works
The main function of the promoter plugin is if a DRBD device can be promoted, promote it to Primary and start a set of user-defined services. This could be a series of services, such as:
-
Promote the DRBD device.
-
Mount the device to a mount point.
-
Start a database that uses a database located at the mount point.
If a resource loses quorum, DRBD Reactor stops these services so that another node that still has quorum (or the node that lost quorum when it has quorum again) can start the services.
Besides systemd services such as these examples, the promoter plugin supports OCF resource agents. For example, you can configure the promoter plugin to start an IPaddr2 resource agent which can create a virtual IP address on a node. This ensures that you can reach services through a consistent IP address, no matter which node in your cluster is running them. The promoter plugin also supports failure actions such as rebooting a node if a resource fails to demote, so that the resource can promote on another node.
The drbd-reactor.promoter manual page describes in detail the mechanisms and logic that the promoter plugin uses behind the scenes to start or block services from running on nodes.
8.2.4. The user mode helper (UMH) plugin
Using this plugin and its domain specific language (DSL), you can run a script if an event you define occurs. For example, you can run a script that sends a Slack message whenever a DRBD resource loses connection.
This functionality has existed before in DRBD with “user-defined helper scripts” in “kernel space”. However, DRBD Reactor, including the UMH plugin, can be run in “user space”. This allows for easier container deployments and use with “read-only” host file systems such as those found within container distributions.
Using UMH plugins also provides a benefit beyond what was previously possible using user defined helper scripts: Now you can define your own rules for all the events that are possible for a DRBD resource. You are no longer limited to only the few events that there are event handlers in the kernel for.
UMH plugin scripts can be of two types:
-
User-defined filters. These are “one-shot” UMH scripts where an event happens that triggers the script.
-
Kernel-called helper replacements. This type of script is under development. These are UMH scripts that require communication to and from the kernel. An event triggers the script but an action within the script requires the kernel to communicate back to the script so that the script can take a next action, based on the failure or success of the kernel action. An example of such a script would be a
before-resync-targetactivated script.
8.2.5. The Prometheus monitoring plugin
This plugin provides a Prometheus compatible endpoint that exposes various DRBD metrics, including out-of-sync bytes, resource roles (for example, Primary), and connection states (for example, Connected). This information can then be used in every monitoring solution that supports Prometheus endpoints. The full set of metrics and an example Grafana dashboard are available at the DRBD Reactor source code repository.
8.2.6. The AgentX plugin for SNMP monitoring
This plugin acts as an AgentX subagent for SNMP to expose various DRBD metrics, for example, to monitor DRBD resources via SNMP. AgentX is a standardized protocol that can be used between the SNMP daemon and a subagent, such as the AgentX plugin in DRBD Reactor.
The DRBD metrics that this plugin exposes to the SNMP daemon are shown in the DRBD Reactor source code repository.
8.3. Configuring DRBD Reactor
Before you can run DRBD Reactor, you must configure it. Global configurations are made within a main TOML configuration file, /etc/drbd-reactor.toml. The file has to be a valid TOML (https://toml.io) file. Plugin configurations should be made within TOML snippet files that can be placed into the default DRBD Reactor snippets directory, /etc/drbd-reactor.d, or into another directory if specified in the main configuration file.
For documentation purposes only, the example configuration file also shows example plugin configurations. However, for deployment, you should always use snippet files to create plugin configurations.
8.3.1. Configuring the DRBD Reactor core component
The DRBD Reactor core component configuration file consists of global settings and log level settings.
Global settings include specifying a snippets directory, specifying a statistics update polling time period, and specifying a path to a log file. You can also set the log level within the configuration file to one of: trace, debug, info, warn, error, off. “Info” is the default log level.
See the drbd-reactor.toml manual page for the syntax of these settings.
8.3.2. Configuring DRBD Reactor plugins
You configure DRBD Reactor plugins by editing TOML formatted snippet files. On a DRBD Reactor daemon reload, started plugins that are still present in the new configuration keep running.
8.3.3. Configuring the Promoter plugin
You will typically have one snippet file for each DRBD resource that you want DRBD Reactor and the promoter plugin to watch and manage.
Here is an example promoter plugin configuration snippet:
[[promoter]]
[promoter.resources.my_drbd_resource] (1)
dependencies-as = "Requires" (2)
target-as = "Requires" (3)
start = ["path-to-my-file-system-mount.mount", "foo.service"] (4)
on-drbd-demote-failure = "reboot" (5)
secondary-force = true (6)
preferred-nodes = ["nodeA", "nodeB"] (7)
preferred-nodes-policy = always (8)
| 1 | “my_drbd_resource” specifies the name of the DRBD resource that DRBD Reactor and the promoter plugin should watch and manage. |
| 2 | Specifies the systemd dependency type to generate inter-service dependencies as. |
| 3 | Specifies the systemd dependency type to generate service dependencies in the final target unit. |
| 4 | start specifies what should be started when the watched DRBD resource is promotable. In this example, the promoter plugin would start a file system mount unit and a service unit. |
| 5 | Specifies the action to take if a DRBD resource fails to demote, for example, after a loss of quorum event. In such a case, an action should be taken on the node that fails to demote that will trigger some “self-fencing” of the node and cause another node to promote. Actions can be one of: none, reboot, reboot-force, reboot-immediate, poweroff, poweroff-force, poweroff-immediate, exit, exit-force. |
| 6 | If a node loses quorum, DRBD Reactor will try to demote the node to a secondary role. If the resource was configured to suspend I/O operations upon loss of quorum, this setting specifies whether or not to demote the node to a secondary role using the drbdadm force secondary feature. See the Recovering a primary node that lost quorum section of the DRBD User Guide for more details. “true” is the default option if this setting is not specified. It is specified here for illustrative purposes. |
| 7 | If set, resources are started on the preferred nodes, in the specified order, if possible. |
| 8 | Since DRBD Reactor v1.9.0, you can set a preferred nodes policy of always (the default if unspecified) or start-only. By setting a start-only preferred nodes policy, promoter plugin configured services will not fail back to a more preferred node if they are already running on a lower priority node. Avoiding “automatic switchback” behavior might be useful if you prefer minimizing service disruption to always trying to run services on particular nodes. |
See the drbd-reactor.promoter manual page for more background and information about the promoter plugin configuration settings.
Specifying a promoter start list service string spanning multiple lines
For formatting or readability reasons, you can split a long service string across multiple lines within a promoter plugin snippet file’s start list of services. You can do this by using TOML syntax for multi-line basic strings. The following example shows splitting the first and third service strings of a promoter plugin start list across more than one line. A backslash (\) at the end of a line within a TOML multi-line basic string ensures that a newline character is not inserted between lines within the string.
[...]
start = [
"""
ocf:heartbeat:Filesystem fs_mysql device=/dev/drbd1001 \
directory=/var/lib/mysql fstype=ext4 run_fsck=no""",
"mariadb.service",
"""ocf:heartbeat:IPaddr2 db_virtip ip=192.168.222.65 \
cidr_netmask=24 iflabel=virtualip"""
]
[...]
| You can also use this technique to split up long strings within other plugin snippet files. |
Configuring resource freezing
Starting with DRBD Reactor version 0.9.0, you can configure the promoter plugin to “freeze” a resource that DRBD Reactor is controlling, rather than stopping it when a currently active node loses quorum. DRBD Reactor can then “thaw” the resource when the node regains quorum and becomes active, rather than having to restart the resource if it was stopped.
While in most cases the default stop and start behavior will be preferred, the freeze and thaw configuration could be useful for a resource that takes a long time to start, for example, a resource that includes services such as a large database. If a Primary node loses quorum in such a cluster, and the remaining nodes are unable to form a partition with quorum, freezing the resource could be useful. A useful case might be if the Primary node’s loss of quorum was momentary, for example, due to a brief network issue. When the formerly Primary node with a frozen resource reconnects with its peer nodes, the node would again become Primary and DRBD Reactor would thaw the resource. The result of this behavior could be that the resource is again available in seconds, rather than minutes, because the resource did not have to start from a stopped state, it only had to resume from a frozen one.
Requirements:
Before configuring the promoter plugin freeze feature for a resource, you will need:
-
A system that uses cgroup v2, implementing unified cgroups. You can verify this by the presence of
/sys/fs/cgroup/cgroup.controllerson your system. If this is not present, and your kernel supports it, you should be able to add the kernel command line argumentsystemd.unified_cgroup_hierarchy=1to enable this feature.This should only be relevant for RHEL 8, Ubuntu 20.04, and earlier versions. -
The following DRBD options configured for the resource:
-
on-no-quorumset tosuspend-io; -
on-no-data-accessibleset tosuspend-io; -
on-suspended-primaryset toforce-secondary; -
rr-conflict(netoption) set toretry-connect.
-
-
A resource that can “tolerate” freezing and thawing. You can test how your resource (and any applications that rely on the resource) respond to freezing and thawing by using the
systemctl freeze <systemd_unit>, and thesystemctl thaw <systemd_unit>commands. Here you specify the systemd unit or units that correspond to the start list of services within the promoter plugin configuration. You can use these commands to test how your applications behave, after services that they depend on are frozen and thawed.If you are unsure whether your resource and applications will tolerate freezing, then it is safer to keep the default stop and start behavior.
To configure resource freezing, add the following line to the promoter plugin snippet file for your DRBD Reactor resource:
on-quorum-loss = "freeze"
Using OCF resource agents with the promoter plugin
You can also configure the promoter plugin to use OCF resource agents in the start list of services.
If you have a LINBIT customer or evaluation account, you can install the resource-agents package available in the LINBIT drbd-9 package repository to install a suite of open source resource agent scripts, including the OCF Filesystem resource agent.
|
The syntax for specifying an OCF resource agent as a service within a start list is ocf:$vendor:$agent instance-id [key=value key=value …]. Here, instance-id is user-defined and key=value pairs, if specified, are passed as environment variables to the created systemd unit file. For example:
[[promoter]]
[...]
start = ["ocf:heartbeat:IPaddr2 ip_mysql ip=10.43.7.223 cidr_netmask=16"]
[...]
The promoter plugin expects OCF resource agents in the /usr/lib/ocf/resource.d/ directory.
|
When to use systemd mount units and OCF Filesystem resource agents
Almost all scenarios that you might use DRBD Reactor and its promoter plugin will likely involve a file system mount. If your use case involves a promoter start list of services with other services or applications besides a file system mount, then you should use a systemd mount unit to handle the file system mounting.
However, you should not use a systemd file system mount unit if a file system mount point is the end goal, that is, it would be the last service in your promoter plugin start list of services. Instead, use an OCF Filesystem resource agent to handle mounting and unmounting the file system.
In this case, using an OCF resource agent is better because the resource agent will be able to escalate the demotion of nodes, by using kill actions and other various signals against processes that might be holding the mount point open. For example, there could be a user running an application against a file in the file system that systemd would not know about. In that case, systemd would not be able to unmount the file system and the promoter plugin would not be able to demote the node.
You can find more information in the DRBD Reactor GitHub documentation.
8.3.4. Configuring the user mode helper (UMH) plugin
Configuration for this plugin consists of:
-
Rule type
-
Command or script to run
-
User-defined environment variables (optional)
-
Filters based on DRBD resource name, event type, or state changes
There are four different DRBD types a rule can be defined for: resource, device, peerdevice, or connection.
For each rule type, you can configure a command or script to run using sh -c as well as any user-defined environment variables. User-defined environment variables are in addition to the commonly set ones:
-
HOME
/ -
TERM
Linux -
PATH
/sbin:/usr/sbin:/bin:/usr/bin
You can also filter UMH rule types by DRBD resource name or event type (exists, create, destroy, or change).
Finally, you can filter the plugin action based on DRBD state changes. Filters should be based upon both the old and the new (current) DRBD state, that are reported to the plugin, because you want the plugin to react to changes. This is only possible if you filter for two states, old and new. Otherwise the plugin might trigger randomly. For example, if you only specified a new (current) DRBD role as a DRBD state to filter for, the plugin might trigger even when the new role is the same as the old DRBD role.
Here is an example UMH plugin configuration snippet for a resource rule:
[[umh]]
[[umh.resource]]
command = "slack.sh $DRBD_RES_NAME on $(uname -n) from $DRBD_OLD_ROLE to $DRBD_NEW_ROLE"
event-type = "Change"
resource-name = "my-resource"
old.role = { operator = "NotEquals", value = "Primary" }
new.role = "Primary"
This example UMH plugin configuration is based on change event messages received from the DRBD Reactor daemon for the DRBD resource specified by the resource-name value my-resource.
If the old role for the resource was not Primary and its new (current) role is Primary, then a script named slack.sh runs with the arguments that follow. As the full path is not specified, the script needs to reside within the commonly set PATH environment variable (/sbin:/usr/sbin:/bin:/usr/bin) of the host machine (or container if run that way). Presumably, the script sends a message to a Slack channel informing of the resource role change. Variables specified in the command string value are substituted for based on specified values elsewhere in the plugin configuration, for example, the value specified by resource-name will be substituted for $DRBD_RES_NAME when the command runs.
The example configuration earlier uses the specified operator “NotEquals” to evaluate whether or not the old.role value of “Primary” was true. If you do not specify an operator, then the default operator is “Equals”, as in the new.role = "Primary" filter in the example configuration.
|
There are more rules, fields, filter types, and variables that you can specify in your UMH plugin configurations. See the UMH documentation page in the DRBD Reactor source code repository for more details, explanations, examples, and caveats.
8.3.5. Configuring the Prometheus plugin
This plugin provides a Prometheus compatible HTTP endpoint serving DRBD monitoring metrics, such as the DRBD connection state, whether or not the DRBD device has quorum, number of bytes out of sync, signs of TCP send buffer congestion, and many more. The drbd-reactor.prometheus manual page has a full list of metrics and more details.
8.3.6. Configuring the AgentX plugin for SNMP monitoring
Configuring the AgentX plugin involves installing an SNMP management information base (MIB) that defines the DRBD metrics that will be exposed, configuring the SNMP daemon, and editing a DRBD Reactor configuration snippet file for the AgentX plugin.
| You will need to complete the following setup steps on all your DRBD Reactor nodes. |
Prerequisites
Before configuring this plugin to expose various DRBD metrics to an SNMP daemon, you will need to install the following packages, if they are not already installed.
For RPM-based systems:
dnf -y install net-snmp net-snmp-utils
For DEB-based systems:
apt -y install snmp snmpd
If you encounter errors related to missing MIBs when using SNMP commands against the LINBIT MIB, you will have to download the missing MIBs. You can do this manually or else install the snmp-mibs-downloader DEB package.
|
AgentX firewall considerations
If you are using a firewall service, you will need to allow TCP traffic via port 705 for the AgentX protocol.
Installing the LINBIT DRBD management information base
To use the AgentX plugin, download the LINBIT DRBD MIB to /usr/share/snmp/mibs:
curl -L https://github.com/LINBIT/drbd-reactor/raw/master/example/LINBIT-DRBD-MIB.mib \
  -o /usr/share/snmp/mibs/LINBIT-DRBD-MIB.mib
Configuring the SNMP daemon
To configure the SNMP service daemon, add the following lines to its configuration file (/etc/snmp/snmpd.conf):
# add LINBIT ID to the system view and enable agentx
view    systemview    included   .1.3.6.1.4.1.23302
master agentx
agentXSocket tcp:127.0.0.1:705
Verify that the view name that you use matches a view name that is configured appropriately in the SNMP configuration file. This example shows systemview as the view name used in a RHEL 8 system. For Ubuntu, the view name could be different, for example, in Ubuntu 22.04 it is systemonly.
|
Next, enable and start the service (or restart the service if it was already enabled and running):
systemctl enable --now snmpd.service
Editing the AgentX plugin configuration snippet file
The AgentX plugin needs only minimal configuration in a DRBD Reactor snippet file. Edit the configuration snippet file by entering the following command:
drbd-reactorctl edit -t agentx agentx
Then add the following lines:
[[agentx]]
address = "localhost:705"
cache-max = 60 # seconds
agent-timeout = 60 # seconds snmpd waits for an answer
peer-states = true # include peer connection and disk states
|
If you use the systemctl reload drbd-reactor.service |
Verifying the AgentX plugin operation
Before verifying the AgentX plugin operation, first verify that the SNMP service exposes a standard, preinstalled MIB, by entering the following command:
snmpwalk -Os -c public -v 2c localhost iso.3.6.1.2.1.1.1
Output from the command will be similar to the following:
sysDescr.0 = STRING: Linux linstor-1 5.14.0-284.30.1.el9_2.x86_64 #1 SMP PREEMPT_DYNAMIC Fri Aug 25 09:13:12 EDT 2023 x86_64
Next, verify that the AgentX plugin is shown in the output of a drbd-reactorctl status command:
/etc/drbd-reactor.d/agentx.toml:
AgentX: connecting to main agent at localhost:705
[...]
Next, show the LINBIT MIB table structure by entering the following command:
snmptranslate -Tp -IR -mALL linbit
Finally, you can use an snmptable command to show a table of the values held in the MIB, particular to your current DRBD setup and resources. The following example command starts showing the values for your DRBD resources at the enterprises.linbit.1.2 (enterprises.linbit.drbdData.drbdTable) object identifier (OID) within the LINBIT MIB.
snmptable -m ALL -v 2c -c public localhost enterprises.linbit.1.2 | less -S
Using the AgentX plugin with LINSTOR
If you are using DRBD Reactor and its AgentX plugin to work with LINSTOR®-created DRBD resources, note that these DRBD resources will start from minor number 1000, rather than 1. So, for example, to get the DRBD resource name of the first LINSTOR-created resource on a particular node, enter the following command:
snmpget -m ALL -v 2c -c public localhost .1.3.6.1.4.1.23302.1.2.1.2.1000
Output from the command will be similar to the following:
LINBIT-DRBD-MIB::ResourceName.1000 = STRING: linstor_db
8.4. Using the DRBD Reactor client utility
You can use the DRBD Reactor CLI client utility, drbd-reactorctl, to control the DRBD Reactor daemon and its plugins.
| This utility only operates on plugin snippets. Any existing plugin configurations in the main configuration file (not advised nor supported) should be moved to snippet files within the snippets directory. |
With the drbd-reactorctl utility, you can:
-
Get the status of the DRBD Reactor daemon and enabled plugins, by using the
drbd-reactorctl statuscommand. -
Edit an existing or create a new plugin configuration, by using the
drbd-reactorctl edit -t <plugin_type> <plugin_file>command. -
Display the TOML configuration of a given plugin, by using the
drbd-reactorctl cat <plugin_file>command. -
Enable or disable a plugin, by using the
drbd-reactorctl enable|disable <plugin_file>command. -
Evict a promoter plugin resource from the node, by using the
drbd-reactorctl evict <plugin_file>command. -
Restart specified plugins (or the DRBD Reactor daemon, if no plugins specified) by using the
drbd-reactorctl restart <plugin_file>command. Remove an existing plugin and restart the daemon, by using thedrbd-reactorctl rm <plugin_file>command. -
Remove a specified DRBD Reactor plugin and reload the DRBD Reactor daemon, by using the
drbd-reactorctl rmcommand. -
List the activated plugins, or optionally list disabled plugins, by using the
drbd-reactorctl ls [--disabled]command. -
Start a subset of services in a promoter plugin start list, by using the
drbd-reactorctl start-untilcommand.
For greater control over some of these actions, there are additional options available. The drbd-reactorctl manual page has more details and syntax information.
8.4.1. Showing DRBD Reactor status
By using the drbd-reactorctl status command, you can show the status of DRBD Reactor plugins that are enabled on the node. You can specify the name of a plugin snippet file (with or without the .toml file extension) to show only its status. You can also specify more than one plugin snippet file to show the status of each. If you do not specify a plugin snippet file name, the command shows the status of all enabled plugins on a node.
The following example output from a drbd-reactorctl status command shows the status of two enabled plugins, a promoter and a Prometheus plugin, on a node:
/etc/drbd-reactor.d/nfs.toml:
Promoter: Currently active on this node
● [email protected]
● ├─ [email protected]
● ├─ ocf.rs@portblock_nfs.service
● ├─ ocf.rs@fs_cluster_private_nfs.service
● ├─ ocf.rs@fs_1_nfs.service
● ├─ ocf.rs@fs_2_nfs.service
● ├─ ocf.rs@nfsserver_nfs.service
● ├─ ocf.rs@export_drbd_nfs_vol1_nfs.service
● ├─ ocf.rs@export_drbd_nfs_vol2_nfs.service
● ├─ ocf.rs@virtual_ip_nfs.service
● └─ ocf.rs@portunblock_nfs.service
/etc/drbd-reactor.d/prom.toml:
Prometheus: listening on :9942
In this output, a green filled circle shows that a promoter plugin configured service unit is running on the node. An empty circle shows that a service is configured but not running on the node, as shown in the following example output from running the same drbd-reactorctl status command on another node.
/etc/drbd-reactor.d/nfs.toml:
Promoter: Currently active on node 'node-0'
○ [email protected]
○ ├─ [email protected]
○ ├─ ocf.rs@portblock_nfs.service
○ ├─ ocf.rs@fs_cluster_private_nfs.service
○ ├─ ocf.rs@fs_1_nfs.service
○ ├─ ocf.rs@fs_2_nfs.service
○ ├─ ocf.rs@nfsserver_nfs.service
○ ├─ ocf.rs@export_drbd_nfs_vol1_nfs.service
○ ├─ ocf.rs@export_drbd_nfs_vol2_nfs.service
○ ├─ ocf.rs@virtual_ip_nfs.service
○ └─ ocf.rs@portunblock_nfs.service
/etc/drbd-reactor.d/prom.toml:
Prometheus: listening on :9942
The drbd-reactorctl status indicators for a promoter plugin service unit state are:
-
Active: a bold green filled circle (●)
-
Reloading: a bold green refresh arrow (↻)
-
Inactive: a plain circle (○)
-
Failed: a bold red cross (×)
-
Activating: a bold filled circle (●)
-
Deactivating: a bold filled circle (●)
-
Maintenance: a plain circle (○)
8.4.2. DRBD Reactor client command alternatives to Pacemaker CRM shell commands
The following table shows some common CRM tasks and the Pacemaker CRM shell and DRBD Reactor client commands to accomplish them.
| CRM task | Pacemaker CRM shell command | DRBD Reactor client command |
|---|---|---|
Get status |
|
|
Migrate away |
|
|
Unmigrate |
|
Unnecessary |
A DRBD Reactor client command that is the same as crm resource unmigrate is unnecessary because the DRBD Reactor promoter plugin evicts a DRBD resource in the moment, but it does not prevent the resource from failing back to the node it was evicted from later, should the situation arise. In contrast, the CRM shell migrate command inserts a permanent constraint into the cluster information base (CIB) that prevents the resource from running on the node the command is run on. The CRM shell unmigrate command is a manual intervention that removes the constraint and allows the resource to fail back to the node the command is run on. A forgotten unmigrate command can have dire consequences the next time the node might be needed to host the resource during an HA event.
If you need to prevent failback to a particular node, you can evict it by using the DRBD Reactor client with the evict --keep-masked command and flag. This prevents failback, until the node reboots and the flag gets removed. You can remove the flag sooner than a reboot would, by using the drbd-reactorctl evict --unmask command. This command is the same as the CRM shell unmigrate command.
|
8.5. Using the DRBD Reactor promoter plugin to create a highly available file system mount
In this example, you will use DRBD Reactor and the promoter plugin to create a highly available file system mount within a cluster.
Prerequisites:
-
A directory
/mnt/testcreated on all of your cluster nodes -
A DRBD configured resource named ha-mount that is backed by a DRBD device on all nodes. The configuration examples that follow use
/dev/drbd1000. -
The Cluster Labs OCF Filesystem resource agent, available through the Cluster Lab
resource-agentssource code repository, should be present in the/usr/lib/ocf/resource.d/heartbeatdirectoryIf you have a LINBIT customer or evaluation account, you can install the resource-agentspackage available in the LINBITdrbd-9package repository to install a suite of open source resource agent scripts, including the OCF Filesystem resource agent.
The DRBD resource, ha-mount, should have the following settings configured in its DRBD resource configuration file:
resource ha-mount {
  options {
    auto-promote no;
    quorum majority;
    on-no-quorum suspend-io;
    on-no-data-accessible suspend-io;
    [...]
  }
[...]
}
First, make one of your nodes Primary for the ha-mount resource:
drbdadm primary ha-mount
Then create a file system on the DRBD backed device. The ext4 file system is used in this example.
mkfs.ext4 /dev/drbd1000
Make the node Secondary because after further configurations, DRBD Reactor and the Promoter plugin will control promoting nodes:
drbdadm secondary ha-mount
On all nodes that should be able to mount the DRBD backed device, create a systemd unit file:
cat << EOF > /etc/systemd/system/mnt-test.mount
[Unit]
Description=Mount /dev/drbd1000 to /mnt/test

[Mount]
What=/dev/drbd1000
Where=/mnt/test
Type=ext4
EOF
The systemd unit file name must match the mount location value given by the “Where=” directive, using systemd escape logic. In this example, mnt-test.mount matches the mount location given by Where=/mnt/test. You can use the command systemd-escape -p --suffix=mount /my/mount/point to convert your mount point to a systemd unit file name.
|
Next, on the same nodes as the earlier step, create a configuration file for the DRBD Reactor promoter plugin:
cat << EOF > /etc/drbd-reactor.d/ha-mount.toml
[[promoter]]
[promoter.resources.ha-mount]
start = [
"""ocf:heartbeat:Filesystem fs_test device=/dev/drbd1000 \
directory=/mnt/test fstype=ext4 run_fsck=no"""
]
on-drbd-demote-failure = "reboot"
EOF
This promoter plugin configuration uses a start list of services that specifies an OCF resource agent for the file system found at your HA mount point. By using this particular resource agent, you can circumvent situations where systemd might not know about certain users and processes that might hold the mount point open and prevent it from unmounting. This could happen if you specified a systemd mount unit for the mount point, for example, start = ["mnt-test.mount"], rather than using the OCF Filesystem resource agent.
|
To apply the configuration, enable and start the DRBD Reactor service on all nodes. If the DRBD Reactor service is already running, reload it instead.
systemctl enable drbd-reactor.service --now
Next, verify which cluster node is in the Primary role for the ha-mount resource and has the backing device mounted:
drbd-reactorctl status ha-mount
Test a simple failover situation on the Primary node by using the DRBD Reactor CLI utility to disable the ha-mount configuration:
drbd-reactorctl disable --now ha-mount
Run the DRBD Reactor status command again to verify that another node is now in the Primary role and has the file system mounted.
After testing failover, you can enable the configuration on the node you disabled it on earlier:
drbd-reactorctl enable ha-mount
As a next step, you can read the LINSTOR User Guide section on creating a highly available LINSTOR cluster. Instructions there describe how to use DRBD Reactor to manage the LINSTOR controller service so that the service is highly available within a cluster.
8.6. Configuring the DRBD Reactor Prometheus plugin
The DRBD Reactor Prometheus monitoring plugin acts as a Prometheus compatible endpoint for DRBD resources and exposes various DRBD metrics. You can find a list of the available metrics in the documentation folder in the project’s source code repository.
Prerequisites:
-
Prometheus installed with its service enabled and running.
-
Grafana installed with its service enabled and running.
To enable the Prometheus plugin, create a simple configuration file snippet on all DRBD Reactor nodes that you are monitoring:
cat << EOF > /etc/drbd-reactor.d/prometheus.toml
[[prometheus]]
enums = true
address = "0.0.0.0:9942"
EOF
Reload the DRBD Reactor service on all nodes that you are monitoring:
systemctl reload drbd-reactor.service
Add the following DRBD Reactor monitoring endpoint to your Prometheus configuration file scrape_configs section. Replace “node-x” in the following targets lines with either hostnames or IP addresses for your DRBD Reactor monitoring endpoint nodes. Hostnames must be resolvable from your Prometheus monitoring node.
  - job_name: drbd_reactor_endpoint
    static_configs:
      - targets: ['node-0:9942']
        labels:
          instance: 'node-0'
      - targets: ['node-1:9942']
        labels:
          instance: 'node-1'
      - targets: ['node-2:9942']
        labels:
          instance: 'node-2'
       [...]
Then, assuming it is already enabled and running, reload the Prometheus service by entering sudo systemctl reload prometheus.service.
Next, open a web browser and go to the URL of your Grafana server. If the Grafana server service is running on the same node as your Prometheus monitoring service, the URL would look like: http://<node_IP_address_or_hostname>:3000.
You can then log in to the Grafana server web UI, add a Prometheus data source, and then add or import a Grafana dashboard that uses your Prometheus data source. An example dashboard is available at the Grafana Labs dashboards marketplace. An example dashboard is also available as a downloadable JSON file here, at the DRBD Reactor GitHub project site.
9. Integrating DRBD with Pacemaker clusters
Using DRBD in conjunction with the Pacemaker cluster stack is arguably DRBD’s most frequently found use case. Pacemaker is also one of the applications that make DRBD extremely powerful in a wide variety of usage scenarios.
DRBD can be used in Pacemaker clusters in different ways:
-
作为后台服务运行的DRBD,用作SAN;或
-
DRBD completely managed by Pacemaker through the DRBD OCF resource agent
两者都有一些优点和缺点,这些将在下面讨论。
| It’s recommended to have either fencing configured or quorum enabled. (But not both. External fencing handler results may interact in conflicting ways with DRBD internal quorum.) If your cluster has communication issues (for example, a network switch loses power) and gets split, the parts might start the services (failover) and cause a Split-Brain when the communication resumes again. |
9.1. Introduction to Pacemaker
Pacemaker is a sophisticated, feature-rich, and widely deployed cluster resource manager for the Linux platform. It includes a rich set of documentation. To understand this chapter, reading the following documents is highly recommended:
-
Clusters From Scratch , a step-by-step guide to configuring high-availability clusters;
-
CRM CLI (command line interface) tool, a manual for the CRM shell, a simple and intuitive command line interface bundled with Pacemaker;
-
Pacemaker Configuration Explained, a reference document explaining the concept and design behind Pacemaker.
9.2. Using DRBD as a background service in a Pacemaker cluster
在本节中,您将看到使用自主DRBD存储看起来像本地存储;因此,在Pacemaker集群中集成是通过将挂载点指向DRBD来完成的。
First of all, we will use the auto-promote feature of DRBD, so that DRBD automatically sets itself Primary when needed. This will probably apply to all of your resources, so setting that as a default “yes” in the common section makes sense:
common {
  options {
    auto-promote yes;
    ...
  }
}
Now you just need to use your storage, for example, through a filesystem:
auto promote 为DRBD支持的MySQL服务配置Pacemakercrm configure
crm(live)configure# primitive fs_mysql ocf:heartbeat:Filesystem \
params device="/dev/drbd/by-res/mysql/0" \
directory="/var/lib/mysql" fstype="ext3"
crm(live)configure# primitive ip_mysql ocf:heartbeat:IPaddr2 \
params ip="10.9.42.1" nic="eth0"
crm(live)configure# primitive mysqld lsb:mysqld
crm(live)configure# group mysql fs_mysql ip_mysql mysqld
crm(live)configure# commit
crm(live)configure# exit
bye
实际上,所需要的只是一个挂载点(在本例中为`/var/lib/mysql`),DRBD资源在这里挂载。
Provided that Pacemaker has control, it will only allow a single instance of that mount across your cluster.
See also Importing DRBD’s promotion scores into the CIB for additional information about ordering constraints for system startup and more.
9.3. Adding a DRBD-backed service to the cluster configuration, including a master-slave resource
本节介绍如何在Pacemaker集群中启用DRBD支持的服务。
| 如果您使用的是DRBD OCF资源代理,建议您将DRBD的启动、关闭、升级和降级 专门 推迟到OCF资源代理。这意味着您应该禁用DRBD init脚本: |
chkconfig drbd off
ocf:linbit:drbd ocf资源代理提供主/从功能,允许Pacemaker启动和监视多个节点上的drbd资源,并根据需要进行升级和降级。但是,您必须了解,DRBD RA在Pacemaker关闭时,以及在为节点启用待机模式时,会断开并分离它管理的所有DRBD资源。
The OCF resource agent which ships with DRBD belongs to the linbit provider, and therefore installs as /usr/lib/ocf/resource.d/linbit/drbd. There is a legacy resource agent that is included with the OCF resource agents package, which uses the heartbeat provider and installs into /usr/lib/ocf/resource.d/heartbeat/drbd. The legacy OCF RA is deprecated and should no longer be used.
|
To enable a DRBD-backed configuration for a MySQL database in a Pacemaker CRM cluster with the drbd OCF resource agent, you must create both the necessary resources, and Pacemaker constraints to ensure your service only starts on a previously promoted DRBD resource. You may do so using the crm shell, as outlined in the following example:
master-slave 资源为DRBD支持的MySQL服务配置Pacemakercrm configure
crm(live)configure# primitive drbd_mysql ocf:linbit:drbd \
params drbd_resource="mysql" \
op monitor interval="29s" role="Master" \
op monitor interval="31s" role="Slave"
crm(live)configure# ms ms_drbd_mysql drbd_mysql \
meta master-max="1" master-node-max="1" \
clone-max="2" clone-node-max="1" \
notify="true"
crm(live)configure# primitive fs_mysql ocf:heartbeat:Filesystem \
params device="/dev/drbd/by-res/mysql/0" \
directory="/var/lib/mysql" fstype="ext3"
crm(live)configure# primitive ip_mysql ocf:heartbeat:IPaddr2 \
params ip="10.9.42.1" nic="eth0"
crm(live)configure# primitive mysqld lsb:mysqld
crm(live)configure# group mysql fs_mysql ip_mysql mysqld
crm(live)configure# colocation mysql_on_drbd \
inf: mysql ms_drbd_mysql:Master
crm(live)configure# order mysql_after_drbd \
inf: ms_drbd_mysql:promote mysql:start
crm(live)configure# commit
crm(live)configure# exit
bye
在此之后,应启用配置。Pacemaker现在选择一个节点,在该节点上提升DRBD资源,然后在同一节点上启动DRBD支持的资源组。
See also Importing DRBD’s promotion scores into the CIB for additional information about location constraints for placing the Master role.
9.4. Using resource-level fencing in Pacemaker clusters
本节概述了在DRBD复制链接中断时防止Pacemaker升级DRBD主/从资源所需的步骤。这使得Pacemaker不会使用过时的数据启动服务,也不会在启动过程中造成不必要的 时间扭曲 。
To enable any resource-level fencing for DRBD, you must add the following lines to your resource configuration:
resource <resource> {
  net {
    fencing resource-only;
    ...
  }
}
You will also have to make changes to the handlers section depending on the cluster infrastructure being used.
Corosync-based Pacemaker clusters can use the functionality explained in Resource-level fencing using the cluster information base (CIB).
It is absolutely vital to configure at least two independent cluster communications channels for this functionality to work correctly. Corosync clusters should list at least two redundant rings in corosync.conf, respectively several paths for knet.
|
9.4.1. Resource-level fencing using the cluster information base (CIB)
To enable resource-level fencing for Pacemaker, you will have to set two options in drbd.conf:
resource <resource> {
  net {
    fencing resource-only;
    ...
  }
  handlers {
    fence-peer "/usr/lib/drbd/crm-fence-peer.9.sh";
    unfence-peer "/usr/lib/drbd/crm-unfence-peer.9.sh";
    # Note: we used to abuse the after-resync-target handler to do the
    # unfence, but since 2016 have a dedicated unfence-peer handler.
    # Using the after-resync-target handler is wrong in some corner cases.
    ...
  }
  ...
}
Therefore, if the DRBD replication link becomes disconnected, the crm-fence-peer.9.sh script contacts the cluster manager, determines the Pacemaker Master/Slave resource associated with this DRBD resource, and ensures that the Master/Slave resource no longer gets promoted on any node other than the currently active one. Conversely, when the connection is re-established and DRBD completes its synchronization process, then that constraint is removed and the cluster manager is free to promote the resource on any node again.
9.5. Using stacked DRBD resources in Pacemaker clusters
| Stacking is deprecated in DRBD version 9.x, as more nodes can be implemented on a single level. See 定义网络连接 for details. |
堆叠资源允许DRBD用于多节点集群中的多级冗余,或建立非现场灾难恢复能力。本节描述如何在这种配置中配置DRBD和Pacemaker。
9.5.1. Adding off-site disaster recovery to Pacemaker clusters
在这个配置场景中,我们将在一个站点中处理一个两节点高可用性集群,外加一个单独的节点,该节点可能位于异地。第三个节点充当灾难恢复节点,是一个独立的服务器。考虑下面的插图来描述这个概念。

在本例中, alice 和 bob 组成了一个两节点Pacemaker集群,而 charlie 是一个非现场节点,不由Pacemaker管理。
要创建这样的配置,首先要配置和初始化DRBD资源,如Creating a stacked 3-node setup中所述。然后,使用以下CRM配置配置Pacemaker:
primitive p_drbd_r0 ocf:linbit:drbd \
	params drbd_resource="r0"

primitive p_drbd_r0-U ocf:linbit:drbd \
	params drbd_resource="r0-U"

primitive p_ip_stacked ocf:heartbeat:IPaddr2 \
	params ip="192.168.42.1" nic="eth0"

ms ms_drbd_r0 p_drbd_r0 \
	meta master-max="1" master-node-max="1" \
        clone-max="2" clone-node-max="1" \
        notify="true" globally-unique="false"

ms ms_drbd_r0-U p_drbd_r0-U \
	meta master-max="1" clone-max="1" \
        clone-node-max="1" master-node-max="1" \
        notify="true" globally-unique="false"

colocation c_drbd_r0-U_on_drbd_r0 \
        inf: ms_drbd_r0-U ms_drbd_r0:Master

colocation c_drbd_r0-U_on_ip \
        inf: ms_drbd_r0-U p_ip_stacked

colocation c_ip_on_r0_master \
        inf: p_ip_stacked ms_drbd_r0:Master

order o_ip_before_r0-U \
        inf: p_ip_stacked ms_drbd_r0-U:start

order o_drbd_r0_before_r0-U \
        inf: ms_drbd_r0:promote ms_drbd_r0-U:start
假设您在名为 /tmp/crm.txt 的临时文件中创建了此配置,则可以使用以下命令将其导入实时集群配置:
crm configure < /tmp/crm.txt
此配置将确保在 alice / bob 集群上按正确顺序执行以下操作:
-
Pacemaker在两个集群节点上启动DRBD资源
r0,并将一个节点提升为Master(DRBD Primary)角色。 -
Pacemaker然后启动IP地址192.168.42.1,堆叠的资源将用于复制到第三个节点。它在先前提升为
r0DRBD资源的Master角色的节点上执行此操作。 -
在现在具有
r0的主要角色和r0-U的复制IP地址的节点上,Pacemaker现在启动r0-UDRBD资源,该资源连接并复制到非站点节点。 -
然后Pacemaker也将
r0-U资源提升为主要角色,以便应用程序可以使用它。
Therefore, this Pacemaker configuration ensures that there is not only full data redundancy between cluster nodes, but also to the third, off-site node.
| 这种设置通常与DRBD Proxy一起部署。 |
9.5.2. Using stacked resources to achieve four-way redundancy in Pacemaker clusters
In this configuration, a total of three DRBD resources (two unstacked, one stacked) are used to achieve 4-way storage redundancy. This means that of a four-node cluster, up to three nodes can fail while still providing service availability.
考虑下面的插图来解释这个概念。

在本例中, alice 、 bob 、 charlie 和 daisy 构成两个双节点Pacemaker集群alice和bob组成了名为 left 的集群,并在它们之间使用DRBD资源复制数据,而charlie和daisy在名为 right 的集群中使用单独的DRBD资源复制数据。第三者,堆叠的DRBD资源连接两个集群。
| 由于Pacemaker集群管理器自Pacemaker 1.0.5版起的限制,在不禁用CIB验证的情况下无法在单个四节点集群中创建此设置,这是一个高级过程,不建议用于一般用途。预计这将在未来的Pacemaker版本中得到解决。 |
要创建这样的配置,您首先要配置和初始化DRBD资源,如Creating a stacked 3-node setup中所述(除了DRBD配置的远程部分也是堆叠的,而不仅仅是本地集群)。然后,使用以下CRM配置配置Pacemaker,从集群 left 开始:
primitive p_drbd_left ocf:linbit:drbd \
	params drbd_resource="left"

primitive p_drbd_stacked ocf:linbit:drbd \
	params drbd_resource="stacked"

primitive p_ip_stacked_left ocf:heartbeat:IPaddr2 \
	params ip="10.9.9.100" nic="eth0"

ms ms_drbd_left p_drbd_left \
	meta master-max="1" master-node-max="1" \
        clone-max="2" clone-node-max="1" \
        notify="true"

ms ms_drbd_stacked p_drbd_stacked \
	meta master-max="1" clone-max="1" \
        clone-node-max="1" master-node-max="1" \
        notify="true" target-role="Master"

colocation c_ip_on_left_master \
        inf: p_ip_stacked_left ms_drbd_left:Master

colocation c_drbd_stacked_on_ip_left \
        inf: ms_drbd_stacked p_ip_stacked_left

order o_ip_before_stacked_left \
        inf: p_ip_stacked_left ms_drbd_stacked:start

order o_drbd_left_before_stacked_left \
        inf: ms_drbd_left:promote ms_drbd_stacked:start
假设您在名为 /tmp/crm.txt 的临时文件中创建了此配置,则可以使用以下命令将其导入实时集群配置:
crm configure < /tmp/crm.txt
将此配置添加到CIB后,Pacemaker将执行以下操作:
-
调出DRBD资源
left,在alice和bob之间复制,将资源提升到其中一个节点上的Master角色。 -
调出IP地址10.9.9.100(在
alice或bob上,具体取决于其中哪一个拥有资源left的主角色)。 -
将DRBD资源
stacked调到保存刚才配置的IP地址的同一节点上。 -
将堆叠的DRBD资源提升为主角色。
现在,在集群 right 上继续创建以下配置:
primitive p_drbd_right ocf:linbit:drbd \
	params drbd_resource="right"

primitive p_drbd_stacked ocf:linbit:drbd \
	params drbd_resource="stacked"

primitive p_ip_stacked_right ocf:heartbeat:IPaddr2 \
	params ip="10.9.10.101" nic="eth0"

ms ms_drbd_right p_drbd_right \
	meta master-max="1" master-node-max="1" \
        clone-max="2" clone-node-max="1" \
        notify="true"

ms ms_drbd_stacked p_drbd_stacked \
	meta master-max="1" clone-max="1" \
        clone-node-max="1" master-node-max="1" \
        notify="true" target-role="Slave"

colocation c_drbd_stacked_on_ip_right \
        inf: ms_drbd_stacked p_ip_stacked_right

colocation c_ip_on_right_master \
        inf: p_ip_stacked_right ms_drbd_right:Master

order o_ip_before_stacked_right \
        inf: p_ip_stacked_right ms_drbd_stacked:start

order o_drbd_right_before_stacked_right \
        inf: ms_drbd_right:promote ms_drbd_stacked:start
将此配置添加到CIB后,Pacemaker将执行以下操作:
-
在
charlie和daisy之间启动DRBD资源right复制,将资源提升到其中一个节点上的Master角色。 -
调出IP地址10.9.10.101(在
charlie或daisy上,具体取决于其中哪个拥有资源right的主角色)。 -
将DRBD资源
stacked调到保存刚才配置的IP地址的同一节点上。 -
将堆叠的DRBD资源保留在次要角色中(由于
target role=Slave “)。
9.6. Configuring DRBD to replicate between two SAN-backed Pacemaker clusters
This is a somewhat advanced setup usually employed in split-site configurations. It involves two separate Pacemaker clusters, where each cluster has access to a separate Storage Area Network (SAN). DRBD is then used to replicate data stored on that SAN, across an IP link between sites.
考虑下面的插图来描述这个概念。

每个站点中当前充当DRBD对等点的单个节点中的哪一个没有明确定义 – DRBD对等点被称为是 浮动的,;也就是说,DRBD绑定到没有绑定到特定物理机的虚拟IP地址。
| This type of setup is usually deployed together with DRBD Proxy or truck based replication, or both. |
由于这种类型的设置处理共享存储,因此对STONITH进行配置和测试对于它的正常工作至关重要。
9.6.1. DRBD resource configuration
要使DRBD资源浮动,请按以下方式在 DRBD.conf 中配置它:
resource <resource> {
  ...
  device /dev/drbd0;
  disk /dev/vg0/lv0;
  meta-disk internal;
  floating 10.9.9.100:7788;
  floating 10.9.10.101:7788;
}
The floating keyword replaces the on <host> sections normally found in the resource configuration. In this mode, DRBD identifies peers by IP address and TCP port, rather than by host name. It is important to note that the addresses specified must be virtual cluster IP addresses, rather than physical node IP addresses, for floating to function properly. As shown in the example, in split-site configurations the two floating addresses can be expected to belong to two separate IP networks — it is therefore vital for routers and firewalls to properly allow DRBD replication traffic between the nodes.
9.6.2. Pacemaker resource configuration
就Pacemaker配置而言,DRBD浮动对等点设置包括以下各项(在涉及的两个Pacemaker集群中的每一个中):
-
虚拟集群IP地址。
-
主/从DRBD资源(使用DRBD OCF资源代理)。
-
Pacemaker约束确保资源以正确的顺序在正确的节点上启动。
要使用复制地址 10.9.9.100 在2节点集群的浮动对等配置中配置名为 mysql 的资源,请使用以下 crm 命令配置Pacemaker:
crm configure
crm(live)configure# primitive p_ip_float_left ocf:heartbeat:IPaddr2 \
                    params ip=10.9.9.100
crm(live)configure# primitive p_drbd_mysql ocf:linbit:drbd \
                    params drbd_resource=mysql
crm(live)configure# ms ms_drbd_mysql drbd_mysql \
                    meta master-max="1" master-node-max="1" \
                         clone-max="1" clone-node-max="1" \
                         notify="true" target-role="Master"
crm(live)configure# order drbd_after_left \
                      inf: p_ip_float_left ms_drbd_mysql
crm(live)configure# colocation drbd_on_left \
                      inf: ms_drbd_mysql p_ip_float_left
crm(live)configure# commit
bye
将此配置添加到CIB后,Pacemaker将执行以下操作:
-
调出IP地址10.9.9.100(在
alice或bob上)。 -
根据配置的IP地址调出DRBD资源。
-
将DRBD资源提升为主要角色。
Then, to create the matching configuration in the other cluster, configure that Pacemaker instance with the following commands:
crm configure
crm(live)configure# primitive p_ip_float_right ocf:heartbeat:IPaddr2 \
                    params ip=10.9.10.101
crm(live)configure# primitive drbd_mysql ocf:linbit:drbd \
                    params drbd_resource=mysql
crm(live)configure# ms ms_drbd_mysql drbd_mysql \
                    meta master-max="1" master-node-max="1" \
                         clone-max="1" clone-node-max="1" \
                         notify="true" target-role="Slave"
crm(live)configure# order drbd_after_right \
                      inf: p_ip_float_right ms_drbd_mysql
crm(live)configure# colocation drbd_on_right
                      inf: ms_drbd_mysql p_ip_float_right
crm(live)configure# commit
bye
将此配置添加到CIB后,Pacemaker将执行以下操作:
-
调出IP地址10.9.10.101(在
charlie或daisy上)。 -
根据配置的IP地址调出DRBD资源。
-
将DRBD资源保留在次要角色中(由于 `target role=”Slave” `)。
9.6.3. Site failover
In split-site configurations, it may be necessary to transfer services from one site to another. This may be a consequence of a scheduled migration, or of a disastrous event. In case the migration is a normal, anticipated event, the recommended course of action is this:
-
连接到站点上即将放弃资源的集群,并将受影响的DRBD资源的
target role属性从Master更改为Slave。这将根据DRBD资源的主要角色关闭所有资源,将其降级并继续运行,以便从新的主要资源接收更新。 -
连接到站点上即将接管资源的集群,并将受影响的DRBD资源的
target role属性从Slave更改为Master。这将提升DRBD资源,根据DRBD资源的主要角色启动任何其他Pacemaker资源,并将更新复制到远程站点。 -
若要退回,只需颠倒程序即可。
In case of a catastrophic outage on the active site, it can be expected that the site is offline and no longer replicated to the backup site. In such an event:
-
连接到仍在运行的站点资源上的集群,并将受影响的DRBD资源的
target role属性从Slave更改为Master。这将提升DRBD资源,并根据DRBD资源的主要角色启动任何其他Pacemaker资源。 -
还原或重建原始站点时,可以再次连接DRBD资源,然后使用相反的过程进行故障恢复。
9.7. Importing DRBD’s promotion scores into the CIB
Everything described in this section depends on the drbd-attr OCF resource agent. It is available since drbd-utils version 9.15.0. On Debian/Ubuntu systems this is part of the drbd-utils package. On RPM based Linux distributions you need to install the drbd-pacemaker package.
|
Every DRBD resource exposes a promotion score on each node where it is configured. It is a numeric value that might be 0 or positive. The value reflects how desirable it is to promote the resource to master on this particular node. A node that has an UpToDate disk and two UpToDate replicas has a higher score than a node with an UpToDate disk and just one UpToDate replica.
During startup, the promotion score is 0. E.g., before the DRBD device has its backing device attached, or, if quorum is enabled, before quorum is gained. A value of 0 indicates that a promotion request will fail, and is mapped to a pacemaker score that indicates must not run here.
The drbd-attr OCF resource agent imports these promotion scores into node attributes of a Pacemaker cluster. It needs to be configured like this:
primitive drbd-attr ocf:linbit:drbd-attr
clone drbd-attr-clone drbd-attr
These are transient attributes (have a lifetime of reboot in pacemaker speak). That means, after a reboot of the node, or local restart of pacemaker, those attributes will not exist until an instance of drbd-attr is started on that node.
You can inspect the generated attributes with crm_mon -A -1.
These attributed can be used in constraints for services that depend on the DRBD devices, or, when managing DRBD with the ocf:linbit:drbd resource agent, for the Master role of that DRBD instance.
Here is an example location constraint for the example resource from Using DRBD as a background service in a Pacemaker cluster
location lo_fs_mysql fs_mysql \
        rule -inf: not_defined drbd-promotion-score-mysql \
        rule drbd-promotion-score-mysql: defined drbd-promotion-score-mysql
This means, provided that the attribute is not defined, the fs_mysql file system cannot be mounted here. When the attribute is defined, its value becomes the score of the location constraint.
This can also be used to cause Pacemaker to migrate a service away when DRBD loses a local backing device. Because a failed backing block device causes the promotion score to drop, other nodes with working backing devices will expose higher promotion scores.
The attributes are updated live, independent of the resource-agent’s monitor operation, with a dampening delay of 5 seconds by default.
The resource agent has these optional parameters, see also its man page ocf_linbit_drbd-attr(7):
-
dampening_delay -
attr_name_prefix -
record_event_details
10. 在DRBD中使用LVM
This chapter deals with managing DRBD for use with LVM2. In particular, this chapter covers how to:
-
Use LVM Logical Volumes as backing devices for DRBD.
-
Use DRBD devices as Physical Volumes for LVM.
-
Combine these two concepts to implement a layered LVM approach using DRBD.
If you are unfamiliar with these terms, the next section, Introduction to LVM, may serve as a starting point to learn about LVM concepts. However, you are also encouraged to familiarize yourself with LVM in more detail than this section provides.
10.1. Introduction to LVM
LVM2是Linux device mapper框架上下文中逻辑卷管理的实现。它实际上与原始LVM实现没有任何共同点,除了名称和缩写。旧的实现(现在追溯命名为 “LVM1″)被认为是过时的;本节不涉及它。
在使用LVM时,必须了解其最基本的概念:
A PV is an underlying block device exclusively managed by LVM. PVs can either be entire hard disks or individual partitions. It is common practice to create a partition table on the hard disk where one partition is dedicated to the use by the Linux LVM.
分区类型 “Linux LVM”(签名 0x8E)可用于标识供LVM独占使用的分区。然而,这并不是必需的 – LVM通过在PV初始化时写入设备的签名来识别PV。
|
A VG is the basic administrative unit of the LVM. A VG may include one or more several PVs. Every VG has a unique name. A VG may be extended during runtime by adding additional PVs, or by enlarging an existing PV.
LVs may be created during runtime within VGs and are available to the other parts of the kernel as regular block devices. As such, they may be used to hold a file system, or for any other purpose block devices may be used for. LVs may be resized while they are online, and they may also be moved from one PV to another (provided that the PVs are part of the same VG).
Snapshots are temporary point-in-time copies of LVs. Creating snapshots is an operation that completes almost instantly, even if the original LV (the origin volume) has a size of several hundred GiByte. Usually, a snapshot requires significantly less space than the original LV.

10.2. Using a logical volume as a DRBD backing device
Because an existing LVM logical volume is simply a block device in Linux terms, you can use one as a DRBD backing device. To use an LVM logical volume in this way, you simply create one, and then reference it in a DRBD resource configuration just as you would a physical backing disk.
|
When using DRBD together with LVM, set the global_filter = [ "r|^/dev/drbd|" ] This setting tells LVM to reject DRBD devices from operations such as scanning or opening attempts. In some cases, not setting this filter might lead to increased CPU load or stuck LVM operations. |
The following example assumes that an LVM volume group named foo already exists on two nodes of in your LVM-enabled cluster, and that you want to create a DRBD resource named r0 using a logical volume in that volume group.
First, you create the logical volume on both nodes in your cluster:
# lvcreate --name bar --size 10G foo
Logical volume "bar" created
After this, you will have a block device named /dev/foo/bar on both nodes.
Then, you can simply enter the newly created volumes in your resource configuration:
resource r0 {
  ...
  on alice {
    device /dev/drbd0;
    disk   /dev/foo/bar;
    ...
  }
  on bob {
    device /dev/drbd0;
    disk   /dev/foo/bar;
    ...
  }
}现在您可以continue to bring your resource up,就像使用非LVM块设备一样。
10.3. Using automated LVM snapshots during DRBD synchronization
当DRBD正在同步时,同步目标的状态是不一致的,直到同步完成。如果在这种情况下,SyncSource发生故障(无法修复),这将使您处于一个不幸的位置:具有良好数据的节点已死亡,而幸存的节点具有不良(不一致)数据。
当从LVM逻辑卷上服务DRBD时,可以通过在同步启动时创建自动快照,并在同步成功完成后自动删除同一快照来缓解此问题。
To enable automated snapshotting during resynchronization, add the following lines to your resource configuration:
resource r0 {
  handlers {
    before-resync-target "/usr/lib/drbd/snapshot-resync-target-lvm.sh";
    after-resync-target "/usr/lib/drbd/unsnapshot-resync-target-lvm.sh";
  }
}
这两个脚本解析DRBD自动传递给它调用的任何 handler 的 $DRBD_RESOURCE 环境变量。然后, snapshot-resync-target-lvm.sh 脚本为资源包含的任何卷创建一个lvm快照,然后开始同步。如果脚本失败,则同步不会开始。
同步完成后, unsnapshot-resync-target-lvm.sh 脚本将删除不再需要的快照。如果取消快照失败,快照将继续徘徊。
| 你应该尽快检查悬挂的快照。完整快照会导致快照本身及其原始卷失败。 |
如果您的同步源在任何时候确实出现无法修复的故障,并且您决定还原到对等机上的最新快照,则可以通过输入 lvconvert -M 命令来执行此操作。
10.4. Configuring a DRBD resource as a physical volume
To prepare a DRBD resource for use as a Physical Volume, it is necessary to create a PV signature on the DRBD device. To do this, issue one of the following commands on the node where the resource is currently in the primary role:
# pvcreate /dev/drbdX
或
# pvcreate /dev/drbd/by-res/<resource>/0
| This example assumes a single-volume resource. |
Now, it is necessary to include this device in the list of devices LVM scans for PV signatures. To do this, you must edit the LVM configuration file, normally named /etc/lvm/lvm.conf. Find the line in the devices section that contains the filter keyword and edit it accordingly. If all your PVs are to be stored on DRBD devices, the following is an appropriate filter option:
filter = [ "a|drbd.*|", "r|.*|" ]此筛选器表达式接受在任何DRBD设备上找到的PV签名,同时拒绝(忽略)所有其他签名。
默认情况下,LVM扫描在 /dev 中找到的所有块设备以获取PV签名。这相当于 filter=[ "a |.*|" ]。
|
If you want to use stacked resources as LVM PVs, then you will need a more explicit filter configuration. You need to verify that LVM detects PV signatures on stacked resources, while ignoring them on the corresponding lower-level resources and backing devices. This example assumes that your lower-level DRBD resources use device minors 0 through 9, whereas your stacked resources are using device minors from 10 upwards:
filter = [ "a|drbd1[0-9]|", "r|.*|" ]此筛选器表达式接受仅在DRBD设备 /dev/drbd10 到 `/dev/drbd19′ 上找到的PV签名,同时拒绝(忽略)所有其他签名。
After modifying the lvm.conf file, you must run the vgscan command so LVM discards its configuration cache and re-scans devices for PV signatures.
You may of course use a different filter configuration to match your particular system configuration. What is important to remember, however, is that you need to:
-
Accept (include) the DRBD devices that you want to use as PVs.
-
拒绝(排除)相应的低级设备,以避免LVM发现重复的PV签名。
此外,应通过设置以下内容禁用LVM缓存:
write_cache_state = 0After disabling the LVM cache, remove any stale cache entries by deleting /etc/lvm/cache/.cache.
您还必须在对等节点上重复上述步骤。
If your system has its root filesystem on LVM, Volume Groups will be activated from your initial RAM disk (initrd) during boot. In doing so, the LVM tools will evaluate an lvm.conf file included in the initrd image. Therefore, after you make any changes to your lvm.conf, you should be certain to update your initrd with the utility appropriate for your distribution (mkinitrd, update-initramfs, and so on).
|
When you have configured your new PV, you may proceed to add it to a Volume Group, or create a new Volume Group from it. The DRBD resource must, of course, be in the primary role while doing so.
# vgcreate <name> /dev/drbdX
| 虽然可以在同一个卷组中混合DRBD和非DRBD物理卷,但不建议这样做,也不太可能有任何实际价值。 |
When you have created your VG, you may start carving Logical Volumes out of it, using the lvcreate command (as with a non-DRBD-backed Volume Group).
10.5. Adding a new DRBD volume to an existing volume group
有时,您可能希望向卷组中添加新的DRBD支持的物理卷。无论何时执行此操作,都应将新卷添加到现有资源配置中。这将保留复制流并确保VG中所有pv的写入保真度。
| 如果您的LVM卷组由Pacemaker管理,如Highly available LVM with Pacemaker中所述,则在更改DRBD配置之前,必须将集群置于维护模式。 |
扩展资源配置以包括附加卷,如下例所示:
resource r0 {
  volume 0 {
    device    /dev/drbd1;
    disk      /dev/disk/by-id/nvme-eui.daac3bd0da3b9b2b;
    meta-disk internal;
  }
  volume 1 {
    device    /dev/drbd2;
    disk      /dev/disk/by-id/nvme-eui.9ecf6fb61f451198;
    meta-disk internal;
  }
  on alice {
    address   10.1.1.31:7789;
  }
  on bob {
    address   10.1.1.32:7789;
  }
}
When not using LVM or ZFS logical volumes to back DRBD volumes, use persistent block device names, that is, the block device names that you find in /dev/disk/by-id/, in your DRBD resource configurations, as shown in this configuration. This prevents a bus-based name change from possibly affecting your DRBD resources. You can enter a lsblk -o Name,UUID,WWN command to determine a particular disk’s ID.
|
Verify that your DRBD configuration is identical across nodes, then issue:
# drbdadm adjust r0
这将隐式调用 drbdsetup new-minor r0 1,以启用资源 r0 中的新卷 1。将新卷添加到复制流后,可以初始化并将其添加到卷组:
# pvcreate /dev/drbd/by-res/<resource>/1
# vgextend <name> /dev/drbd/by-res/<resource>/1
这将把新的PV /dev/drbd/by res/<resource>/1 添加到 <name> VG中,从而在整个VG中保持写保真度。
10.6. Highly available LVM with Pacemaker
在对等机之间传输卷组并使相应的逻辑卷可用的过程可以自动化。PacemakerLVM资源代理正是为此目的而设计的。
To put an existing, DRBD-backed volume group under Pacemaker management, run the following commands in the crm shell:
primitive p_drbd_r0 ocf:linbit:drbd \
  params drbd_resource="r0" \
  op monitor interval="29s" role="Master" \
  op monitor interval="31s" role="Slave"
ms ms_drbd_r0 p_drbd_r0 \
  meta master-max="1" master-node-max="1" \
       clone-max="2" clone-node-max="1" \
       notify="true"
primitive p_lvm_r0 ocf:heartbeat:LVM \
  params volgrpname="r0"
colocation c_lvm_on_drbd inf: p_lvm_r0 ms_drbd_r0:Master
order o_drbd_before_lvm inf: ms_drbd_r0:promote p_lvm_r0:start
commit
提交此配置后,Pacemaker将自动使 r0 卷组在当前具有DRBD资源主(Master)角色的节点上可用。
10.7. Using DRBD and LVM without a cluster resource manager
The typical high availability use case for DRBD is to use a cluster resource manager (CRM) to handle the promoting and demoting of resources, such as DRBD replicated storage volumes. However, it is possible to use DRBD without a CRM.
You might want to do this in a situation when you know that you always want a particular node to promote a DRBD resource and you know that the peer nodes are never going to take over but are only being replicated to for disaster recovery purposes.
In this case, you can use a couple of systemd unit files to handle DRBD resource promotion and make sure that back-end LVM logical volumes are activated first. You also need to make the DRBD systemd unit file for your DRBD resource a dependency of whatever file system mount might be using the DRBD resource as a backing device.
To set this up, for example, given a hypothetical DRBD resource named webdata and a file system mount point of /var/lib/www, you might enter the following commands:
# systemctl enable [email protected]
# systemctl enable [email protected]
# echo "/dev/drbdX /var/lib/www xfs defaults,nofail,[email protected] 0 0" \
    >> /etc/fstab
In this example, the X in drbdX is the volume number of your DRBD backing device for the webdata resource.
The drbd-wait-promotable@<DRBD-resource-name>.service is a systemd unit file that is used to wait for DRBD to connect to its peers and establish access to good data, before DRBD promotes the resource on the node.
11. 将GFS与DRBD结合使用
This chapter outlines the steps necessary to set up a DRBD resource as a block device holding a shared Global File System (GFS). It covers both GFS and GFS2.
To use GFS on top of DRBD, you must configure DRBD in dual-primary mode.
| DRBD 9 supports exactly two nodes with its dual-primary mode. Attempting to use more than three nodes in the Primary state is not supported and may lead to data loss. |
|
All cluster file systems require fencing – not only through the DRBD resource, but STONITH! A faulty member must be killed. You will want these settings: net {
fencing resource-and-stonith;
}
handlers {
# Make sure the other node is confirmed
# dead after this!
fence-peer "/usr/lib/drbd/crm-fence-peer.9.sh";
unfence-peer "/usr/lib/drbd/crm-unfence-peer.9.sh";
}
|
If a node becomes a disconnected primary, the resource-and-stonith network fencing setting will:
-
Freeze all the node’s I/O operations.
-
Call the node’s fence-peer handler.
If the fence-peer handler cannot reach the peer node, for example over an alternate network, then the fence-peer handler should STONITH the disconnected primary node. I/O operations will resume as soon as the situation is resolved.
11.1. Introduction to GFS
Red Hat全局文件系统(GFS)是redhat对并发访问共享存储文件系统的实现。与任何此类文件系统一样,GFS允许多个节点以读/写方式同时访问同一存储设备,而不会造成数据损坏的风险。它通过使用分布式锁管理器(DLM)来管理来自集群成员的并发访问。
GFS was designed, from the outset, for use with conventional shared storage devices. Regardless, it is perfectly possible to use DRBD, in dual-primary mode, as a replicated storage device for GFS. Applications may benefit from reduced read/write latency due to the fact that DRBD normally reads from and writes to local storage, as opposed to the SAN devices GFS is normally configured to run from. Also, of course, DRBD adds an additional physical copy to every GFS filesystem, therefore adding redundancy to the concept.
GFS makes use of a cluster-aware variant of LVM, termed Cluster Logical Volume Manager or CLVM. As such, some parallelism exists between using DRBD as the data storage for GFS, and using DRBD as a Physical Volume for conventional LVM.
GFS file systems are usually tightly integrated with Red Hat’s own cluster management framework, the Red Hat Cluster. This chapter explains the use of DRBD in conjunction with GFS in the Red Hat Cluster context.
GFS, CLVM, and Red Hat Cluster are available in Red Hat Enterprise Linux (RHEL) and distributions derived from it, such as CentOS. Packages built from the same sources are also available in Debian GNU/Linux. This chapter assumes running GFS on a Red Hat Enterprise Linux system.
11.2. Creating a DRBD resource suitable for GFS
Since GFS is a shared cluster file system expecting concurrent read/write storage access from all cluster nodes, any DRBD resource to be used for storing a GFS filesystem must be configured in dual-primary mode. Also, it is recommended to use some of DRBD’s features for automatic recovery from split brain. To do all this, include the following lines in the resource configuration:
resource <resource> {
  net {
    allow-two-primaries yes;
    after-sb-0pri discard-zero-changes;
    after-sb-1pri discard-secondary;
    after-sb-2pri disconnect;
    [...]
  }
  [...]
}|
By configuring auto-recovery policies, with the exception of the |
Once you have added these options to your freshly-configured resource, you may initialize your resource as you normally would. Since the allow-two-primaries option is set to yes for this resource, you will be able to promote the resourceto the primary role on two nodes.
11.3. Configuring LVM to recognize the DRBD resource
GFS uses CLVM, the cluster-aware version of LVM, to manage block devices to be used by GFS. To use CLVM with DRBD, ensure that your LVM configuration
-
使用集群锁定。为此,请在
/etc/lvm/lvm.conf中设置以下选项:locking_type = 3 -
扫描DRBD设备以识别基于DRBD的物理卷(pv)。这适用于传统(非集群)LVM;有关详细信息,请参见Configuring a DRBD resource as a physical volume。
11.4. Configuring your cluster to support GFS
创建新的DRBD资源并 completed your initial cluster configurations后,必须在GFS集群的两个节点上启用并启动以下系统服务:
-
cman(这也会启动ccsd和fenced), -
clvmd.
11.5. Creating a GFS filesystem
To create a GFS filesystem on your dual-primary DRBD resource, you must first initialize it as a Logical Volume for LVM.
Contrary to conventional, non-cluster-aware LVM configurations, the following steps must be completed on only one node due to the cluster-aware nature of CLVM:
# pvcreate /dev/drbd/by-res/<resource>/0
Physical volume "/dev/drbd<num>" successfully created
# vgcreate <vg-name> /dev/drbd/by-res/<resource>/0
Volume group "<vg-name>" successfully created
# lvcreate --size <size> --name <lv-name> <vg-name>
Logical volume "<lv-name>" created
| This example assumes a single-volume resource. |
CLVM will immediately notify the peer node of these changes; issuing lvs (or lvdisplay) on the peer node will list the newly created logical volume.
Now, you may proceed by creating the actual filesystem:
# mkfs -t gfs -p lock_dlm -j 2 /dev/<vg-name>/<lv-name>
或者,对于GFS2文件系统:
# mkfs -t gfs2 -p lock_dlm -j 2 -t <cluster>:<name>
	/dev/<vg-name>/<lv-name>
The -j option in this command refers to the number of journals to keep for GFS. This must be identical to the number of nodes with concurrent Primary role in the GFS cluster; since DRBD does not support more than two Primary nodes the value to set here is always 2.
The -t option, applicable only for GFS2 filesystems, defines the lock table name. This follows the format <cluster>:<name>, where <cluster> must match your cluster name as defined in /etc/cluster/cluster.conf. Therefore, only members of that cluster will be permitted to use the filesystem. By contrast, <name> is an arbitrary file system name unique in the cluster.
11.6. Using Your GFS filesystem
创建文件系统后,可以将其添加到 /etc/fstab :
/dev/<vg-name>/<lv-name> <mountpoint> gfs defaults 0 0对于GFS2文件系统,只需更改文件系统类型:
/dev/<vg-name>/<lv-name> <mountpoint> gfs2 defaults 0 0Do not forget to make this change on both cluster nodes.
After this, you may mount your new filesystem by starting the gfs service (on both nodes):
# service gfs start
From then on, if you have DRBD configured to start automatically on system startup, before the Pacemaker services and the gfs service, you will be able to use this GFS file system as you would use one that is configured on traditional shared storage.
12. 在DRBD中使用OCFS2
This chapter outlines the steps necessary to set up a DRBD resource as a block device holding a shared Oracle Cluster File System, version 2 (OCFS2).
|
All cluster file systems require fencing – not only through the DRBD resource, but STONITH! A faulty member must be killed. 您需要这些设置: net {
fencing resource-and-stonith;
}
handlers {
# Make sure the other node is confirmed
# dead after this!
outdate-peer "/sbin/kill-other-node.sh";
}
There must be no volatile caches! |
12.1. Introduction to OCFS2
Oracle集群文件系统(OCFS2)是Oracle公司开发的一个并发访问共享存储文件系统。与它的前身OCFS不同,OCFS是专门设计的,只适用于Oracle数据库有效负载,OCFS2是实现大多数POSIX语义的通用文件系统。OCFS2最常见的用例可以说是Oracle Real Application Cluster(RAC),但是OCFS2也可以用于实现比如负载平衡的NFS集群。
虽然OCFS2最初设计用于传统的共享存储设备,但它同样非常适合部署在dual-Primary DRBD上。从文件系统中读取的应用程序可能会受益于减少的读取延迟,这是因为DRBD从本地存储中读取和写入,而不是在正常情况下运行的SAN设备OCFS2。此外,DRBD通过向每个文件系统映像添加一个额外的副本来增加OCFS2的冗余,而不是仅仅共享一个文件系统映像。
与其他共享群集文件系统(如GFS)一样,OCFS2允许多个节点以读/写模式同时访问同一存储设备,而不会导致数据损坏。它通过使用分布式锁管理器(DLM)来管理来自集群节点的并发访问。DLM本身使用一个虚拟文件系统(ocfs2_dlmfs),它独立于系统上的实际ocfs2文件系统。
OCFS2可以使用一个内在的集群通信层来管理集群成员和文件系统的装载和卸载操作,或者将这些任务推迟到Pacemaker集群基础设施。
OCFS2在SUSE Linux企业服务器(它是主要受支持的共享集群文件系统)、CentOS、Debian GNU/Linux和Ubuntu服务器版本中可用。Oracle还为Red Hat Enterprise Linux(RHEL)提供了软件包。本章假设在SUSE Linux企业服务器系统上运行OCFS2。
12.2. Creating a DRBD resource suitable for OCFS2
Since OCFS2 is a shared cluster file system expecting concurrent read/write storage access from all cluster nodes, any DRBD resource to be used for storing a OCFS2 filesystem must be configured in dual-primary mode. Also, it is recommended to use some of DRBD’s features for automatic recovery from split brain. To do all this, include the following lines in the resource configuration:
resource <resource> {
  net {
    # allow-two-primaries yes;
    after-sb-0pri discard-zero-changes;
    after-sb-1pri discard-secondary;
    after-sb-2pri disconnect;
    ...
  }
  ...
}|
通过设置自动恢复策略,您可以有效地配置自动数据丢失!一定要明白其中的含义。 |
不建议在初始配置时将 allow-two-primaries 选项设置为 yes 。您应该在初始资源同步完成后执行此操作。
Once you have added these options to your freshly-configured resource, you may initialize your resource as you normally would. After you set the allow-two-primaries option to yes for this resource, you will be able to promote the resourceto the primary role on both nodes.
12.3. Creating an OCFS2 filesystem
Now, use OCFS2’s mkfs implementation to create the file system:
# mkfs -t ocfs2 -N 2 -L ocfs2_drbd0 /dev/drbd0
mkfs.ocfs2 1.4.0
Filesystem label=ocfs2_drbd0
Block size=1024 (bits=10)
Cluster size=4096 (bits=12)
Volume size=205586432 (50192 clusters) (200768 blocks)
7 cluster groups (tail covers 4112 clusters, rest cover 7680 clusters)
Journal size=4194304
Initial number of node slots: 2
Creating bitmaps: done
Initializing superblock: done
Writing system files: done
Writing superblock: done
Writing backup superblock: 0 block(s)
Formatting Journals: done
Writing lost+found: done
mkfs.ocfs2 successful
这将在 /dev/drbd0 上创建一个具有两个节点插槽的OCFS2文件系统,并将文件系统标签设置为 ocfs2_drbd0。您可以在 mkfs 调用中指定其他选项;有关详细信息,请参阅 mkfs.ocfs2 系统手册页。
12.4. Pacemaker OCFS2 management
12.4.1. Adding a dual-primary DRBD resource to Pacemaker
现有的Dual-Primary DRBD resource可通过以下 crm 配置添加到Pacemaker资源管理:
primitive p_drbd_ocfs2 ocf:linbit:drbd \
  params drbd_resource="ocfs2"
ms ms_drbd_ocfs2 p_drbd_ocfs2 \
  meta master-max=2 clone-max=2 notify=true
注意 master max=2 元变量;它为Pacemaker 主/从设备启用双主模式。这要求在DRBD配置中将 allow-two-primaries 也设置为 yes。否则,Pacemaker将在资源验证期间标记配置错误。
|
12.4.2. Adding OCFS2 management capability to Pacemaker
To manage OCFS2 and the kernel Distributed Lock Manager (DLM), Pacemaker uses a total of three different resource agents:
-
ocf:pacemaker:controld— Pacemaker与DLM的接口; -
ocf:ocfs2:o2cb–Pacemaker与ocfs2集群管理的接口; -
ocf:heartbeat:Filesystem–通用文件系统管理资源代理,配置为Pacemaker克隆时支持群集文件系统。
您可以通过创建具有以下“crm”配置的克隆资源组,为OCFS2管理启用Pacemaker群集中的所有节点:
primitive p_controld ocf:pacemaker:controld
primitive p_o2cb ocf:ocfs2:o2cb
group g_ocfs2mgmt p_controld p_o2cb
clone cl_ocfs2mgmt g_ocfs2mgmt meta interleave=true
提交此配置后,Pacemaker将在群集中的所有节点上启动“controld”和“o2cb”资源类型的实例。
12.4.3. Adding an OCFS2 filesystem to Pacemaker
Pacemaker使用传统的“ocf:heartbeat:Filesystem”资源代理管理OCFS2文件系统,尽管处于克隆模式。要将OCFS2文件系统置于Pacemaker管理下,请使用以下“crm”配置:
primitive p_fs_ocfs2 ocf:heartbeat:Filesystem \
  params device="/dev/drbd/by-res/ocfs2/0" directory="/srv/ocfs2" \
         fstype="ocfs2" options="rw,noatime"
clone cl_fs_ocfs2 p_fs_ocfs2| This example assumes a single-volume resource. |
12.4.4. Adding required Pacemaker constraints to manage OCFS2 filesystems
To tie all OCFS2-related resources and clones together, add the following constraints to your Pacemaker configuration:
order o_ocfs2 ms_drbd_ocfs2:promote cl_ocfs2mgmt:start cl_fs_ocfs2:start
colocation c_ocfs2 cl_fs_ocfs2 cl_ocfs2mgmt ms_drbd_ocfs2:Master
12.5. Legacy OCFS2 management (without Pacemaker)
| 本节介绍的信息适用于Pacemaker中不支持OCFS2 DLM的传统系统。此处仅作参考之用。新装置应始终使用Pacemaker方法。 |
12.5.1. Configuring your cluster to support OCFS2
Creating the configuration file
OCFS2使用一个中央配置文件 /etc/OCFS2/cluster.conf。
创建OCFS2集群时,请确保将两个主机都添加到集群配置中。默认端口(7777)通常是群集互连通信的可接受选择。如果您选择任何其他端口号,请确保选择的端口号与DRBD使用的现有端口(或任何其他配置的TCP/IP)不冲突。
如果您觉得直接编辑cluster.conf文件不太舒服,还可以使用通常更方便的 ocfs2console 图形配置实用程序。不管您选择什么方法,您的 /etc/ocfs2/cluster.conf 文件内容应该大致如下:
node:
    ip_port = 7777
    ip_address = 10.1.1.31
    number = 0
    name = alice
    cluster = ocfs2

node:
    ip_port = 7777
    ip_address = 10.1.1.32
    number = 1
    name = bob
    cluster = ocfs2

cluster:
    node_count = 2
    name = ocfs2
When you have configured you cluster, use scp to distribute the configuration to both nodes in the cluster.
Configuring the O2CB driver in SUSE Linux Enterprise Server
On SUSE Linux Enterprise Server (SLES), you may use the configure option of the o2cb init script:
# /etc/init.d/o2cb configure
Configuring the O2CB driver.

This will configure the on-boot properties of the O2CB driver.
The following questions will determine whether the driver is loaded on
boot.  The current values will be shown in brackets ('[]').  Hitting
<ENTER> without typing an answer will keep that current value.  Ctrl-C
will abort.

Load O2CB driver on boot (y/n) [y]:
Cluster to start on boot (Enter "none" to clear) [ocfs2]:
Specify heartbeat dead threshold (>=7) [31]:
Specify network idle timeout in ms (>=5000) [30000]:
Specify network keepalive delay in ms (>=1000) [2000]:
Specify network reconnect delay in ms (>=2000) [2000]:
Use user-space driven heartbeat? (y/n) [n]:
Writing O2CB configuration: OK
Loading module "configfs": OK
Mounting configfs filesystem at /sys/kernel/config: OK
Loading module "ocfs2_nodemanager": OK
Loading module "ocfs2_dlm": OK
Loading module "ocfs2_dlmfs": OK
Mounting ocfs2_dlmfs filesystem at /dlm: OK
Starting O2CB cluster ocfs2: OK
Configuring the O2CB driver in Debian GNU/Linux systems
On Debian, the configure option to /etc/init.d/o2cb is not available. Instead, reconfigure the ocfs2-tools package to enable the driver:
# dpkg-reconfigure -p medium -f readline ocfs2-tools
Configuring ocfs2-tools
Would you like to start an OCFS2 cluster (O2CB) at boot time? yes
Name of the cluster to start at boot time: ocfs2
The O2CB heartbeat threshold sets up the maximum time in seconds that a node
awaits for an I/O operation. After it, the node "fences" itself, and you will
probably see a crash.

It is calculated as the result of: (threshold - 1) x 2.

Its default value is 31 (60 seconds).

Raise it if you have slow disks and/or crashes with kernel messages like:

o2hb_write_timeout: 164 ERROR: heartbeat write timeout to device XXXX after NNNN
milliseconds
O2CB Heartbeat threshold: `31`
		Loading filesystem "configfs": OK
Mounting configfs filesystem at /sys/kernel/config: OK
Loading stack plugin "o2cb": OK
Loading filesystem "ocfs2_dlmfs": OK
Mounting ocfs2_dlmfs filesystem at /dlm: OK
Setting cluster stack "o2cb": OK
Starting O2CB cluster ocfs2: OK
Optimizing DRBD Performance
13. Measuring block device performance
13.1. Measuring throughput
When measuring the impact of using DRBD on a system’s I/O throughput, the absolute throughput the system is capable of is of little relevance. What is much more interesting is the relative impact DRBD has on I/O performance. Therefore, it is always necessary to measure I/O throughput both with and without DRBD.
| The tests described in this section are intrusive; they overwrite data and bring DRBD devices out of sync. It is therefore vital that you perform them only on scratch volumes which can be discarded after testing has completed. |
I/O吞吐量估计的工作原理是将大量数据写入块设备,并测量系统完成写入操作所需的时间。这可以使用相当普遍的实用程序 dd 轻松完成,该实用程序的最新版本包括内置的吞吐量估计。
一个简单的基于 dd 的吞吐量基准,假设您有一个名为 test 的临时资源,该资源当前已连接并且在两个节点上都处于次要角色,如下所示:
# TEST_RESOURCE=test
# TEST_DEVICE=$(drbdadm sh-dev $TEST_RESOURCE | head -1)
# TEST_LL_DEVICE=$(drbdadm sh-ll-dev $TEST_RESOURCE | head -1)
# drbdadm primary $TEST_RESOURCE
# for i in $(seq 5); do
    dd if=/dev/zero of=$TEST_DEVICE bs=1M count=512 oflag=direct
  done
# drbdadm down $TEST_RESOURCE
# for i in $(seq 5); do
    dd if=/dev/zero of=$TEST_LL_DEVICE bs=1M count=512 oflag=direct
  done
此测试只需将512MiB的数据写入DRBD设备,然后写入其备份设备进行比较。这两项测试各重复5次,以便进行一些统计平均。相关结果是由 dd 生成的吞吐量测量。
对于刚刚启用的DRBD设备,在第一次 dd 运行时性能会略有下降是正常的。这是因为活动日志是 冷 的,不需要担心。
|
有关一些性能数据,请参阅我们的 Optimizing DRBD throughput 一章。
13.2. Measuring latency
延迟测量的目标与吞吐量基准完全不同:在I/O延迟测试中,一个人会写入非常小的数据块(理想情况下是系统可以处理的最小数据块),并观察完成该写入所需的时间。这个过程通常重复几次,以解释正常的统计波动。
与吞吐量测量一样,可以使用无处不在的 dd 实用程序执行I/O延迟测量,尽管设置不同,观察的焦点完全不同。
下面提供了一个简单的基于 dd 的延迟微基准测试,假设您有一个名为 test 的临时资源,该资源当前已连接,并且在两个节点上都处于次要角色:
# TEST_RESOURCE=test
# TEST_DEVICE=$(drbdadm sh-dev $TEST_RESOURCE | head -1)
# TEST_LL_DEVICE=$(drbdadm sh-ll-dev $TEST_RESOURCE | head -1)
# drbdadm primary $TEST_RESOURCE
# dd if=/dev/zero of=$TEST_DEVICE bs=4k count=1000 oflag=direct
# drbdadm down $TEST_RESOURCE
# dd if=/dev/zero of=$TEST_LL_DEVICE bs=4k count=1000 oflag=direct
这个测试用4kiB分别将1000个数据块写入DRBD设备,然后写入其备份设备进行比较。4096字节是Linux系统(除了s390以外的所有体系结构)、现代硬盘和固态硬盘预计要处理的最小块大小。
重要的是要了解由 dd 生成的吞吐量测量与此测试完全无关;重要的是在完成所述1000次写入过程中经过的时间。将此时间除以1000可得出单个块写入的平均延迟。
| This is the worst-case, in that it is single-threaded and does one write strictly after the one before, that is, it runs with an I/O-depth of 1. Please refer to Latency compared to IOPS. |
此外,有关一些典型的性能值,请参阅我们的Optimizing DRBD latency一章。
14. Optimizing DRBD throughput
本章讨论优化DRBD吞吐量。它研究了与吞吐量优化有关的一些硬件考虑因素,并详细介绍了为此目的提出的优化建议。
14.1. Hardware considerations
DRBD吞吐量受底层I/O子系统(磁盘、控制器和相应缓存)的带宽和复制网络的带宽的影响。
I/O subsystem throughput is determined, largely, by the number and type of storage units (disks, SSDs, other Flash storage [like FusionIO], …) that can be written to in parallel. A single, reasonably recent, SCSI or SAS disk will typically allow streaming writes of roughly 40MiB/s to the single disk; an SSD will do 300MiB/s; one of the recent Flash storages (NVMe) will be at 1GiB/s. When deployed in a striping configuration, the I/O subsystem will parallelize writes across disks, effectively multiplying a single disk’s throughput by the number of stripes in the configuration. Therefore, the same 40MiB/s disks will allow effective throughput of 120MiB/s in a RAID-0 or RAID-1+0 configuration with three stripes, or 200MiB/s with five stripes; with SSDs, NVMe, or both, you can easily get to 1GiB/sec.
一个带有RAM和BBU的RAID控制器可以加速短峰值(通过缓冲它们),因此太短的基准测试可能也会显示类似于1GiB/s的速度;对于持续的写操作,它的缓冲区只会满负荷运行,然后就没有多大帮助。
| 硬件中的磁盘镜像(RAID-1)通常对吞吐量的影响很小(如果有的话)。带奇偶校验的磁盘条带(RAID-5)确实对吞吐量有影响,与条带相比通常是不利的;软件中的RAID-5和RAID-6更是如此。 |
Network throughput is usually determined by the amount of traffic present on the network, and on the throughput of any routing/switching infrastructure present. These concerns are, however, largely irrelevant in DRBD replication links which are normally dedicated, back-to-back network connections. Therefore, network throughput may be improved either by switching to a higher-throughput hardware (such as 10 Gigabit Ethernet, or 56 Gbit InfiniBand), or by using link aggregation over several network links, as one may do using the Linux bonding network driver.
14.2. Estimating DRBD’s effects on throughput
When estimating the throughput effects associated with DRBD, it is important to consider the following natural limitations:
-
DRBD吞吐量受到原始I/O子系统的限制。
-
DRBD的吞吐量受到可用网络带宽的限制。
The lower of these two establishes the theoretical throughput maximum available to DRBD. DRBD then reduces that baseline throughput maximum number by DRBD’s additional I/O activity, which can be expected to be less than three percent of the baseline number.
-
Consider the example of two cluster nodes containing I/O subsystems capable of 600 MB/s throughput, with a Gigabit Ethernet link available between them. Gigabit Ethernet can be expected to produce 110 MB/s throughput for TCP connections, therefore the network connection would be the bottleneck in this configuration and one would expect about 110 MB/s maximum DRBD throughput.
-
相比之下,如果I/O子系统仅能够以80 MB/s的速度进行持续的写操作,那么它就构成了瓶颈,您应该只期望大约77 MB/s的最大DRBD吞吐量。
14.3. Tuning recommendations
DRBD offers several configuration options which may have an effect on your system’s throughput. This section list some recommendations for tuning for throughput. However, since throughput is largely hardware dependent, the effects of tweaking the options described here may vary greatly from system to system. It is important to understand that these recommendations should not be interpreted as “silver bullets” which would magically remove any and all throughput bottlenecks.
14.3.1. 设置 max-buffers 和 max-epoch-size
这些选项会影响辅助节点上的写入性能。max buffers 是DRBD为将数据写入磁盘而分配的最大缓冲区数,而 max-epoch-size 是两个写入屏障之间允许的最大写入请求数。max buffers 必须等于或大于 max-epoch-size ,才能提高性能。两者的默认值都是2048;对于大多数合理的高性能硬件RAID控制器来说,将其设置为8000左右应该没问题。
resource <resource> {
  net {
    max-buffers    8000;
    max-epoch-size 8000;
    ...
  }
  ...
}
14.3.2. Tuning the TCP send buffer size
The TCP send buffer is a memory buffer for outgoing TCP traffic. By default, DRBD uses TCP send buffer auto-tuning (sndbuf-size set to 0), which dynamically selects an appropriate buffer size.
If you want to set a fixed buffer size instead, you can do so explicitly. For high-throughput networks (such as dedicated Gigabit Ethernet or load-balanced bonded connections), a size of 2MiB or more might help. Send buffer sizes of more than 16MiB are generally not recommended (and are also unlikely to produce any throughput improvement).
resource <resource> {
  net {
    sndbuf-size 2M;
    ...
  }
  ...
}
请注意,您的 sysctl 设置 net.ipv4.tcp_rmem 和 net.ipv4.tcp_wmem 仍将影响行为;您应该检查这些设置,并可能将它们设置为类似于 131072 1048576 16777216 (最小128kiB,默认1MiB,最大16MiB)。
net.ipv4.tcp_mem 是另一个怪兽,有不同的单位-不要碰,错误的值很容易把你的机器推入内存不足的情况!
|
14.4. Achieving better read performance through increased redundancy
如 read-balancing 下 drbd.conf 的手册页所述,可以通过添加更多数据副本来提高读取性能。
As a ballpark figure: with a single node processing read requests, fio on a FusionIO card gave us 100k IOPS; after enabling read-balancing, the performance jumped to 180k IOPS, i.e. +80%!
So, in case you’re running a read-mostly workload (big databases with many random reads), it might be worth a try to turn read-balancing on – and, perhaps, add another copy for still more read IO throughput.
15. Optimizing DRBD latency
本章讨论优化DRBD延迟。它研究了与延迟最小化有关的一些硬件考虑,并详细介绍了为此目的而提出的优化建议。
15.1. Hardware considerations
DRBD延迟既受底层I/O子系统(磁盘、控制器和相应缓存)的延迟影响,也受复制网络的延迟影响。
For rotating media the I/O subsystem latency is primarily a function of disk rotation speed. Therefore, using fast-spinning disks is a valid approach for reducing I/O subsystem latency.
对于 固态媒体 (如固态硬盘),闪存控制器是决定因素;下一个最重要的因素是未使用的容量。使用DRBD的Trim and discard support将帮助您向控制器提供所需的信息,哪些块可以循环使用。这样,当一个写请求进入时,它可以使用一个提前清理过的块,而不必等待至 现在 直到有可用的空间为止。[9]
Likewise, the use of a battery-backed write cache (BBWC) reduces write completion times, also reducing write latency. Most reasonable storage subsystems come with some form of battery-backed cache, and allow the administrator to configure which portion of this cache is used for read and write operations. The recommended approach is to disable the disk read cache completely and use all available cache memory for the disk write cache.
Network latency is, in essence, the packet round-trip time (RTT) between hosts. It is influenced by several factors, most of which are irrelevant on the dedicated, back-to-back network connections recommended for use as DRBD replication links. Therefore, it is sufficient to accept that a certain amount of latency always exists in network links, which typically is on the order of 100 to 200 microseconds (μs) packet RTT for Gigabit Ethernet.
Network latency may typically be pushed below this limit only by using lower-latency network protocols, such as running DRBD over Dolphin Express using Dolphin SuperSockets, or a 10GBe direct connection; these are typically in the 50µs range. Even better is InfiniBand, which provides even lower latency.
15.2. Estimating DRBD’s effects on latency
As for throughput, when estimating the latency effects associated with DRBD, there are some important natural limitations to consider:
-
DRBD延迟受原始I/O子系统的延迟限制。
-
DRBD延迟受可用网络延迟的约束。
The sum of the two establishes the theoretical latency minimum incurred to DRBD[10]. DRBD then adds to that latency a slight additional latency, which can be expected to be less than one percent.
-
以本地磁盘子系统为例,其写延迟为3ms,网络链路为0.2ms。那么,预期的DRBD延迟将为3.2ms,或者仅写到本地磁盘的延迟大约增加7%。
| Latency may be influenced by several other factors, including CPU cache misses, context switches, and others. |
15.3. Latency compared to IOPS
IOPS is the abbreviation of “I/O operations per second“.
Marketing typically doesn’t like numbers that get smaller; press releases aren’t written with “Latency reduced by 10µs, from 50µs to 40µs now!” in mind, they like “Performance increased by 25%, from 20000 to now 25000 IOPS” much more. Therefore IOPS were invented – to get a number that says “higher is better”.
So, IOPS are the reciprocal of latency. The method in Measuring latency gives you a latency measurement based on the number of IOPS for a purely sequential, single-threaded I/O load. Most other documentation will give measurements for some highly parallel I/O load[11], because this gives much larger numbers.
So, please don’t shy away from measuring serialized, single-threaded latency. If you want a large IOPS number, run the fio utility with threads=8 and an iodepth=16, or some similar settings… But please remember that these numbers will not have any meaning to your setup, unless you’re driving a database with many tens or hundreds of client connections active at the same time.
15.4. Tuning recommendations
15.4.1. Setting DRBD’s CPU mask
DRBD allows you to set an explicit CPU mask for its kernel threads. By default, DRBD picks a single CPU for each resource. All the threads for this resource run on this CPU. This policy is generally optimal when the goal is maximum aggregate performance with more DRBD resources than CPU cores. If instead you want to maximize the performance of individual resources at the cost of total CPU usage, you can use the CPU mask parameter to allow the DRBD threads to use multiple CPUs.
In addition, for detailed fine-tuning, you can coordinate the placement of application threads with the corresponding DRBD threads. Depending on the behavior of the application and the optimization goals, it may be beneficial to either use the same CPU, or to separate the threads onto independent CPUs, that is, restrict DRBD from using the same CPUs that are used by the application.
The CPU mask value that you set in a DRBD resource configuration is a hex number (or else a string of comma-separated hex numbers, to specify a mask that includes a system’s 33rd CPU core or beyond). You can specify a mask that has up to a maximum of 908 CPU cores.
When represented in binary, the least significant bit of the CPU mask represents the first CPU, the second-least significant bit the second CPU, and so forth, up to a maximum of 908 CPU cores. A set bit (1) in the binary representation of the mask means that DRBD can use the corresponding CPU. A cleared bit (0) means that DRBD cannot use the corresponding CPU.
For example, a CPU mask of 0x1 (00000001 in binary) means DRBD can use the first CPU only. A mask of 0xC (00001100 in binary) means that DRBD can use the third and fourth CPU.
To convert a binary mask value to the hex value (or string of hex values) needed for your DRBD resource configuration file, you can use the following commands, provided that you have the bc utility installed. For example, to get the hex value for the binary number 00001100 and apply the necessary formatting for the CPU mask value string, enter the following:
$ binmask=00001100
$ echo "obase=16;ibase=2;$binmask" | BC_LINE_LENGTH=0 bc | \
sed ':a;s/\([^,]\)\([^,]\{8\}\)\($\|,\)/\1,\2\3/;p;ta;s/,0\+/,/g' | tail -n 1
The sed command above transforms the resulting hex number (converted from the binary number in the binmask variable, into a string format that the function that parses the cpu-mask string expects.
|
Output from these commands will be C. You can then use this value in your resource configuration file, as follows, to limit DRBD to only use the third and fourth CPU cores:
resource <resource> {
  options {
    cpu-mask C;
    ...
  }
  ...
}
If you need to specify a mask that represents more than 32 CPUs then you will need to use a comma separated list of 32 bit hex values[12], up to a maximum of 908 CPU cores. A comma must separate every group of eight hex digits (32 binary digits) in the string.
For a contrived, more complex example, if you wanted to restrict DRBD to using just the 908th, 35th, 34th, 5th, 2nd, and 1st CPUs, you would set your CPU mask as follows:
$ binmask=10000000000000000000000000000000000000000000000000000000000000000000000000000000000000000000000000000000000000000000000000000000000000000000000000000000000000000000000000000000000000000000000000000000000000000000000000000000000000000000000000000000000000000000000000000000000000000000000000000000000000000000000000000000000000000000000000000000000000000000000000000000000000000000000000000000000000000000000000000000000000000000000000000000000000000000000000000000000000000000000000000000000000000000000000000000000000000000000000000000000000000000000000000000000000000000000000000000000000000000000000000000000000000000000000000000000000000000000000000000000000000000000000000000000000000000000000000000000000000000000000000000000000000000000000000000000000000000000000000000000000000000000000000000000000000000000000000000000000000000000000000000000000000000000000000000011000000000000000000000000000010011
$ echo "obase=16;ibase=2;$binmask" | BC_LINE_LENGTH=0 bc | \
sed ':a;s/\([^,]\)\([^,]\{8\}\)\($\|,\)/\1,\2\3/;p;ta;s/,0\+/,/g' | tail -n 1
Output from this command will be:
$ 800,,,,,,,,,,,,,,,,,,,,,,,,,,,6,13
You would then set the CPU mask parameter in your resource configuration to:
cpu-mask 800,,,,,,,,,,,,,,,,,,,,,,,,,,,6,13
|
Of course, to minimize CPU competition between DRBD and the application using it, you need to configure your application to use only those CPUs which DRBD does not use. Some applications might provide for this through an entry in a configuration file, just like DRBD itself. Others include an invocation of the |
|
保持DRBD线程在相同的L2/L3缓存上运行是有意义的。 However, the numbering of CPUs doesn’t have to correlate with the physical partitioning. You can try the |
15.4.2. Modifying the network MTU
It may be beneficial to change the replication network’s maximum transmission unit (MTU) size to a value higher than the default of 1500 bytes. Colloquially, this is referred to as “enabling Jumbo frames”.
可以使用以下命令更改MTU:
# ifconfig <interface> mtu <size>
或
# ip link set <interface> mtu <size>
<interface> refers to the network interface used for DRBD replication. A typical value for <size> would be 9000 (bytes).
15.4.3. Enabling the deadline I/O scheduler
When used in conjunction with high-performance, write back enabled hardware RAID controllers, DRBD latency may benefit greatly from using the simple deadline I/O scheduler, rather than the CFQ scheduler. The latter is typically enabled by default.
Modifications to the I/O scheduler configuration may be performed through the sysfs virtual file system, mounted at /sys. The scheduler configuration is in /sys/block/device, where <device> is the backing device DRBD uses.
You can enable the deadline scheduler with the following command:
# echo deadline > /sys/block/<device>/queue/scheduler
You may then also set the following values, which may provide additional latency benefits:
-
Disable front merges:
# echo 0 > /sys/block/<device>/queue/iosched/front_merges
-
Reduce read I/O deadline to 150 milliseconds (the default is 500ms):
# echo 150 > /sys/block/<device>/queue/iosched/read_expire
-
Reduce write I/O deadline to 1500 milliseconds (the default is 3000ms):
# echo 1500 > /sys/block/<device>/queue/iosched/write_expire
If these values effect a significant latency improvement, you may want to make them permanent so they are automatically set at system startup. Debian and Ubuntu systems provide this functionality through the sysfsutils package and the /etc/sysfs.conf configuration file.
You may also make a global I/O scheduler selection by passing the elevator parameter through your kernel command line. To do so, edit your boot loader configuration (normally found in /etc/default/grub if you are using the GRUB boot loader) and add elevator=deadline to your list of kernel boot options.
Learning More
16. DRBD internals
本章介绍了DRBD的一些内部算法和结构的背景信息。它是为有兴趣的用户希望获得DRBD一定程度的背景知识。它没有深入研究DRBD的内部工作机制,不能作为DRBD开发人员的参考。为此,请参阅出版物中列出的论文,当然也请参阅DRBD源代码中的注释。
16.1. DRBD metadata
DRBD stores various pieces of information about the data it keeps in a dedicated area. This metadata includes:
-
DRBD设备的大小,
-
生成标识符(GI,详细说明见Generation identifiers),
-
活动日志(AL,在The activity log中详细描述)。
-
快速同步位图(详见The quick-sync bitmap),
此元数据可以存储在内部或外部。所使用的方法是基于每个资源可配置的。
16.1.1. Internal metadata
Configuring a resource to use internal metadata means that DRBD stores its metadata on the same physical lower-level device as the actual production data. It does so by setting aside an area at the end of the device for the specific purpose of storing metadata.
Since the metadata are inextricably linked with the actual data, no special action is required from the administrator in case of a hard disk failure. The metadata are lost together with the actual data and are also restored together.
In case of the lower-level device being a single physical hard disk (as opposed to a RAID set), internal metadata may negatively affect write throughput. The performance of write requests by the application may trigger an update of the metadata in DRBD. If the metadata are stored on the same magnetic disk of a hard disk, the write operation may result in two additional movements of the write/read head of the hard disk.
|
If you are planning to use internal metadata in conjunction with an existing lower-level device that already has data that you want to preserve, you must account for the space required by DRBD’s metadata. 否则,在创建DRBD资源时,新创建的元数据将覆盖较低级别设备末尾的数据,从而可能在该过程中破坏现有文件。 |
要避免这种情况,您必须执行以下操作之一:
-
Enlarge your lower-level device. This is possible with any logical volume management facility (such as LVM) provided that you have free space available in the corresponding volume group. It may also be supported by hardware storage solutions.
-
缩容较低级别设备上的现有文件系统。您的文件系统可能支持,也可能不支持。
-
If neither of the two are possible, use external metadata instead.
要估计必须放大低级设备或缩小文件系统的数量,请参见Estimating metadata size。
16.1.2. External metadata
External metadata is simply stored on a separate, dedicated block device distinct from that which holds your production data.
For some write operations, using external metadata produces a somewhat improved latency behavior.
Meta data are not inextricably linked with the actual production data. This means that manual intervention is required in the case of a hardware failure destroying just the production data (but not DRBD metadata), to effect a full data sync from the surviving node onto the subsequently replaced disk.
Use of external metadata is also the only viable option if all of the following apply:
-
You are using DRBD to duplicate an existing device that already contains data you want to preserve, and
-
现有设备不支持扩容,并且
-
设备上现有的文件系统不支持收缩。
To estimate the required size of the block device dedicated to hold your device metadata, see Estimating metadata size.
| External metadata requires a minimum of a 1MB device size. |
16.1.3. Estimating metadata size
You may calculate the exact space requirements for DRBD’s metadata using the following formula:

Cs is the data device size in sectors, and N is the maximum number of peer bitmap slots configured in the metadata (bm-max-peers).
These formulas assume the default bitmap granularity of 4 KiB per bit. If you use a different bm-bytes-per-bit setting, the bitmap portion of the metadata scales inversely with the granularity.
|
您可以通过发出 blockdev --getsize64 <device> ;为转换为MB,除以1048576(=220或10242)来检索设备大小(字节)。
|
实际上,您可以使用一个相当好的近似值,如下所示。注意,在这个公式中,单位是兆字节,而不是扇区:

16.2. Generation identifiers
DRBD generation identifiers (GIs) are information within DRBD resource metadata that identify “generations” of replicated data, so called “data generations”. GIs might be used, for example, to determine that resource data on one node is older than on another node.
Beyond this basic use, DRBD also uses GIs internally for
-
Determining whether nodes are members of the same cluster (as opposed to nodes that were connected accidentally)
-
Determining whether full re-synchronization is necessary or whether partial re-synchronization is sufficient
-
Determining the direction of background re-synchronization (if necessary)
-
Identifying a split brain situation
16.2.1. Data generations
Whenever a resource is in the Connected connection state, and the disk state of nodes in a cluster is UpToDate, the current data generation on the nodes is the same.
DRBD marks the start of a new data generation, by using an 8-byte universally unique identifier (UUID), for each of the following events:
-
An initial device full synchronization
-
A primary node that disconnects from a peer
-
A disconnected resource switching to the primary role
Apart from when primary --force is used, DRBD will mark the start of a new generation upon the next data write to the resource, which might be some time after the event occurs.
The UUID implementation uses the lowest bit to encode the role of the node (primary or secondary). Therefore, the lowest bit can be different on nodes in a cluster but the nodes can still be considered to have the same data generation.
16.2.2. Generation identifier UUIDs
DRBD keeps some pieces of information about current and historical data generations in the local resource metadata. The different generation identifier UUIDs serve different purposes, detailed as follows.
This is the generation identifier for the current data generation, as seen from the perspective of the local node. When a resource is Connected and fully synchronized, the current UUID is identical between nodes, except for the earlier mentioned lowest bit which might be different based on the resource role (primary or secondary).
This is the UUID of the generation against which the DRBD quick-sync bitmap is tracking changes (per peer). Like the quick-sync bitmap itself, this identifier is only relevant when a peer resource is disconnected. This UUID is empty (zero) when a resource is in a Connected state.
These are the identifiers of preceding data generations, maintained as a rolling history. New entries are pushed to the front, and older entries are shifted out when the buffer is full.
16.2.3. When generation identifiers change
When DRBD updates GIs is different in DRBD 9 than it was in DRBD 8. A node generates a new GI and updates generation identifiers on the first data write (or I/O completion) if
-
The node is in a Primary role and it loses an earlier established replication link, that is, it cannot connect to a secondary peer node.
-
The node is in a Secondary role and is promoted to Primary but cannot communicate to one or more peers.
Also, in a dual-primary mode cluster, a primary node will not generate a new GI if it loses connection to the other primary node.
The way DRBD 9 updates GIs is an improvement from DRBD 8 because it prevents data divergence (split brains) if a node becomes Primary but then does not write anything.
The following diagram shows example before and after changes to generation identifiers for a resource on a primary node.

-
An event in the cluster causes a new data generation.
-
The primary node creates a new UUID. This becomes the new current UUID for the primary node.
-
The previous current UUID becomes the new bitmap UUID, but only for peers that are disconnected. As mentioned earlier, the bitmap UUID refers to the data generation that the quick-sync bitmap is tracking changes against.
16.2.4. How DRBD uses generation identifiers
When a connection between two nodes is established, the two nodes exchange their currently available generation identifiers. After comparing the GIs, DRBD might take different actions. There are several possible outcomes.
The local node detects that both its current UUID and the peer’s current UUID are empty. This is the normal occurrence for a freshly configured resource that has not had the initial full synchronization initiated. No synchronization takes place; it has to be started manually.
The local node detects that the peer’s current UUID is empty, and its own is not. This is the normal case for a freshly configured resource on which the initial full synchronization has just been initiated, the local node having been selected as the initial synchronization source. DRBD now sets all bits in the quick-sync bitmap (meaning it considers the entire device out-of-sync), and starts synchronizing as a synchronization source. In the opposite case (local current UUID empty, peer’s non-empty), DRBD performs the same steps, except that the local node becomes the synchronization target.
本地节点检测到其当前UUID和对等方的当前UUID不为空且相等。这是资源在处于次要角色时进入断开连接模式的正常情况,并且在断开连接时未在任何节点上升级。不需要同步,因为不需要同步。
The local node detects that its bitmap UUID matches the peer’s current UUID, and that the peer’s bitmap UUID is empty. This is the normal and expected occurrence after a secondary node failure, with the local node being in the primary role. It means that the peer never became primary in the meantime and worked on the basis of the same data generation all along. DRBD now initiates a normal background re-synchronization, with the local node becoming the synchronization source. If, conversely, the local node detects that its bitmap UUID is empty, and that the peer’s bitmap matches the local node’s current UUID, then that is the normal and expected occurrence after a failure of the local node. Again, DRBD now initiates a normal, background re-synchronization, with the local node becoming the synchronization target.
The local node detects that its current UUID matches one of the peer’s historical UUIDs. This implies that while the two data sets share a common ancestor, and the peer node has the up-to-date data, the information kept in the peer node’s bitmap is outdated and not usable. Therefore, a normal synchronization would be insufficient. DRBD now marks the entire device as out-of-sync and initiates a full background re-synchronization, with the local node becoming the synchronization target. In the opposite case (one of the local node’s historical UUID matches the peer’s current UUID), DRBD performs the same steps, except that the local node becomes the synchronization source.
The local node detects that its current UUID differs from the peer’s current UUID, and that the bitmap UUIDs match. This is a split brain, but one where the data generations have the same parent. This means that DRBD invokes split brain auto-recovery strategies, if configured. Otherwise, DRBD disconnects and waits for manual split brain resolution.
The local node detects that its current UUID differs from the peer’s current UUID, and that the bitmap UUIDs do not match. This is split brain with unrelated ancestor generations, therefore auto-recovery strategies, even if configured, are moot. DRBD disconnects and waits for manual split brain resolution.
Finally, in case DRBD does not detect even a single matching element in the two nodes’ generation identifiers, it logs a warning about unrelated data and disconnects. This is DRBD’s safeguard against accidental connection of two cluster nodes that have never heard of each other before.
16.3. The activity log
16.3.1. 目的
During a write operation DRBD forwards the write operation to the local backing block device, but also sends the data block over the network. These two actions occur, for all practical purposes, simultaneously. Random timing behavior may cause a situation where the write operation has been completed, but the transmission over the network has not yet taken place, or vice versa.
If, at this moment, the active node fails and failover is being initiated, then this data block is out of sync between nodes — it has been written on the failed node prior to the failure, but replication has not yet completed. Therefore, when the node eventually recovers, this block must be removed from the data set during subsequent synchronization. Otherwise, the failed node would be “one write ahead” of the surviving node, which would violate the “all or nothing” principle of replicated storage. This is an issue that is not limited to DRBD, in fact, this issue exists in practically all replicated storage configurations. Many other storage solutions (just as DRBD itself, prior to version 0.7) therefore require that after a failure of the active node the data must be fully synchronized after its recovery.
DRBD’s approach, since version 0.7, is a different one. The activity log (AL), stored in the metadata area, keeps track of those blocks that have “recently” been written to. Colloquially, these areas are referred to as hot extents.
If a temporarily failed node that was in active mode at the time of failure is synchronized, only those hot extents highlighted in the AL need to be synchronized (plus any blocks marked in the bitmap on the now-active peer), rather than the full device. This drastically reduces synchronization time after an active node failure.
16.3.2. Active extents
The activity log has a configurable parameter, the number of active extents. Every active extent adds 4MiB to the amount of data being retransmitted after a Primary failure. This parameter must be understood as a compromise between the following opposites:
Keeping a large activity log improves write throughput. Every time a new extent is activated, an old extent is reset to inactive. This change requires a write operation to the metadata area. If the number of active extents is high, old active extents are swapped out fairly rarely, reducing metadata write operations and thereby improving performance.
保持一个小的活动日志可以减少活动节点故障和后续恢复后的同步时间。
16.3.3. Selecting a suitable activity log size
Consideration of the number of extents should be based on the desired synchronization time at a given synchronization rate. The number of active extents can be calculated as follows:

R 是同步速率,以MiB/s为单位。t~sync 是目标同步时间,以秒为单位。E 是活动范围的结果数量。
举个例子,假设集群有一个I/O子系统,其吞吐量 (R) 为200兆字节/秒,配置为60兆字节/秒的同步速率,并且我们希望将目标同步时间(ttsync)保持在4分或240秒:

最后,DRBD 9需要在次要节点上保持AL,因为它们的数据可能用于同步其他次要节点。
16.4. The quick-sync bitmap
The quick-sync bitmap is the internal data structure which DRBD uses, on a per-resource per-peer basis, to keep track of blocks being in sync (identical on both nodes) or out-of sync. It is only relevant when a resource is in disconnected mode.
In the quick-sync bitmap, one bit represents a chunk of on-disk data. By default, each bit covers 4 KiB, but since DRBD 9.3, this is configurable up to 1 MiB per bit. If the bit is cleared, it means that the corresponding block is still in sync with the peer node. That implies that the block has not been written to since the time of disconnection. Conversely, if the bit is set, it means that the block has been modified and needs to be re-synchronized whenever the connection becomes available again.
As DRBD detects write I/O on a disconnected device, and therefore starts setting bits in the quick-sync bitmap, it does so in RAM — therefore avoiding expensive synchronous metadata I/O operations. Only when the corresponding blocks turn cold (that is, expire from the Activity Log), DRBD makes the appropriate modifications in an on-disk representation of the quick-sync bitmap. Likewise, if the resource happens to be manually shut down on the remaining node while disconnected, DRBD flushes the complete quick-sync bitmap out to persistent storage.
当对等节点恢复或重新建立连接时,DRBD结合来自两个节点的位图信息来确定必须重新同步的 总数据集 。同时,DRBDexamines the generation identifiers以确定同步的 方向 。
然后,作为同步源的节点将商定的块发送到对等节点,在同步目标确认修改时清除位图中的同步位。如果重新同步现在被中断(例如,被另一个网络中断)并随后恢复,它将在中断的地方继续 — 当然,同时修改的任何其他块都会被添加到重新同步数据集中。
Re-synchronization may be also be paused and resumed manually with the drbdadm pause-sync and drbdadm resume-sync commands. You should, however, not do so light-heartedly — interrupting re-synchronization leaves your secondary node’s disk Inconsistent longer than necessary.
|
16.5. The peer-fencing interface
DRBD has an interface defined for fencing[13] the peer node in case of the replication link being interrupted. The fence-peer should mark the disk(s) on the peer node as Outdated, or shut down the peer node. It has to fulfill these tasks under the assumption that the replication network is down.
只有在出现以下情况时才会调用击剑助手
-
在资源的(或“common”)“handler s”部分中定义了“fence peer”处理程序,然后_
-
资源的“fencing”选项设置为“resource only”或“resource and stonith”_
-
the node was primary and the replication link is interrupted long enough for DRBD[14] to detect a network failure. or
-
the node should promote to primary and is not connected to the peer and the peer’s disks are not already marked as Outdated.
当调用指定为“fence peer”处理程序的程序或脚本时,它具有“DRBD_RESOURCE”和“DRBD_peer”环境变量。它们分别包含受影响的DRBD资源的名称和对等主机名。
任何对等围栏帮助程序(或脚本)必须返回以下退出代码之一:
| Exit code | Implication |
|---|---|
3 |
Peer’s disk state was already Inconsistent. |
4 |
Peer’s disk state was successfully set to Outdated (or was Outdated to begin with). |
5 |
Connection to the peer node failed, peer could not be reached. |
6 |
Peer refused to be outdated because the affected resource was in the primary role. |
7 |
Peer node was successfully fenced off the cluster. This should never occur unless |
16.6. The client mode
Since version 9.0.13 DRBD supports clients. A client in DRBD speak is just a permanently diskless node. In the configuration, it is expressed by using the keyword none for the backing block device (the disk keyword). You will notice that in the drbdsetup status output you will see the Diskless disk status displayed in green color. (Usually, a disk state of Diskless is displayed in red).
Internally all the peers of an intentional diskless node are configured with the peer-device-option --bitmap=no. That means that they will not allocate a bitmap slot in the meta-data for the intentional diskless peer. On the intentional diskless node the device gets marked with the option --diskless=yes while it is created with the new-minor sub-command of drbdsetup.
These flags are visible through the events2 status command:
-
a
devicemight have theclient:field. If it reportsyesthe local device was marked to be permanently diskless. -
a
peer-devicemight have thepeer-clientfiled. If it saysyesthen there is no change-tracking bitmap to that peer.
Relevant commands and implications:
-
You can only run
drbdsetup peer-device-options --bitmap=yes …if bitmap slots are available in the meta-data, since a bitmap-slot gets allocated. -
The command
drbdsetup peer-device-options --bitmap=no …is only possible if the peer is diskless, it does not unallocate the bitmap-slot. -
drbdsetup forget-peer …is used to irrevocable free the bitmap-slot assigned to a certain peer. -
Connecting two peers with disk where one (or both) expect the peer to be permanently diskless fails.
17. Getting more information
17.1. Commercial DRBD support
Commercial DRBD support, consultation, and training services are available from the project’s sponsor company, LINBIT.
17.2. Community forum
LINBIT maintains a community forum for asking questions, sharing knowledge, getting software release announcements, and learning about how others might be using DRBD and other LINBIT software. You can join or browse the LINBIT Community Forum at: https://forums.linbit.com.
17.3. Official X account
LINBIT maintains an official X (formerly Twitter) account.
If you post about DRBD, please include the #drbd hashtag.
17.4. 出版物
DRBD’s authors have written and published several papers on DRBD in general, or a specific aspect of DRBD. Here is a short selection:
-
Philipp Reisner. DRBD 9 – What’s New, 2012.
-
Lars Ellenberg. DRBD v8.0.x and beyond, 2007.
-
Philipp Reisner. DRBD v8 – Replicated Storage with Shared Disk Semantics, 2007.
-
Philipp Reisner. Rapid resynchronization for replicated storage, 2006.
17.5. Other useful resources
-
In addition to the user guide you are reading now, LINBIT provides more documentation such as how-to guides, video tutorials, and explanatory blog posts that are available through the LINBIT website:
-
User guides: https://linbit.com/user-guides-and-product-documentation
-
How-to guides: https://linbit.com/solutions-and-how-to-documentation
-
Blog: https://linbit.com/blog
-
-
LINBIT offers an official training course for DRBD: DRBD Basics.
-
Wikipedia has an entry on DRBD.
-
The ClusterLabs website has useful information about using DRBD in high-availability clusters.
附录
附录标题 A: Recent changes
This appendix is for users who upgrade from earlier DRBD versions to DRBD 9.x. It highlights some important changes to DRBD’s configuration and behavior.
A.1. DRBD 9.3 changelog
You can find an itemized list of updates, fixes, and changes to the DRBD 9.3 branch at the project’s open source codebase repository: https://github.com/LINBIT/drbd/blob/master/ChangeLog
Some of the highlights include:
-
Resync without replication (default). The resync operation begins with application write mirroring disabled and performs multiple passes to clear bitmap bits. Mirroring is enabled when resync is nearly complete, reducing I/O load and resync time.
-
Support for configurable bitmap granularity between 4 KiB and 1 MiB per bit, including exchanging bitmaps with peers that use a different bitmap block size.
-
Use compound pages to optimize large I/O performance.
A.2. DRBD 9.2 changelog
You can find an itemized list of updates, fixes, and changes to the DRBD 9.2 branch at the project’s open source codebase repository: https://github.com/LINBIT/drbd/blob/drbd-9.2/ChangeLog
Some of the highlights include:
-
Add RDMA transport.
-
Allow resync to proceed even with continuous application I/O.
-
Process control socket packets directly in “bottom half” context. This improves performance by decreasing latency.
-
Perform more discards when resyncing. Resync in multiples of discard granularity.
-
Support network namespaces, for better integration with containers and orchestrators such as Kubernetes.
A.3. DRBD 9.1 changelog
You can find an itemized list of updates, fixes, and changes to the DRBD 9.1 branch at the project’s open source codebase repository: https://github.com/LINBIT/drbd/blob/drbd-9.1/ChangeLog
Some of the highlights include:
-
Reduce locking contention in sending path. This increases performance of workloads with multiple peers or high I/O depth.
-
Improve support for various scenarios involving suspended I/O due to loss of quorum.
A.4. Changes coming from DRBD 8.4
If you are coming to DRBD 9.x from DRBD 8.4, some noteworthy changes are detailed in the following subsections.
A.4.1. 连接
With DRBD 9, data can be replicated across more than two nodes.
This also means that stacking DRBD volumes is now deprecated (though still possible), and that using DRBD as a network-blockdevice (a DRBD client) now makes sense.
Associated with this change are:
-
Metadata size changes (one bitmap per peer).
-
/proc/drbd现在只提供最少的信息,请参见drbdadm status. -
Resynchronization to or from multiple peers is possible.
-
The activity log is used even when in Secondary role.
A.4.2. Auto-promote feature
DRBD 9 can be configured to do the Primary/Secondary role switch automatically, on-demand.
此功能将替换 become-primary-on 配置值以及旧的Heartbeat v1 drbddisk 脚本。
See Automatic promotion of resources for more details.
附录标题 B: Upgrading DRBD from 8.4 to 9.x
This section covers the process of upgrading DRBD from version 8.4.x to 9.x in detail. For upgrades within version 9, and for special considerations when upgrading to a particular DRBD 9.x version, refer to the Upgrading DRBD chapter in this guide.
B.1. Compatibility
DRBD 9.a.b releases are generally protocol compatible with DRBD 8.c.d. In particular, all DRBD 9.a.b releases other than DRBD 9.1.0 to 9.1.7 inclusive are compatible with DRBD 8.c.d.
B.2. General overview
The general process for upgrading 8.4 to 9.x is as follows:
-
Configure the new repositories (if using packages from LINBIT).
-
Verify that the current situation is okay.
-
Pause any cluster manager.
-
Upgrade packages to install new versions .
-
If you want to move to more than two nodes, you will need to resize the lower-level storage to provide room for the additional metadata. This topic is discussed in the LVM Chapter.
-
Unconfigure resources, unload DRBD 8.4, and load the v9 kernel module.
-
Convert DRBD metadata to format
v09, perhaps changing the number of bitmaps in the same step. -
Start the DRBD resources and bring the cluster node online again if you are using a cluster manager.
B.3. Updating your repository
Due to the number of changes between the 8.4 and 9.x branches, LINBIT has created separate repositories for each. The best way to get LINBIT’s software installed on your machines, if you have a LINBIT customer or evaluation account, is to download a small Python helper script and run it on your target machines.
B.3.1. Using the LINBIT manage node helper script to enable LINBIT repositories
Running the LINBIT helper script will allow you to enable certain LINBIT package repositories. When upgrading from DRBD 8.4, it is recommended that you enable the drbd-9 package repository.
While the helper script does give you the option of enabling a drbd-9.0 package repository, this is not recommended as a way to upgrade from DRBD 8.4, as that branch only contains DRBD 9.0 and related software. It will likely be discontinued in the future and the DRBD versions 9.1+ that are available in the drbd-9 package repository are protocol compatible with version 8.4.
|
To use the script to enable the drbd-9 repository, refer to the instructions in this guide for Using a LINBIT Helper Script to Register Nodes and Configure Package Repositories
B.3.2. Debian/Ubuntu systems
When using LINBIT package repositories to update DRBD 8.4 to 9.1+, note that LINBIT currently only keeps two LTS Ubuntu versions up-to-date: Focal (20.04) and Jammy (22.04). If you are running DRBD v8.4, you are likely on an older version of Ubuntu Linux than these. Before using the helper script to add LINBIT package repositories to update DRBD, you would first need to update your system to a LINBIT supported LTS version.
B.4. Checking the DRBD state
Before you update DRBD, verify that your resources are in sync. The output of cat /proc/drbd should show an UpToDate/UpToDate status for your resources.
node-2# cat /proc/drbd

version: 8.4.9-1 (api:1/proto:86-101)
GIT-hash: [...] build by linbit@buildsystem, 2016-11-18 14:49:21
GIT-hash: [...] build by linbit@buildsystem, 2016-11-18 14:49:21

 0: cs:Connected ro:Secondary/Secondary ds:UpToDate/UpToDate C r-----
     ns:0 nr:211852 dw:211852 dr:0 al:0 bm:0 lo:0 pe:0 ua:0 ap:0 ep:1 wo:d oos:0
The cat /proc/drbd command is deprecated in DRBD versions 9.x for getting resource status information. After upgrading DRBD, use the drbdadm status command to get resource status information.
|
B.5. Pausing the services
Now that you know the resources are in sync, start by upgrading the secondary node. This can be done manually or according to your cluster manager’s documentation. Both processes are covered below. If you are running Pacemaker as your cluster manager do not use the manual method.
B.6. Upgrading the packages
Now update your packages.
RHEL/CentOS:
node-2# dnf -y upgrade
Debian/Ubuntu:
node-2# apt-get update && apt-get upgrade
Once the upgrade is finished you will have the latest DRBD 9.x kernel module and drbd-utils installed on your secondary node, node-2.
但是内核模块还没有激活。
B.7. Loading the new kernel module
By now the DRBD module should not be in use anymore, so unload it by entering the following command:
node-2# rmmod drbd_transport_tcp; rmmod drbd
If there is a message like ERROR: Module drbd is in use, then not all resources have been correctly stopped.
Retry upgrading packages, or run the command drbdadm down all to find out which resources are still active.
Some typical issues that might prevent you from unloading the kernel module are:
-
在DRBD支持的文件系统上有导出NFS的操作(参见
exportfs -v输出) -
文件系统仍在安装-检查
grep drbd/proc/mounts -
Loopback 设备仍然处于活动状态(
losetup -l) -
直接或间接使用DRBD的device mapper(
dmsetup ls --tree) -
有带DRBD-PV的LVM(
pvs)
| This list is not complete. These are just the most common examples. |
Now you can load the new DRBD module.
node-2# modprobe drbd
Next, you can verify that the version of the DRBD kernel module that is loaded is the updated 9.x version. If the installed package is for the wrong kernel version, the modprobe would be successful, but output from a drbdadm --version command would show that the DRBD kernel version (DRBD_KERNEL_VERSION_CODE) was still at the older 8.4 (0x08040 in hexadecimal) version.
The output of drbdadm --version should show 9.x.y and look similar to this:
DRBDADM_BUILDTAG=GIT-hash:\ [...]\ build\ by\ @buildsystem\,\ 2022-09-19\ 12:15:10
DRBDADM_API_VERSION=2
DRBD_KERNEL_VERSION_CODE=0x09010b
DRBD_KERNEL_VERSION=9.1.11
DRBDADM_VERSION_CODE=0x091600
DRBDADM_VERSION=9.22.0
On the primary node, node-1, drbdadm --version will still show the
|
B.8. Migrating your configuration files
DRBD 9.x is backward compatible with the 8.4 configuration files; however, some syntax has changed. See Changes to the configuration syntax for a full list of changes. In the meantime you can port your old configs fairly easily by using drbdadm dump all command. This will output both a new global configuration followed by the new resource configuration files. Take this output and make changes accordingly.
B.9. Changing the metadata
Now you need to convert the on-disk metadata to the new version. You can do this by using the drbdadm create-md command and answering two questions.
If you want to change the number of nodes, you should already have increased the size of the lower level device, so that there is enough space to store the additional bitmaps; in that case, you would run the command below with an additional argument --max-peers=<N>. When determining the number of (possible) peers please take setups like the DRBD client into account.
# drbdadm create-md <resource>
You want me to create a v09 style flexible-size internal meta data block.
There appears to be a v08 flexible-size internal meta data block
already in place on <disk> at byte offset <offset>

Valid v08 meta-data found, convert to v09?
[need to type 'yes' to confirm] yes

md_offset <offsets...>
al_offset <offsets...>
bm_offset <offsets...>

Found some data

 ==> This might destroy existing data! <==

Do you want to proceed?
[need to type 'yes' to confirm] yes

Writing meta data...
New drbd meta data block successfully created.
success
Of course, you can pass all for the resource names, too. And if you feel lucky, brave, or both you can avoid the questions by using the --force flag like this:
drbdadm -v --max-peers=<N> -- --force create-md <resources>
| The order of these arguments is important. Make sure you understand the potential data loss implications of this command before you enter it. |
B.10. Starting DRBD again
Now, the only thing left to do is to get the DRBD devices up and running again. You can do this by using the drbdadm up all command.
Next, depending on whether you are using a cluster manager or if you keep track of your DRBD resources manually, there are two different ways to bring up your resources. If you are using a cluster manager follow its documentation.
-
手动
node-2# systemctl start drbd@<resource>.target
-
Pacemaker
# crm node online node-2
这将使DRBD连接到另一个节点,并且重新同步过程将启动。
When the two nodes are UpToDate on all resources again, you can move your applications to the already upgraded node (here node-2), and then follow the same steps on the cluster node still running version 8.4.
ping.
--force flag. It’s assumed that before you use the --force flag, you know what you are doing.
bitmap_parse function to provide the CPU mask parameter functionality. See the Linux kernel documentation for the bitmap_parse function: here.
ping-timeout, or the kernel triggers a connection abort, perhaps as a result of the network link going down.